Configuring Libraries
This topic describes the process of configuring a Windchill library for Creo Elements/Direct Modeling library parts and drawing frames.
|
|
If you plan to use Creo Elements/Direct Modeling library parts, configuring a target location for your library within Windchill is a prerequisite.
|
Windchill Workgroup Manager supports the management of library parts from the Creo Elements/Direct Modeling Part Library in a predefined target location within a PDMLink library context. Once your library is properly configured, a library part is implicitly checked into your Windchill library when it is instantiated for the first time within Creo Elements/Direct Modeling. Subsequent occurrences of the part instance automatically use the stored library part.
Similarly, annotation drawing frames can be managed in a predefined library context. Frames stored in this context are automatically registered with Annotation and can be selected whenever you create a drawing.
|
|
In Windchill, the default length for names of parts and library objects is set at a maximum of two hundred (200) characters. It is recommended to increase the allowable character length to avoid errors when saving (uploading) parts and library objects to the Windchill server. For more information, see Customizing the Length of the ‘asStoredChildName’ Column |
Creating a PDMLink Library Context
|
|
Name entries for libraries and folders shown in the following figures are intended for example only.
Please substitute with names of your choice.
|
To create a new Windchill library:
1. Use the Browse tab in the WindchillNavigator panel to preview the existing set of libraries (if any).
2. If you still need to add a new library, click View All.
The Libraries view opens.
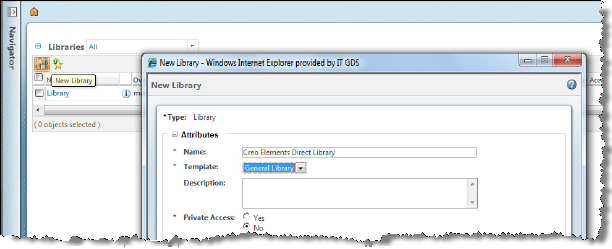
3. In the
Libraries view, click on the
New Library
icon. The
New Library window appears as shown in the following figure.
4. Enter attribute values for the new library, then click OK. The library is created and its name appears in the NavigatorRecent Libraries list.
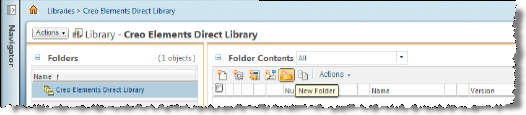
5. Optional: If you want to save library parts to a specific folder within the new library, click on the information

icon next to the library name within the
Libraries page. The library information page appears as shown in the following figure.
Perform the following steps:
a. Click on the
New Folder
icon. The
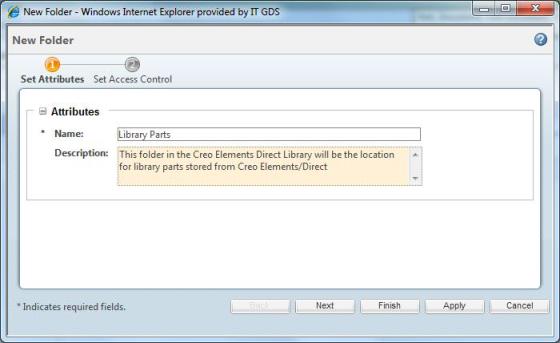
New Folder window appears as shown in the following figure.
b. Enter a name and an optional description for the folder in the Attributes area, then click Apply. You may also want to create folders for other library objects such as drawing frames.
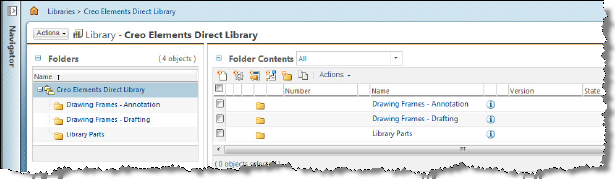
c. When you are done creating library folders, click Finish. The folders are created and appear under their library parent as shown in the following figure.
Setting Library Preferences
| Name entries for libraries and folders shown in the following figures are intended for example only. Please substitute with names of your choice. |
To set library and folder preferences:
1. In the
Navigator panel, click the
Browse tab and select the desired context (typically site

or organization

), then click
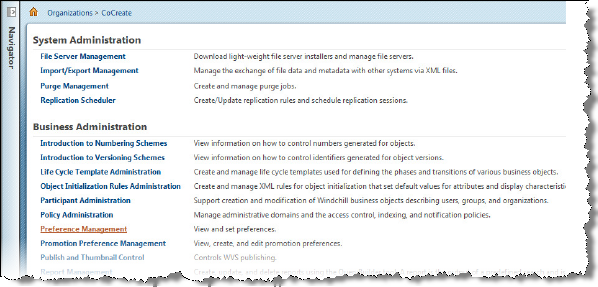
Utilities in the context list. The utilities page for the selected context appears as shown in the following figure.
2. In the Utilities page, under Business Administration, click on Preference Management. The Preference Management page appears as shown in the following figure.
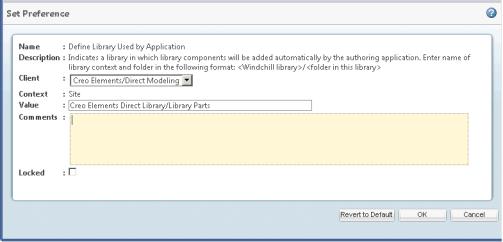
3. Set the preference for library parts by locating the Define Library Used by Application preference in theWorkgroup Manager Client group (expand the group by clicking the + sign). Right-click on the preference and select Set Preference. The Set Preference window appears as shown in the following figure.
| The Define Library used by Application preference is not available for the User context. |
4. In the Set Preference window, select Creo Elements/Direct Modeling from the Client drop-down menu. In the Value field, enter the path to the library folder where you want to store your library parts, then click OK.
5. Set the preference for drawing frames by locating the Default Drawing Frames Location preference in the Workgroup Manager Client group. Right-click the preference and select the Set Preference action.
6. In the Set Preference window, select Creo Elements/Direct Drafting from the Client drop-down menu. In the Value field, enter the path to the library folder where you want to store your drafting drawing frames, then click OK.
7. Repeat the previous two steps to set the preference for annotation drawing frames with the following modifications. Select Creo Elements/Direct Modeling from the Client drop-down menu. In the Value field, enter the path to the library folder where you want to store your annotation drawing frames.