Export from Workspace
The Export from Workspace action enables you to export objects in your active workspace. For example, you can export CAD documents and all dependent files. Export is supported only via the Windchill Workgroup Manager embedded browser and from an active workspace that has access to cache. Exporting objects from a non-active workspace is not supported.
You export objects by using either the Basic mode or the Advanced mode for collecting the object set. In the Basic mode, you specify rules that determine dependent objects to be included in the export in addition to the initially selected objects. In the Advanced mode, you use collection and configuration tools to incrementally add or remove objects to or from an objects table, before committing to the action.
|
|
You can switch between the Basic and Advanced tabs. However, returning to the Basic tab may remove objects that you collected using the Advanced tab.
|
Exporting Using Basic Mode
To export objects using basic mode:
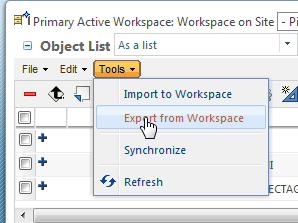
1. In a Windchill Workgroup Manager active workspace, select one or more objects to from your active workspace export and select > .
The Export CAD Documents window opens, displaying the Basic tab.
2. In the following fields, specify an option for dependent or related business objects that you want to include in the export.
◦ Dependents
◦ Drawings
| The Drawings field does not apply to Creo Elements/Direct Drafting, as it is a 2D application. |
3. Optionally (only if you are exporting objects from the commonspace), specify a viewing or editing filter in the Current Settings field. Use the controls listed in the following table.
| Exporting objects already in the workspace uses the workspace configuration specification. |
Control | Description |
Current filter | Opens the Filter Properties window, displaying the current dependency processing, including the Type and Details. |
Edit filter | Opens the Edit Filter window, allowing you to edit the filter applied to the selected structure. |
4. In the Target Directory field, enter the path to the target directory, or click Browse to navigate to and select a target directory.
5. Select the Reuse content in target directory check box if you want to avoid overwriting files of the same name already in the target directory.
6. Optionally, select the Secondary Content check box to export secondary content with the selected CAD documents.
7. Select OK.
The selected objects are exported to the target directory as specified.
Exporting Using Advanced Mode
To export objects using advanced mode:
1. From the Basic tab of the Export CAD Documents window, select the Advanced tab.
Your initially selected objects, plus any additional objects collected according to the specifications entered on the Basic tab appear in the Collect Objects panel.
| In addition to common Windchill table features, the Collect Objects panel includes a table display options icon  on the right side of the table toolbar. Clicking this icon allows you to select the viewing option View Selected Objects Only. |
2. Optionally (only if you are exporting objects from the commonspace), apply filters in the Current Settings field to objects (which may be a product structure). Use the controls listed in the following table.
| Exporting objects already in the workspace uses the workspace configuration specification. |
Control | Description |
 Current filter | Opens the Filter Properties window and displays the current dependency processing, including Type and Details. |
 Edit filter | Opens the Edit Filter window enabling you to edit the filter applied to the selected structure. |
3. You can further modify the collected set of objects using the toolbar controls described in the following table.
Control Icon | Action |
| Add any related drawings for the selected objects. |
| Remove selected objects from the table. |
| Include selected (excluded) objects. |
| Exclude selected objects from action. (Indicated by strike-through). |
4. Optionally, select an object and click the reuse icon

to specify that the file not be overwritten by a file with the same file name in the target directory. This reuses the file content in the target directory.
5. Optionally, click the reset icon

to reset the panel to its initial collection of objects.
6. Click Finish to commit the export.
The objects are exported to the target folder.
| With auditing enabled in Windchill , when objects are exported from the workspace, an audit event is logged in the Security Audit Report to enhance corporate export security control. |