ENOVIA 3DEXPERIENCE Cache Cleaning Tool
In the process of performing product data management (PDM) actions using Windchill Workgroup Manager for CATIA 3DEXPERIENCE, some additional data is generated/stored on the ENOVIA 3DEXPERIENCE server. It is called “cached data” and its main purpose is to increase the performance of PDM actions. This cached data is not automatically deleted when obsolete and can eventually become a storage issue if not properly managed. To help avoid cache storage issues, PTC has provided a cache cleaning utility that is automatically installed on your ENOVIA 3DEXPERIENCE server when the PTC ENOVIA 3DEXPERIENCE Adapter is installed. This tool enables you to select certain cache objects to be removed systematically according to a defined schedule that you specify. You can also perform cache cleaning immediately, if desired.
For example, you can select:
• all cache objects except the latest created in ENOVIA 3DEXPERIENCE based on the timestamp.
—or—
• cache objects older that a specified number of days based on the creation date.
|
|
Do not run this utility when Windchill Workgroup Manager for CATIA 3DEXPERIENCE PDM actions are in progress. For example, Check In and Open from Windchill actions.
|
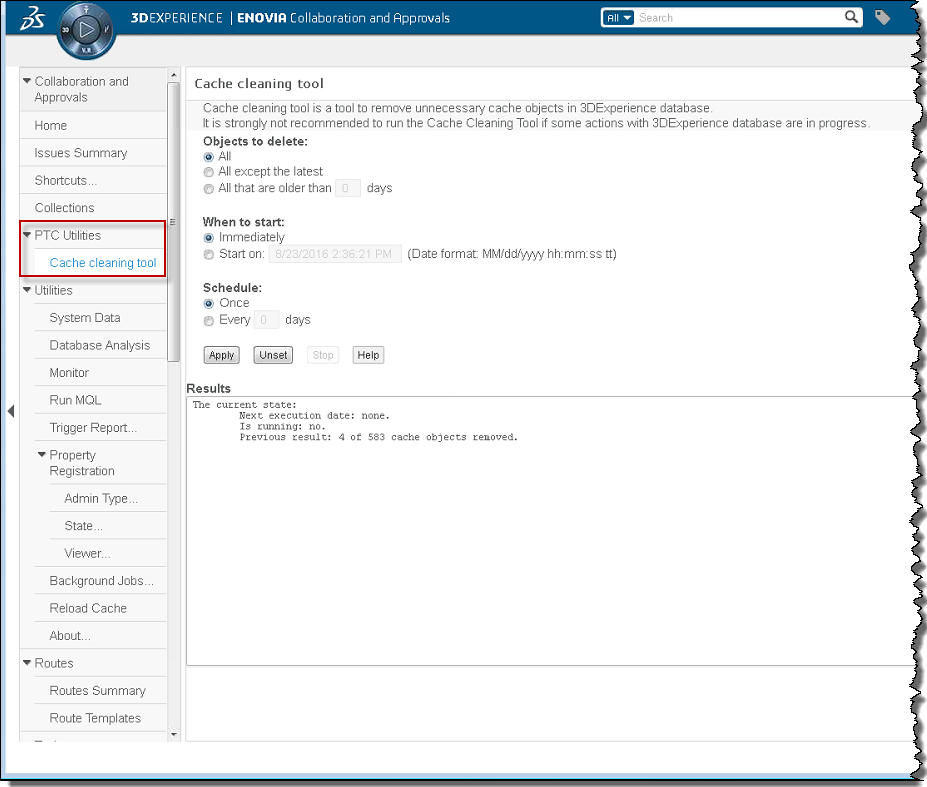
The cache cleaning tool with its default settings as well as its access point on the ENOVIA 3DEXPERIENCE server are shown in the following figure.
Configuring and Running the Cache Cleaning Tool
1. On the ENOVIA 3DEXPERIENCE server, access the cache cleaning tool page by selecting > from the Navigation panel.
2. In the Objects to Delete category, select the cache objects that you want to remove.
3. In the When to Start category, specify a start time/date for removing the cache objects.
4. In the Schedule category, specify how often you want the utility to run.
5. Click Apply to launch the utility using the current settings.
6. Check the Results area for the utility status as well as a list of work completed.
| You can also click Unset to return the settings back to their default values, Stop to halt the utility when running, or Help to get descriptions of the utility controls. |