Check In
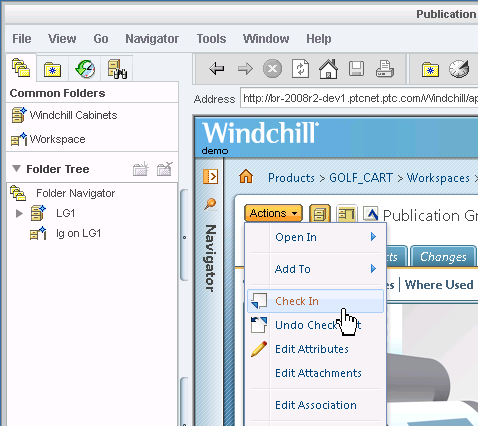
This topic describes the Check In actions available from the Creo CADDS 5File menu and from Windchill as shown in the following figures.
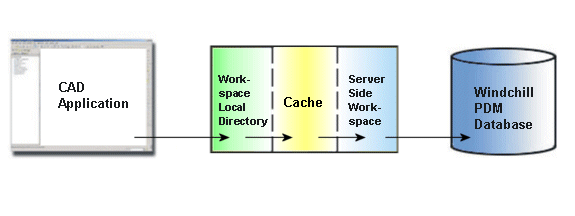
When you are finished making changes to an object, and you are ready to publish the changes to the common space on the server, you must check in your objects. The following figure illustrates the data flow during a Check In action.
| Check In transfers data from the server-side workspace to the commonspace. If you check in an object directly from your CAD application, the data is transferred from your CAD application to the server-side workspace, and then to the Windchill server. |
Check In accomplishes the following.
• Copies the working copy of your object from your workspace to the commonspace on the server.
• Creates a new iteration of the checked-out object in the shared area.
• If this object was checked out by you, the lock is released on the object in the commonspace, so that others can modify it. Other users can access the object while it is checked out, but they cannot check in a modified version if it has been checked out by someone else.
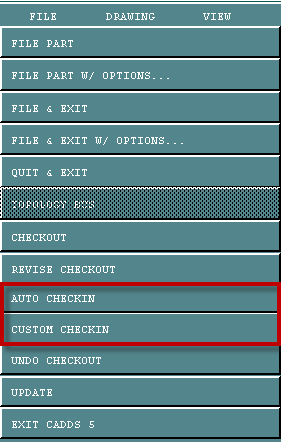
The Check In action can be invoked in two ways from the Creo CADDS 5File menu.
• Auto Checkin
When you select Auto Checkin, your object is copied directly to the commonspace. The process follows the defaults that you or your administrator have set up. It checks in what has changed in objects that have been modified.
• Custom Checkin
Custom Checkin, allows you to specify certain options using the Windchill HTML user interface and applies them to the object that the you are checking in. It takes you through a process where you specify the following options.
1. Collect Objects
The Collect Objects page allows you to choose the objects that you want to check in. Check the boxes next to the objects that you don't want visible to others in the commonspace on the Windchill server.
a. Go to the Edit menu and click Set For Check in to deselect the selected items for that check in. Click Next.
b. On the File menu, click Check out Now.
The object can be checked out using the Check in option.
c. On the Edit menu, click Set Location, Keep Checked out, or Set For Check in.
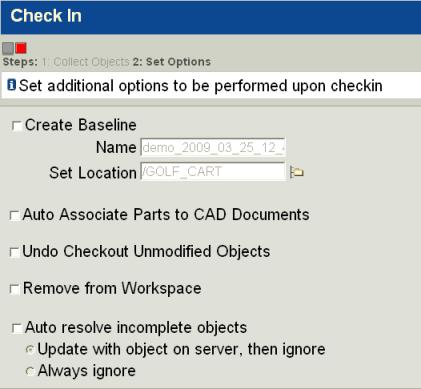
2. Set Options
The Set Options page allows you to specify certain options for the objects you are checking in.
Check the box next to the options that you want to set.
| Check In is not an available action if there is no primary server and primary workspace active. You must register a server from the > in Windchill Workgroup Manager, and activate a workspace. |
For information about
Check In, see
Checking in Objects to Windchill.