Windchill Client Architecture Wizard
Objective
You want to create or perform an operation on object(s) by collecting information step by step.
Background
Wizards are popup windows that are used to guide you step by step through the process of creating an object, or performing an operation on an object. A wizard is a user interface consisting of a sequence of steps that lead the user through a specific task one step at a time, the user clicks next to move through the steps. It might not be necessary to complete all the steps present in a wizard. Once the required information is provided, you can click FINISH / OK button to submit the data to the server. A wizard can consist of one or many steps which must be completed in a certain order.
A clerk is a user interface consisting of a tab control that has two or more tabs. Data can be entered and the user can complete tabs in any order. A user may freely move from one tab to another, even if the current tab is not complete. A clerk is not meant to guide users sequentially through a task, and is typically used for frequent and easily accomplished tasks.
The layout for single step wizards and multi step wizards will be different. The single step wizard will not have “Step icons”, “Step links” and “Back / Next navigation buttons”.
Scope/Applicability/Assumptions
• A wizard should be used when you need to create / edit object(s) by performing any operations on it after collecting required information in a specific systematic manner.
• A table rendered within a wizard is JCA table and table rendered inside a picker is a JSCA table.
• For the most part, clerks are implemented in the same fashion as that of wizards and the instructions in this document are applicable to both. Any differences are noted. Otherwise, the term "wizard" should be interpreted as either a wizard or a clerk and "wizard step" should be interpreted as either a wizard step or a clerk tab.
Solution
Use a Wizard or Clerk component.
Prerequisite knowledge
To achieve this objective, you need to have an understanding of the following:
• Basic development, which involves HTML, JSP, Java, JavaScript and Custom taglibs.
• Overview of Windchill Client Architecture tags.
• The actions framework in the Windchill client architecture.
• Action validation framework.
Solution Elements
Element | Type | Description |
components.tld | tld | Tag Library Descriptor (TLD) file, which contains Wizard Tag and Wizard-Step Tag definition Run time Location: <Windchill>\codebase\WEB-INF\tlds\ |
wizard.js | Js | Contains all the necessary logic of how to move from one step to another and how to call methods defined for each of the steps. Run time Location: <Windchill>\codebase\netmarkets\tlds\javascript\compon ents |
<your_wizard_ page>.jsp | jsp | The jsp file in which your wizard implementation is defined. |
<your_wizard_ step>.jsp | jsp | The jsp file, which contains contents of the wizard step. |
<*-actions>.xml | xml | The actions for the wizard as well as each wizard step are defined in this XML file. |
actionmodels.xml | xml | The models for the list of buttons, to be displayed at the bottom of the wizard (i.e. the navigation area) are defined in this XML file. |
<resourceBundle>.rbInfo | rbInfo | This is another option where you can specify locale specific Strings and properties for wizard step and wizard actions. |
formProcessorController | java | |
wizard | Tag | Specifies the action pointing to the main JSP for the wizard and defines the steps contained in the wizard. Tag handler: com/ptc/core/components/tags/components/WizardTag |
wizardStep | Tag | Specifies the action pointing to the main JSP for the step. |
Procedure – Configuring Wizard Component
Create actions for Wizard as well as Wizard steps
Each step of the wizard and the wizard itself needs an action declaration for the associated page. Actions are grouped together using object types. These object types are declared inside of the <listofactions> tag contained in any one of the *actions.xml files. For more details on how actions work please see
Action Framework for Windchill Client Architecture.
Windchill will expect all jsp pages related to this object type to be located in <Windchill>\codebase\netmarkets\jsp\<objecttype>. For the below specified example the location will be <Windchill>\codebase\netmarkets\jsp\changeTask\.
The “create” action is defined for the wizard page. By default, the name attribute of the action points to the main jsp page for your wizard relative to
codebase/netmarkets/jsp, unless a url attribute is specified on the command tag. Therefore, for the action below
Windchill will now expect “
create.jsp” to be located in
<Windchill>\codebase\netmarkets\jsp\changeTask\ folder. Since this action is for the wizard, it is necessary to specify windowType as “popup” inside the
<command> tag. See
Action Framework for Windchill Client Architecture for more details on the
windowType attribute.
The “affectedAndResultingItemsStep” action is defined for the wizard step. The corresponding jsp should be located at <Windchill>\codebase\netmarkets\jsp\changeTask\affectedAndResultingItemsStep.jsp. Since this action is for the wizard step, it is necessary to specify windowType as “wizard_step”.
<objecttype name="changeTask"
class="wt.change2.WTChangeActivity2">
<action name="create">
<command class=”<path to form processsor>" windowType="popup"/>
</action>
<action name="affectedAndResultingItemsStep">
<command windowType="wizard_step" />
</action>
</objecttype>
The command class is the java class that should be called to process the wizard data. Typically, this will extend CreateObjectFormProcessor.
Note that it is not necessary to specify a “method” attribute in the command tag if the form processor class extends DefaultObjectFormProcessor or CreateObjectFormProcessor.
Note that the “windowType” attribute of the command subtag for steps should always be set to “wizard_step.”
Optional action tag attributes are shown in the table below.
Action tag attribute | Default value | Possible Values | Description |
ajax | None | page component row | Specifies what portion of the parent page should be refreshed when the wizard processing completes. The value “page” refreshes the entire page (equivalent to not using ajax). The value “component” refreshes the table from which the wizard was launched. The value “row” refreshes one or more table rows. To use the value “row” your form processor must tell the system which rows (objects) need to be added. |
UIComponent | None | | References an entry in roleaccessprefs.xml (uic name) used to specify role-based access to the wizard action. |
Here is an example action for launching a creation wizard for “MyPart” objects:
<objecttype name="myPart" class="ext.part.MyPart"
<action name="create" uicomponent="CREATE_MYPART" ajax="row">
<command class="com.ptc.windchill.enterprise.part.forms.
CreateMyPartFormProcessor"
onClick="validateCreateLocation(event)" windowType="popup"/>
</action>
The validateCreateLocation() javascript method shown in the action above is applicable to create wizards that can be launched from a folder browser. See “Solution Elements” in Solution for more information.
Refer to
Adding Actions and Hooking Them Up in the UI for more information on actions and the command tag attributes.
In addition to creating the wizard action, you will need to create text for the action name, wizard window title, action tooltip, etc. This is described in
Adding Actions and Hooking Them Up in the UI.
Create the Wizard page
Create a new jsp page inside <Windchill>\codebase\netmarkets\jsp\ folder and name it as create.jsp.
Wizard steps that are not preloaded should include the following directives at the top of the jsp page:
<%@ include file="/netmarkets/jsp/components/beginWizard.jspf"%>
<%@ include file="/netmarkets/jsp/components/includeWizBean.jspf"%>
Most wizard steps will also use tags in the components.tld tag library and so will also need to include that as follows:
<%@ taglib prefix="jca" uri="http://www.ptc.com/windchill/taglib/components"%>
Define the wizard using the <wizard> tag. All the steps for this wizard will be defined inside <wizard> tag using <wizardStep> tag.
If a step is preloaded, none of these are required, but it is safe to include them. A non-preloaded-step:
<%@ taglib prefix="jca" uri="http://www.ptc.com/windchill/taglib/components" %>
<%@ include file="/netmarkets/jsp/components/beginWizard.jspf"%>
<%@ include file="/netmarkets/jsp/components/includeWizBean.jspf"%> <jca:wizard >
<jca:wizardStep action="defineItemWizStep" type="object"/>
<jca:wizardStep action="setAttributesWizStep" type="object" />
<jca:wizardStep action="affectedAndResultingItemsStep"
type="changeTask" />
</jca:wizard>
<%@ include file="/netmarkets/jsp/util/end.jspf"%>
Define a Clerk
Defining a clerk is exactly same as defining a wizard, the only difference in the case of a clerk is that you define the type as "clerk".
<jca:wizard type="clerk">
<jca:wizardStep action="defineItemWizStep" type="object"/>
<jca:wizardStep action="setAttributesWizStep" type="object" />
<jca:wizardStep action="affectedAndResultingItemsStep" type="changeTask" />
</jca:wizard>
After defining the wizard type as "clerk", the wizard will be displayed as per the Clerk UI standards. Step indicators will not appear and step titles will be displayed as tabs. The Next and Previous buttons will not be displayed for Clerk. The user can navigate from any step to any step without entering the required fields. The validation for required fields will be done when the user clicks on the "OK" button. The user will be shown a message about required fields and will be taken to the appropriate steps, where required fields are not populated.
The Clerk Component has a provision through which application developers can call their specific validation logic.
For example: An application developer can write following code in jsp file to call javascript() on “OK” Button.
<script>
Event.observe($("PJL_wizard_ok"), 'click', userdefinedjavascriptFunction );
</script>
Specify localized Strings / properties for wizard step and wizard actions
You can specify localized strings / properties in a <resourceBundle>.rbInfo file.
The format of each entry should be <objectType>.<action>.<property>.<type> = <value>. For example, you can specify the height and width of the popup window in which the wizard will be displayed, using the following property: changeTask.create.moreurlinfo.value=width=800,height=700
changeTask.create.description.value=New Change Task
changeTask.create.description.comment=Used as the label for the create action
changeTask.create.title.value=New Change Task
changeTask.create.title.comment=Used as the title for the create action
changeTask.create.tooltip.value=New Change Taskchange
Task.create.tooltip.comment=Used as the tooltip for the create action
changeTask.create.icon.value=../../wtcore/images/task_create.gif
changeTask.create.icon.comment=DO NOT TRANSLATE
changeTask.create.icon.pseudo=false
changeTask.create.moreurlinfo.value=width=800,height=700
changeTask.create.moreurlinfo.pseudo=false
Create the wizard step page
This can be any JSP page, and can contain any other component(s) as well as plain HTML contents.
You do not have to create new steps if already existing steps will work. See
Customizing Reusable Wizard Steps for steps available to reuse.
Customization Points
This section contains the following topics:
• <action>.xml attributes
• <wizard> tag attributes
• <wizardStep> tag attributes
• Providing user defined buttons to Wizard
• Providing user defined form processor controller
• Providing server side validation before / after processing a wizard step
• Loading the wizard step content when it is visited
• Marking a wizard step as “required”
• Hiding a wizard step
• Displaying the hidden / dynamic step at runtime
• Providing user defined SUBMIT function
• Providing client side validations before a wizard step is displayed
• Providing client side validations after a wizard step is finished
<action>.xml attributes
Parameter | Default Value | Possible Values | Req? | Description |
name | None | Any string | Yes | The name of the action. Used as the “name” attribute on wizard step tags. |
id | <type>. <action> | Any String | No | Overrides the id of the wizard step (default is type.action). Used to identify the step in certain javascript functions. If not specified the id <action type>.<action name> will be used. |
afterJS | - | Any String | No | Specify the javascript function name to invoke client side validation for a wizard step when step is finished and the user clicks Next or OK on the wizard step. Can be used to do client-side validation of the form data.. |
beforeJS | - | Any String | No | Specify the javascript function name to invoke client side validation for a wizard step when step is loaded. |
beforeVK | - | Any String | No | Specify the server validator name to invoke server side validation for a wizard step when step is loaded when the user navigates to the step using the Previous or Next button... |
afterVK | - | Any String | No | Specify the server validator name to invoke server side validation for a wizard step to be called after the user clicks Next, Previous or Finish on the step. Can be used to do server-side validation of the form data. |
preloadWizar dPage | true | false / true | No | Specifies that wizard step is to be downloaded when wizard is launched rather than when the user navigates to the step. Preloading wizard steps will make it faster to move to the next step. However, do not preload wizard steps that are dependent on information gathered in previous steps.. |
hidden | false | false / true | No | Specifies that wizard step is to be hidden at first, or for the action to be rendered as non-clickable. |
required | false | false / true | No | Specifies that wizard step is required. |
<wizard> tag attributes
Parameter | Default Value | Possible Values | Req? | Description |
buttonList | “Default WizardBu ttons” | Any String | No | The action model containing the list of buttons to display in the wizard. The default set is the DefaultWizardButtons action model. Another commonly used set isNoStepsWizardButtons (for single-step wizards) Additional buttons sets are available in actions.xml and custom button sets can be defined |
formProcesso rController | “DefaultF ormProce ssorContr oller” | Any String | No | The FormProcessorController class that should be used to process the wizard when it is submitted. If not specified, DefaultFormProcessorCo ntroller will be used. |
title | - | Any String | No | The overriding title to display instead of the default title in the rbInfo file or action.properties file. This title will not be localized / internationalized by default. You need to take care of passing a localized title. |
helpSelectorK ey | - | Any String | No | The selector key to identify help file from services.properties file. |
type | wizard | Wizard/clerk/dialog | No | Identifies whether wizard is of type clerk or not. If "clerk" is specified, the wizard will be displayed as per clerk UI. |
progressMess age | - | Any String | No | This allows for text to be displayed above the progress bar using the UI standard. |
<wizardStep> tag attributes
Parameter | Default Value | Possible Values | Req? | Description |
action | - | Any String | Yes | The name of the action to include in the wizard parent tag. |
type | - | Any String | Yes | The type of the action to include in the wizard parent tag. |
objectHandle | - | Any String | No | The object handle to identify which object this step corresponds to. Only required if the wizard needs to create multiple objects. By default, no object handle is needed. |
label | - | Any String | No | The label for the step. Note: Actions should already have labels. Only set this attribute if you want to override the action's label. |
embeddedHel p | - | Any String | No | A small text help button to be displayed on top of the wizard step content. Optional. |
Providing user defined buttons to Wizard
You can change / specify different types of buttons that are present at the bottom of the wizard (i.e. the navigation area). The Wizard framework provides a default button model, which consists of buttons like NEXT, PREVIOUS, OK, APPLY and CANCEL. However, the Wizard framework also provides you the ability to specify your own set of buttons with user-defined functionality.
In <your_wizard_page>.jsp
<jca:wizard buttonList="PreferenceWizardButtons" >
...
...
</jca:wizard>
You need to provide corresponding entry in actionmodels.xml file:
<actionmodels>
<model name="PreferenceWizardButtons">
<action name="revertButton" type="object"/>
<action name="okButton" type="object"/>
<action name="cancelButton" type="object"/>
</model>
</actionmodels>
Every button in the actionmodel should have a corresponding entry for its action in actions.xml file. If there is a separate java class written to render that particular button, than you can specify the name of that class and its method (which contains the rendering code) using the “class” and “method” attributes of <command> tag. For example:
<action name="revertButton" id="PJL_wizard_revert_to_default">
<command class="" method="" windowType="page"
url="javascript:revertToDefault()"/>
</action>
| For a clerk, only the OK and Cancel buttons are displayed by default. If new buttons are to be configured, the appropriate button model should be configured. |
Providing user defined form processor controller
You can specify a form processor controller, which would be executed when the wizard is completed and the user clicks on OK, FINISH or APPLY button to submit it. The form processor controller gets the data specified in all the wizard steps, from Wizard framework, and processes it. After processing the data, a form processor controller returns an object of FormResult, along with the status. Based on the status (SUCCESS / FAILURE), which is returned, the wizard framework will decide further action. For example:
In <your_wizard_page>.jsp
<jca:wizard formProcessorController =
"com.mycompany.MyUniqueFormProcessorController">y
...
</jca:wizard>
Providing server side validation before / after processing a wizard step
You can implement server side validations using specific java classes and configuring the wizard to execute them before / after processing a wizard step. You can achieve this by using “beforeVK” and “afterVK” attributes of <action> tag. You need to provide a key as the value for these attributes. The corresponding key should be declared in any <*-service>.properties file specifying the java class which will perform the validations and return the result. For example:
<action name="setAttributesWizStepForCreateMultiPart" beforeVK =
"nameNumberValidation">
<command windowType="wizard_step"/>
</action>
OR
<action name="setAttributesWizStepForCreateMultiPart" afterVK =
"nameNumberValidation">
<command windowType="wizard_step"/>
</action>
<Service context="default"
name="com.ptc.core.ui.validation.UIComponentValidator">
<Option requestor="null" selector="nameNumberValidation"
serviceClass="com.ptc.windchill.enterprise.part.validator.CreateMul
tiPartNameNumberValidator" />
</Service>
Loading the wizard step content when it is visited
By default, all of the wizard steps are downloaded at wizard execution time.
You can configure the wizard such that the content of any wizard step is not loaded when the wizard is first initialized and loaded. You can load the contents of a wizard step when you try to visit that step. You may need this feature when the step is dependant on information gathered from a previous step.
You can use “preloadWizardPage” attribute of <action> tag to achieve this. By default, the value of this attribute is “true”. For example:.
<action name="setClassificationAttributesWizStep
" preloadWizardPage="false">
<command windowType="wizard_step"/>
</action>
| In the case of a clerk, all the steps will be loaded by default. The clerk does not have conditional display of steps (i.e. hidden steps), so all the steps would be preloaded. |
Marking a wizard step as “required”
You can mark a wizard step as “required”. By doing so, the wizard cannot be submitted unless and until this required step is visited at least once. So the submit buttons (like OK, FINISH or APPLY) would be enabled only after all the required steps are completed / visited at least once. For example:
<action name="setClassificationAttributesWizStep" required="true">
<command windowType="wizard_step"/>
</action>
You can also mark a wizard step as “required” at runtime. You need to use a javascript function called “setStepRequired” which is defined in main.js file. You need to pass the “id” of the step. The default id of the step is in the format “<type>.<action>”. Use the value of the “id” attribute if it is defined explicitly while defining wizard step action. For example:
<table border="0">
<tr>
<td align="left" valign="top" NOWRAP>
<w:radioButton id="copy" name="<%=NmObjectHelper.CHOICE%>"
value="<%=NmObjectHelper.CB_COPY%>" checked="true"
onclick="setStepRequired(<type>.<action >);"/>
</td>
</tr>
</table>
Hiding a wizard step
There are two ways to hide a wizard step. First, you can hide a wizard step initially when the wizard is launched. Secondly, you can hide the wizard step at run time depending on certain criteria or certain user actions. In both the cases, it is mandatory to register the wizard step while defining the wizard.
In <your_wizard_page>.jsp
<jca:wizard >
<jca:wizardStep action="defineItemWizStep" type="object"/>
<jca:wizardStep action=" setClassificationAttributesWizStep " type="object" />
<jca:wizardStep action="affectedAndResultingItemsStep" type="changeTask" />
</jca:wizard>
To implement first way of hiding a step, you can make use of the “hidden” attribute of <action> tag. For example:
In <*-actions>.xml
<action name="setClassificationAttributesWizStep" hidden="true">
<command windowType="wizard_step"/>
</action>
To hide a wizard step at runtime, you need to use a javascript function called “removeStep” which is defined in main.js file. You need to pass the “id” of the step that needs to be removed. The default id of the step is in the format “<type>.<action>”. Use the value of the “id” attribute if it is defined explicitly while defining wizard step action. For example:
In <your_wizardstep_page>.jsp
<table border="0">
<tr>
<td align="left" valign="top" NOWRAP>
<w:radioButton id="copy" name="<%=NmObjectHelper.CHOICE%>"
value="<%=NmObjectHelper.CB_COPY%>" checked="true"
onclick="removeStep(<type>.<action >);"/>
</td>
</tr>
</table>
| Clerk does not use the of conditional display of steps (i.e. hidden steps), so all the steps will be preloaded and displayed to the user. |
Displaying the hidden / dynamic step at runtime
You can show up the hidden wizard step at runtime using the javascript function called “insertStep” which is defined in main.js file. You need to pass the “id” of the step that needs to be inserted. The default id of the step is in the format “<type>.<action>”. Use the value of the “id” attribute if it is defined explicitly while defining wizard step action. It is mandatory to register the wizard step while defining the wizard.
For example:
In <your_wizard_page>.jsp
<jca:wizard >
<jca:wizardStep action="defineItemWizStep" id=” defineItemWizStep”
type="object"/>
<jca:wizardStep action=" setClassificationAttributesWizStep " type="object" />
<jca:wizardStep action="affectedAndResultingItemsStep" type="changeTask" />
</jca:wizard>
In <*-actions>.xml
<action name="setClassificationAttributesWizStep" hidden="true">
<command windowType="wizard_step"/>
</action>
In <your_wizardstep_page>.jsp
<table border="0">
<tr>
<td align="left" valign="top" NOWRAP>
<w:radioButton id="copy" name="<%=NmObjectHelper.CHOICE%>"
value="<%=NmObjectHelper.CB_COPY%>" checked="true"
onclick="insertStep(<type>.<action>);"/>
</td>
</tr>
</table>
Will the Wizard Steps be Clickable?
The intended behavior for whether the steps in a multi-step wizard will be clickable is determined by a number of factors, including whether a step has been visited and/or completed, and whether a step is marked as required or not. The following list summarizes the intended behavior:
• When a wizard has a combination of required and non-required or optional steps, proper UX design dictates that all the required steps should appear sequentially before the optional steps.
• The current active step should be clickable (call this step1). The term 'clickable' indicates the cursor changes to a pointing hand image when hovered over the step number, and clicking the step performs an action, either navigation or message.
• The step after the current active step should also be clickable (call this step2). However, if there are any required fields yet to be completed on step1, clicking step2 should provide a warning message about the missing information and block the move. Essentially, the step after the current active step should perform the same action as clicking the Next button.
• Once all of the required steps have been visited, (and the OK/Finish/Apply button becomes enabled), the remaining optional steps should be clickable.
• Any time a given wizard step has been visited, that step should be clickable. This applies for both forward and backward navigation, and need not be single-step. For example, in a five step wizard, if you've completed the first four steps, then wish to navigate back to verify something on the first step, you can navigate there directly by clicking step1, then returning directly to step4.
Providing user defined SUBMIT function
You can configure a user-defined javascript function, which will be called when the wizard is submitted. You need to write you own submit functionality in some javascript function and than pass the name of that function as an argument to “setUserSubmitFunction” (provided by wizard framework). By doing so, you are preventing the wizard framework to call the default submit function. Based on the return value (true / false), the wizard framework will decide further action. For example:
<script type="text/javascript">
function user_validate() {
...
...
return true;
}
setUserSubmitFunction(user_validate);
</script>
Providing client side validations before a wizard step is displayed
You can configure a user-defined javascript function, which will be called when a wizard step is loaded but before it is displayed. You need to write you own functionality in some javascript function and specify the name of function as the value for the attribute "beforeJS" while defining the action for that particular step. This particular step will only be displayed if the specified function returns "true", else the wizard will move to the previous step. For example:
In <*-actions>.xml
<action name="setClassificationAttributesWizStep" beforeJS ="
validatePreviousStep">
<command windowType="wizard_step"/>
</action>
In any JSP page or Javascript file accessible to wizard
<script type="text/javascript">
function validatePreviousStep() {
...
...
return true;
}
</script>
Providing client side validations after a wizard step is finished
You can configure a user-defined javascript function, which will be called when a wizard step is completed but before next step is loaded. You need to write you own functionality in some javascript function and specify the name of function as the value for the attribute "afterJS" while defining the action for that particular step. The next step will only be displayed if the specified function returns "true".
For example:
In <*-actions>.xml
<action name="setClassificationAttributesWizStep" afterJS ="
validateStep">
<command windowType="wizard_step"/>
</action>
In any JSP page or Javascript file accessible to wizard
<script type="text/javascript">
function validateStep() {
...
...
return true;
}
</script>
Configuring Wizard - Suppressing enter key
You can suppress form submission on enter key.
<script type="text/javascript">
// Supress form submission twice due to hiting enter
function wizardKeyUpListener(event) {
var target = Event.element(event);
if (event.keyCode == Event.KEY_RETURN || event.which ==
Event.KEY_RETURN) {
if (target != null && (target.tagName == "SELECT" ||
target.tagName == "TEXTAREA" || target.tagName == "INPUT")) {
Event.stop(event);
return false;
}
}
}
Configuring Wizard - Changing the Default Focus Element
You can change the default focus element in the wizard. Generally the infrastructure will try to make the default focus element the first required field that is editable (input, select, or textarea tag). This is very tricky and so the infrastructure may not get it right in all cases.
If a different element is desired for the first focused element, or this behavior is not working properly in your wizard then you can create some javascript code to get your desired behavior.
• In a .js file included only by this wizard:
//First, Remove the current focus listener to avoid any race conditions. For Example:
PTC.un('ready', PTC.wizard.focusOnReadyFunc);
//Create the new focus listener to select your desired component
function customFocusFunc {} {
// Focus on a specific ID when it becomes available…
…
}
//Register your new listener on the page.
PTC.onReady( customFocusFunc );
Creating Data Validators for Your Steps
Validation of the data entered by users is done after each step and in some cases after each input field is completed. It may be done on the client via javascript and/or on the MethodServer via a Java class that extends UIComponentValidator.
The system automatically validates that all required attribute values are provided if the input fields are generated by the standard renderers. The renderers add a “class="required"” attribute to the input field and the wizard javascript checks to make sure that each field with such an attribute has a value. You can do other client validation in a javascript method by specifying the method as the value of the afterJS attribute of the step action. See
Adding Custom Code to all Windchill Client Architecture Pages for information on how to package your custom javascript.
Validation of data values against constraints defined for the attributes in the Type and Attribute Management utility must be done in the MethodServer. This is done by implementing the validateFormSubmission() method on a subclass of DefaultUIComponentValidator. You then specify the name of the selector key for a service.properties entry pointing to your DefaultUIComponentValidator in the afterVK attribute of your step action. The validateFormSubmission() method of your validator class will be automatically called by the framework when the user clicks the Next or OK button on a step. It is also called when the value of any attribute in the driver attributes panel is changed.
Default server-side validators are available for the Set Context, driver attributes table, and Set Attributes wizard steps. The selector keys and validator class paths are specified in the following entries in components.service.properties.xconf:
<Service context="default" name="com.ptc.core.ui.validation.
UIComponentValidator">
<Option serviceClass="com.ptc.core.components.validators.
ContextWizardStepValidator" requestor="null" selector=
"setContextWizStep"/>
<Option requestor="null"
serviceClass="com.ptc.core.components.validators.
DefineObjectStepValidator" selector="defineItem" />
<Option serviceClass="com.ptc.core.components.validators.
SetAttributesStepValidator" requestor="null"
selector="setAttributesWizStep "/>
</Service>
If the out-of-the-box validator classes meet your needs you can use them by specifying the selector strings shown in the entries above as the values of the afterVK attributes of your wizard step actions. If you need to do additional validation, you can write your own validators, typically subclassing the standard validators. Note that all the form data can be accessed from the UIValidationCriteria parameter passed to the validator by calling UIValidationCriteria.getFormData(). The validateFormSubmission() method should return a UIValidationResult with a status of UIValidationStatus.PERMITTED if all the form data is valid or a status of UIValidationStatus.DENIED if one or more attribute values are not valid. In the latter case, the user will be returned to the wizard step just completed to correct the invalid values. Feedback messages to be displayed to the user should be added to the UIValidationResult using the UIValidationResult.addFeedbackMsg() method.
Limitations
Windchill Wizard framework takes help from Windchill Action framework to pick up the localized wizard title either from the related .rbInfo file or from a action_<locale>.properties file. It uses the <objectType> and <action> to fetch the required value. The problem arises when you try to use “url” attribute of “command” tag (while defining the wizard action). If the value of the “url” attribute points to a jsp page whose name matches with some another action, the wizard framework will receive localized title corresponding to that action.
Consider the following scenario:
<action name="createPartWizard">
<command class="com.ptc.windchill.enterprise.part.forms.CreatePartFormProcessor"
method="execute" onClick="validateCreateLocation(event)"
windowType="popup"/>
</action>
<action name="createMultiPart" >
<command class =
"com.ptc.windchill.enterprise.part.forms.CreateMultiPartFormProcessor"
method="execute" onClick="validateCreateLocation(event)"
windowType="popup"
url="/netmarkets/jsp/part/createPartWizard.jsp?wizardType=multiPart" />
</action>
In the above specified case, the wizard title for the action “createMultiPart” will be picked up from the property “part.createPartWizard.title.value” and not from the property “part.CreateMultiPart.title.value”.
The workaround for this scenario is to use the “title” attribute of the wizard tag. If this attribute is specified, the wizard framework will not try to look in to any rbInfo or properties file. However, be sure that you provide a localized string as a title to wizard tag. For example:
<%@ taglib prefix="jca" uri="http://www.ptc.com/windchill/taglib/components"%>
<%@ taglib uri="http://www.ptc.com/windchill/taglib/fmt" prefix="fmt"%>
<fmt:setBundle basename="com.ptc.windchill.enterprise.part.partResource"/>
<fmt:message var="createMultiplePartWizardTitle" key =
"part.createMultiPart.WIZARD_LABEL" />
<jca:wizard helpSelectorKey="PartMultipleCreate"
title="${createMultiplePartWizardTitle}">
...
...
</jca:wizard>
Limitations for Clerks
Clerks will execute only required fields validation for all the clerk steps. All the other validations mentioned below should be provided by the respective clerk developers:
• Valid Characters - Validate that the user has not entered any illegal characters for a given field (e.g. alpha characters in a numeric field).
• Format - Validate that the user has entered values in an expected and understandable format. Note that the UI should do as much as possible to prevent the user from entering invalid formats in the first place (e.g. clearly indicating what format is expected, allowing different formats to be entered). See the Form Standard for more information.
• Length - Validate that the user has entered a value which is neither too long nor too short for a given field.
• Uniqueness - Validate that data entered is unique with respect to existing data in the system. For example, verifying that a given part number does not already exist in the system.
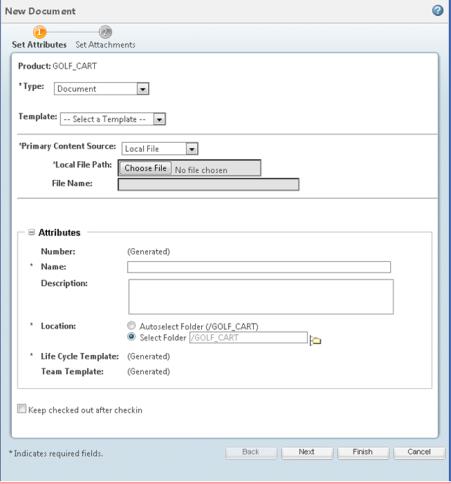
In case of clerk, while navigating between steps any java code such as a validator may not get the required fields so developers need to take care and apply logic accordingly.( E.g. While creating a new document first step has required field type (means type of document), since in clerk user is free to navigate between other tabs while clicking on other tabs,user might not have selected required filed type in first step. In that case server validator can’t get value of type attribute.)
Sample Code
Examples of Usage in Windchill Code
• Create Part wizard:
<Windchill>\codebase\netmarkets\jsp\part\createPartWizard.jsp
• Create Folder wizard:
<Windchill>\codebase\netmarkets\jsp\folder\create.jsp
• Create Document wizard:
<Windchill>\codebase\netmarkets\jsp\document\create.jsp
• Create Multiple Documents wizard:
<Windchill>\codebase\netmarkets\jsp\document\createMulti.jsp
Packaged Samples