Design in Context Flow
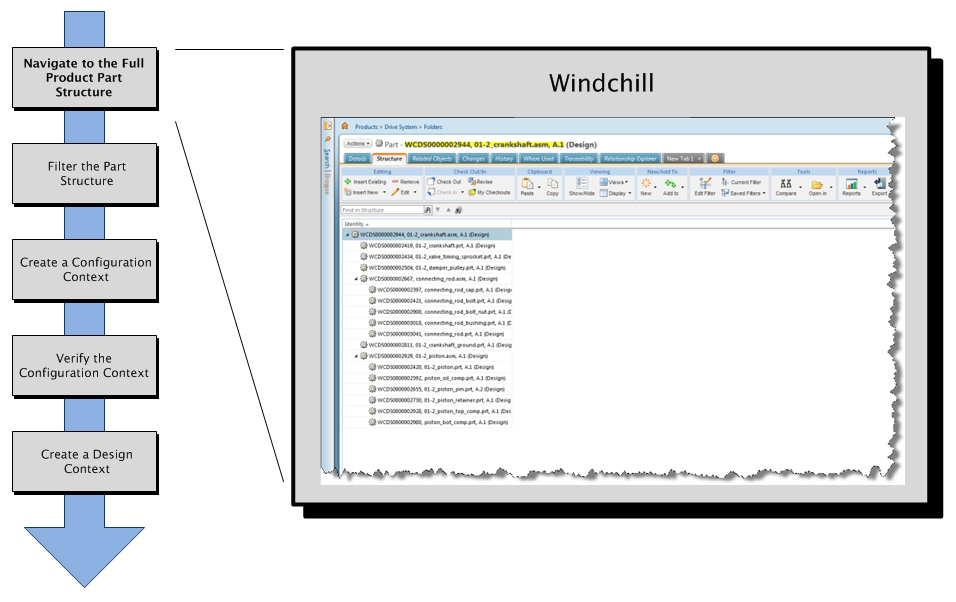
Step 1 — Navigate to the Full Product Structure in Windchill
You begin the design-in-context flow by navigating to the part structure of the complete product assembly located in the Structure tab on the part information page.
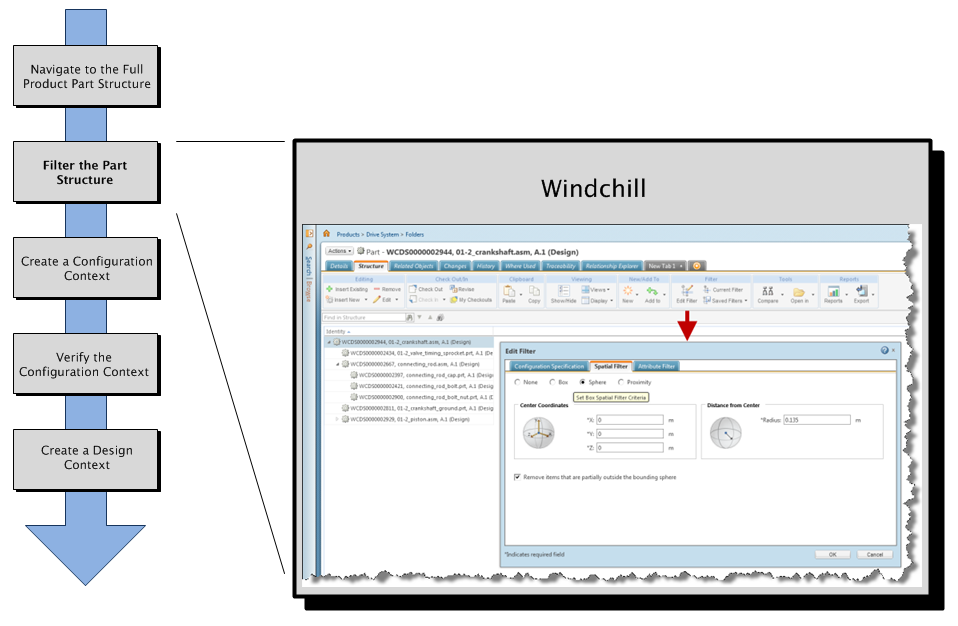
Step 2 — Filter the Part Structure
Using the Edit Filter tools on the Structure tab tool bar, filter the product structure to reduce it to just those assembly parts within your work zone or possibly, just parts of interest.
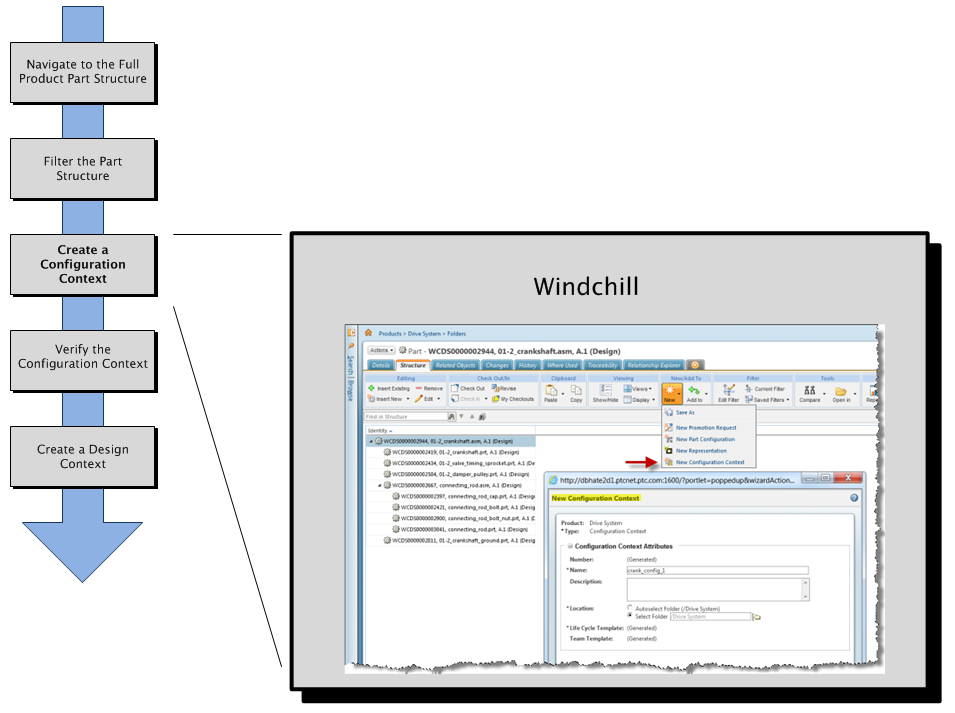
Step 3 — Create a Configuration Context
Create a configuration context from the filtered part structure. If necessary, in the Structure tab of the configuration context, you can refine the configuration by excluding (unchecking) certain parts in the configuration part structure pane that were included in the context, but not required for the design task.
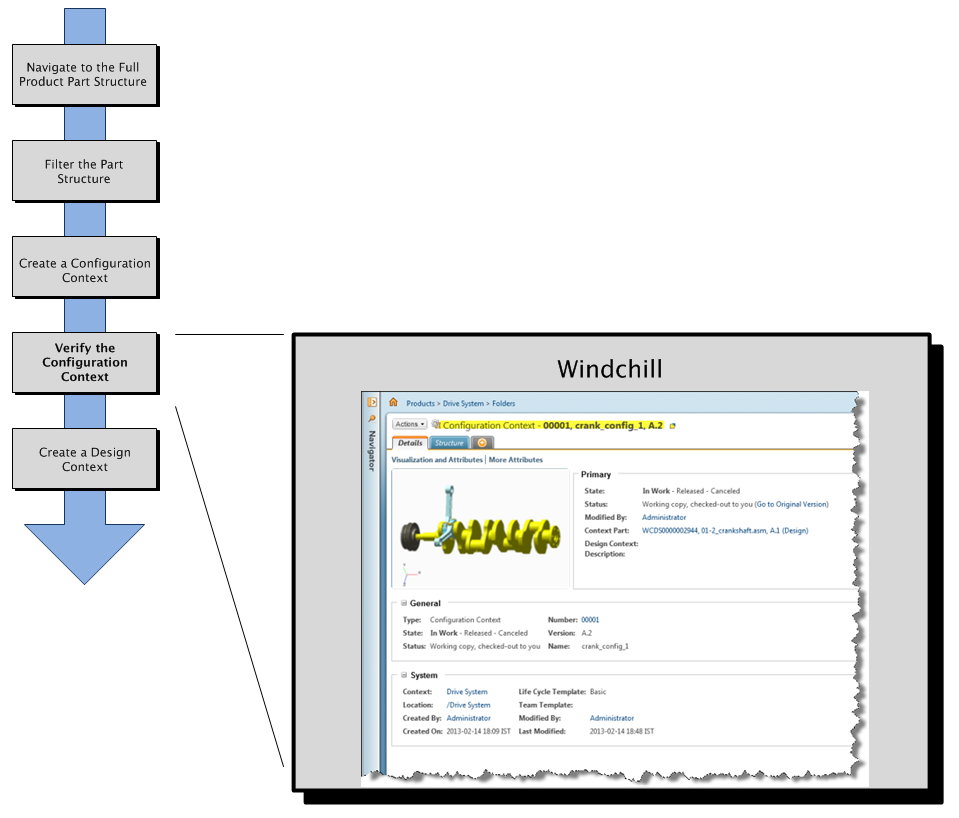
Step 4 — Verify the Configuration Context
Verify the configuration context using the Details tab of the configuration to ensure that you have only the parts needed for the design task. You can also accomplish this using the tools in the > tab on the configuration context information page.
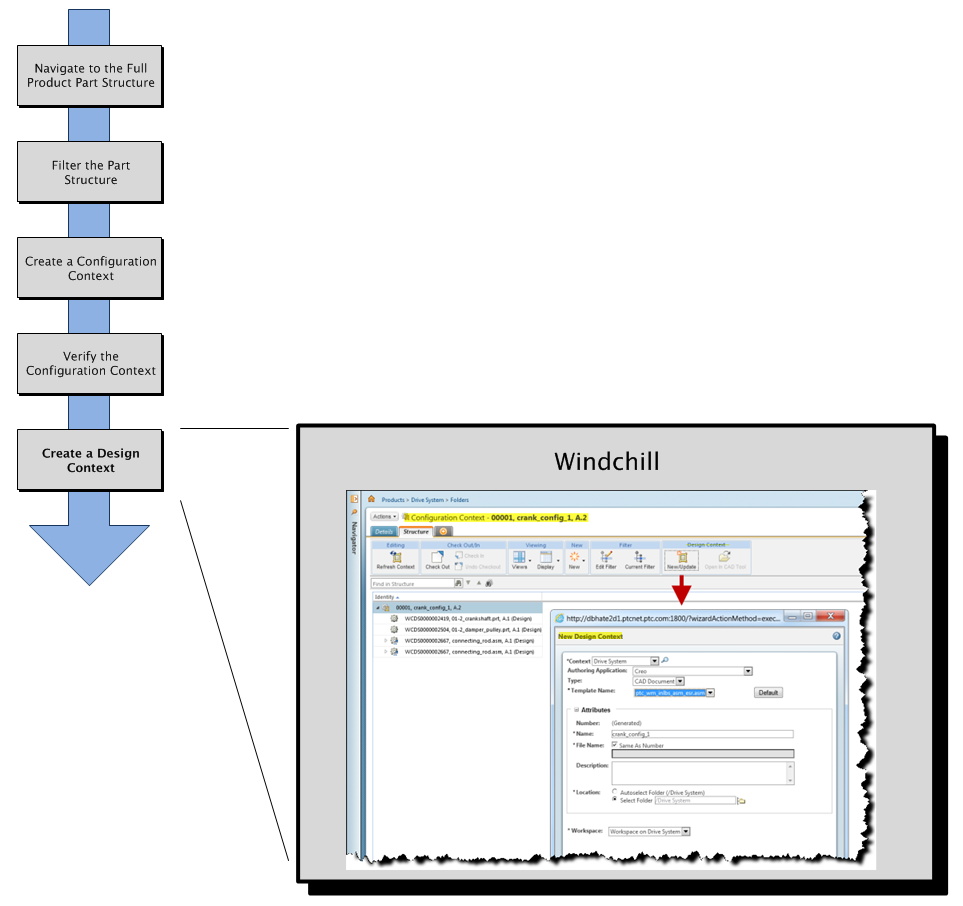
Step 5 — Create a Design Context
Create a design context from the configuration context. During this step, you can further refine the context of the part structure. Once complete, the CAD documents associated with the parts captured in the design context are collected and placed in a workspace, ready for modification in your CAD authoring environment.
| You can also create a design context directly by selecting objects in a CAD document information page in Windchill. |