Creating a New Revision
You can create a new revision for an object by assigning a subsequent revision level available in your revision scheme. The revision scheme represents a sequence of characters identifying subsequent versions of a revisable object. You can choose to revise just one object, or multiple objects in a design. Objects that are not revised retain their revision status as well as their association links to related objects.
|
|
• In cases where you only need to add a related document or change the value a part-specific attribute, it is useful to be able to revise a Windchill part without creating a new revision or iteration of its associated CAD document. For example, you want to attach an assembly instruction document or modify the cost of the material.
• Likewise, for small changes, it is useful to modify a CAD Document without needing to revise its related Windchill part. For example, when correcting a spelling error on a drawing.
|
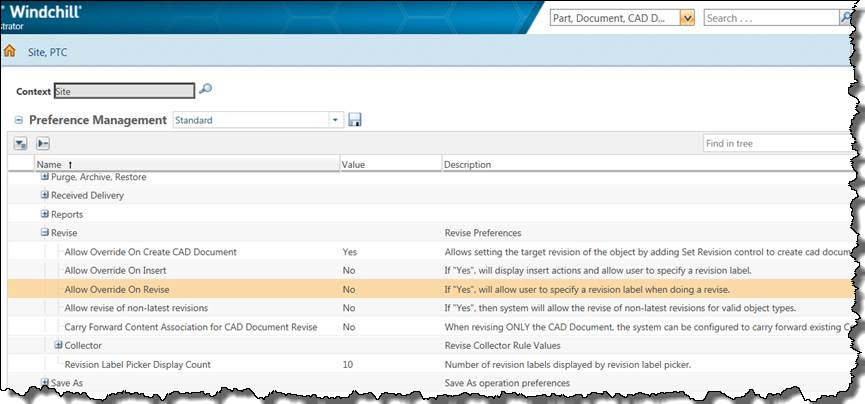
You can specify (skip to) the revision level that you want to use in your revision scheme by setting the Windchill preference shown in the following figure to Yes.
Typically, when an object is revised, the latest version of that object is used as the content for the new revision. You can, however, choose to revise a non-latest version to be the latest revision subject to certain rules. See
About Revision of Non-latest Objects.
Examples — Revising Only the Windchill Part Without Revising its Related Documents
1. You create a CAD model in your authoring application and check it into Windchill using Auto Associate.
Result:
A companion Windchill part is created with an owner association link to the CAD document as follows.
0000000010, test.prt A.1 (Design)
—> TEST.PRT, test.prt, test.prt A.1 Owner
2. You then choose to revise only the Windchill part:
0000000010, test.prt A.1 (Design) to 0000000010, test.prt B.1 (Design)
Result:
0000000010, test.prt B.1 (Design)
—> TEST.PRT, test.prt, test.prt A.1 Owner
0000000010, test.prt A.1 (Design)
—> TEST.PRT, test.prt, test.prt A.1 Owner
3. Check out the CAD document test.prt A.1, modify it, and check it back in.
This iterates it to test.prt A.2.
Result:
0000000010, test.prt A.1 (Design)
0000000010, test.prt B.2 (Design)
—> TEST.PRT, test.prt, test.prt A.2 Owner
| • Only the latest versioned objects are iterated. • Changing the lifecycle state of the Windchill part to Released in the first step of the previous example produces the same results without a conflict for member users. |
To create a new revision:
1. Select Revise from an Actions list, such as from the Actions list on the object 's information page. Alternatively, in a workspace you can select an object and then select > > .
The
Revise window appears and features a collection table.
For more information on basic table use, sorting, using and customizing views, and finding strings in the table listing, see Using Tables and Customizing Table Views.. You can collect, remove, include, or exclude objects for the new revision action using the advanced mode of the collection user interface. The basic collection mode is not available for this action, nor are configuration-setting tools. For more information on collection, see
Collecting in Advanced Mode.
2. From the Revise window, you can collect additional objects by clicking the toolbar icon associated with that object type.
3. For each object in the table, select the appropriate operation. For example, you can exclude an object from revision, include a previously excluded object, or remove an object from the collection table.
4. Depending on the settings at your site, you can assign a revision level. See
Setting a Revision Level. You can click the revision icon

next to any object for which you want to set the revision level. You can also set a level for all objects by selecting all objects and then clicking the set revision icon
on the toolbar.
| You can also modify the location for any or all objects, by clicking the set location icon  . |
5. Click OK.
The revise operation completes.
—or—
If the Revise operation fails, the Event Management window appears to indicate the reason for the error.