Creating Illustrations in a Process Plan Operation
To create an illustration for an operation, you can use either Creo View or Creo Illustrate.
Creating the Illustrations using Creo Illustrate
1. In the Process Plan Browser, right-click an operation and select > .
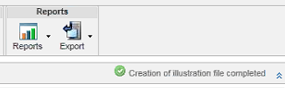
A success message appears below the structure toolbar.
The action creates a C3DI file which opens in Creo Illustrate.
2. On the Home tab, click New Figure.
3. In the New Figure window, click Default, and then click Create.
4. Click > > to save the file.
| The illustration is lost if you do not save the file. This is default Creo Illustrate behavior. |
| • Given that an operation can have only one illustration, the > action is grayed out if an illustration already exists. For more information on enabling the Illustration menu, see Managing Illustrations using Creo Illustrate. • If different object types are selected, the menu is grayed out. • If multiple operations are selected, the New Illustration action is enabled for all the operations. Illustration will be created for all the selected operations. However, only the first operation selected in the list will be displayed in Creo Illustrate. |
Creating the Illustrations using Creo View
1. Create a representation of the operation in Creo View, or create an image document and associate it with the operation, then set that image as the default for the work instruction.
2. Create annotations for the operation.
The annotation created for the default representation is the illustration that is displayed in the work instruction for that operation. If there are multiple annotations for a representation, all are displayed.