The image below shows the Item Create page and the table below describes the various actions that you can perform on this page.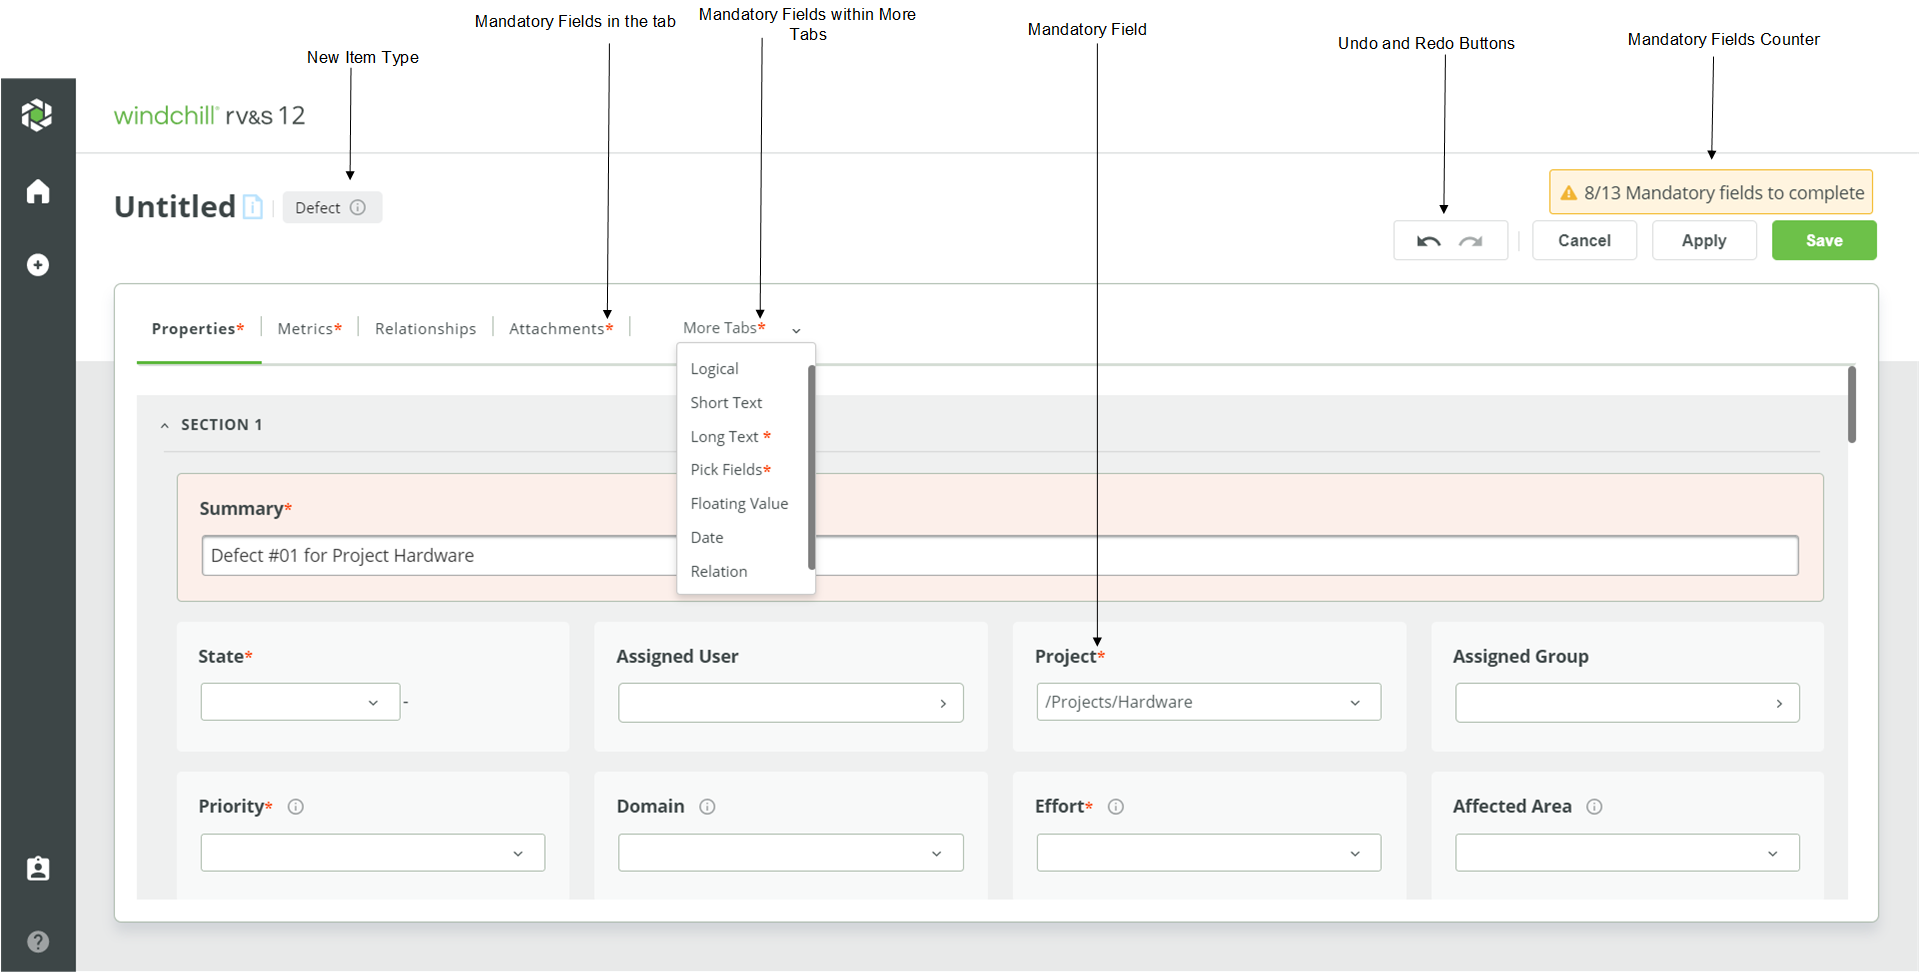
Task | Procedure | ||||||||||
Create an item | In the Refreshed Web Interface: 1. Click  . .2. Select Item Type and Project in the Create Item window and click Proceed. 3. Type the necessary information in the Item Create page. For supported fields, see Fields Supported for Editing in Refreshed Item View.
| ||||||||||
Commit the item information to the database and resume entering additional information | Click Apply. The view changes from Item Create to Item Edit. You can continue editing the content.
| ||||||||||
Save the item and open the Item View | Click Save. The status message indicates that it is saved, and the view changes from Item Create/Item Edit to Item View. | ||||||||||
Save the item and open DocStudio
| Click Save and go to DocStudio. A confirmation window opens. After confirmation, the view changes from Item Create to Item View and DocStudio is opened in a new tab. | ||||||||||
Undo and redo | Click  and and  , respectively after you start editing the content. , respectively after you start editing the content.For details, see Global Undo and Redo Operations. | ||||||||||
Cancel item creation | Click Cancel. After confirmation, the edits in the Item Create page are discarded and home page is opened. |