Modifying Windchill RV&S import options
A valid roundtrip configuration must be open and a valid connection to the RE/RM data source has to be established.
The import settings define the behavior of Windchill Requirements Connector during import. When a document is imported into a RE/RM tool for the first time, you can define which of the attributes from the ReqIF file(s) are imported.
In subsequent imports, called an update, in addition you can define the following details:
• If objects should be created, deleted and / or moved.
• If links should be created.
• If changes should be tracked and if so
◦ If the attribute "PTC Connector Changes" attribute should be reset before executing the update.
◦ If the attribute "PTC Connector Diff" attribute should be reset before executing the update.
◦ If attributes should be checked for parallel conflicting changes.
To modify the import settings of a document:
1. Select thedocument from the Documents table on Import tab.
Figure 205. Selected document with attributes
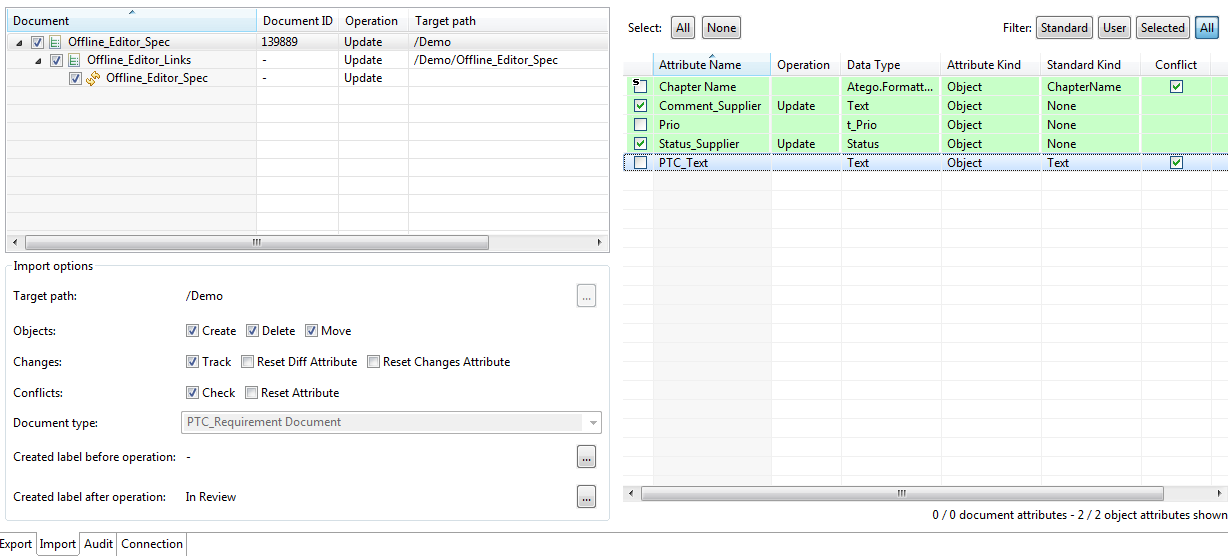
The selected document is highlighted. The attributes of the document are displayed in the Attributes table.
2. To change the value of the import settings for a certain column, click on that column.
a. In the Document name column, select or deselect the documents you want to include the import.
b. Target path the target folder in the RE/RM tool can be selected if it is the initial import of the document. On update this column is filled with the corresponding path.
c. Operation displays whether the document already exists in the RE/RM tool (Update) or not (Import).
d. Alias Name a name for the module can be defined in your RE/RM tool that differs from the name in the ReqIF file if it is the initial import of the document. On update this column is empty.
e. Objects: Create / Delete / Move defines whether objects that exist in the ReqIF file but not in the RE/RM tool will be created. Objects that are not included in the ReqIF file will be deleted if the check box is ticked. Finally objects that have a different hierarchical position in the document in the RE/RM tool compared to the ReqIF file are moved during update.
f. Changes: Reset Diff Attribute / Reset Changes attribute determines what changes are recorded in the PTC Changes attribute:
▪ When selected, only the last change made to each object is recorded in the attribute.
▪ Otherwise a history of all changes made to the each object are recorded. The history of changes starts at the time the object has been created or when the PTC Connector Changes attribute has been reset.
g. Conflicts: Check / Reset will check for conflicting changes during the exchange process (e.g. the original document has changes in requirements that have been evaluated and returned by the exchange partner in the meantime). To check for conflicts all attributes that should be checked have to be returned to the starting partner (instead of e.g. just the comment attributes). Those attributes that should be checked for conflict will be deselected for updated but selected for conflict checking.
Figure 206. Check for conflicts
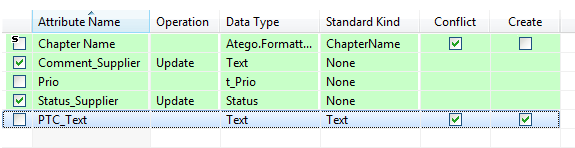
The Create option is enabled if the import is updated and the attribute is not selected. The Create option is independent from the Conflict selection. |
h. Select the relation group in the document table to define relation handling during update. Links: Create will create relations that exist in the ReqIF file but not in the RE/RM tool.
Figure 207. Relation handling
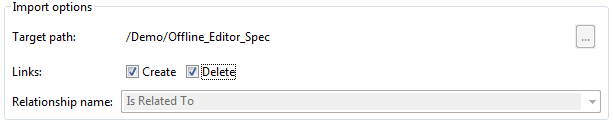
i. Links: Delete deletes relations that exist in the RE/RM tool but not in the ReqIF file during update.
3. Select those attributes to be included during import in the Attributes table.
The attributes are always synchronized when you connect database. |
The Operation column displays whether the attribute will be newly created, updated or ignored.
4. In case of initial import define the Document type (Windchill RV&S)
Figure 208. Define document type

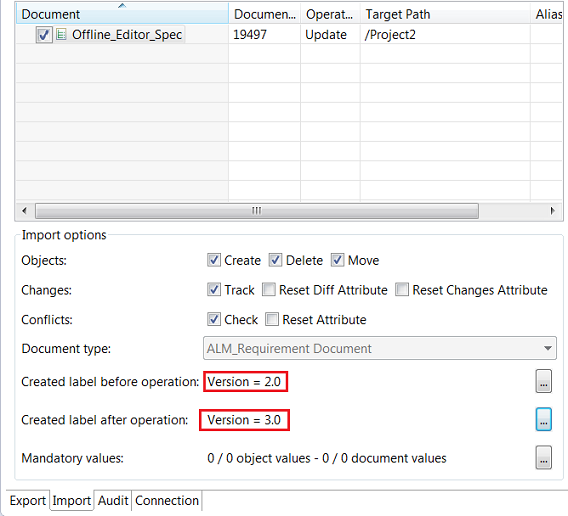
5. Decide whether to create a label / baseline / version after the import or if it is an update decide whether to create a label before and/or after the update . This setting has to be set for each document in the configuration. By default no label will be created.
◦ When importing a document initially, you can choose to create a baseline after import has completed:
▪ Select the three dotted button  at Create Label After Operation
at Create Label After Operation◦ When updating an existing document, you can choose to create a label / baseline before starting the import, and you can choose to create a label / baseline after the import is complete as well:
▪ Select the three dotted button at Create Label Before Operation
at Create Label Before Operation▪ Select the three dotted button at Create Label After Operation
at Create Label After OperationFigure 209. Label dialog
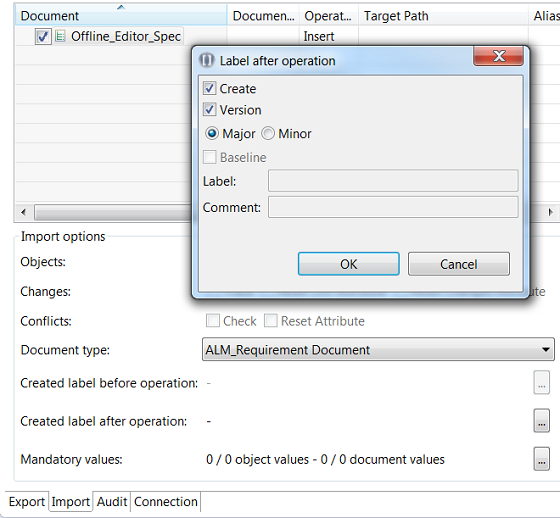
◦ Select the kind of increment for the baseline:
▪ Major: The version number of the new baseline will have the major part incremented and the minor part reset to 0. For example: 2.0 => 3.0, 2.1 => 3.0.
▪ Minor: The version number of the new Baseline will have the minor part incremented, the major part will not change. For example: 2.3 => 2.4, 2.9 => 2.10.
Figure 210. Label Created
The import settings are defined.
The import settings are a powerful tool that can help you to enforce rules about the changes your business partner may have performed on your documents. For example, you might not want your supplier to change or delete your requirements / attributes. You can prevent this by deselecting the Delete Objects option plus deselecting the attributes e.g. Object Heading and Object Text from the Attributes table. |
Parent topic