Modifying Doors export options
A valid roundtrip configuration must be opened and a valid connection to the database has to be established.
The export settings define the label / baseline and view that will be exported from the RE/RM database for each document, as well as the traces to be exported.
To modify the export settings of a document:
1. On the Export tab, select the document in the Documents table.
Figure 187. Selected document with export options
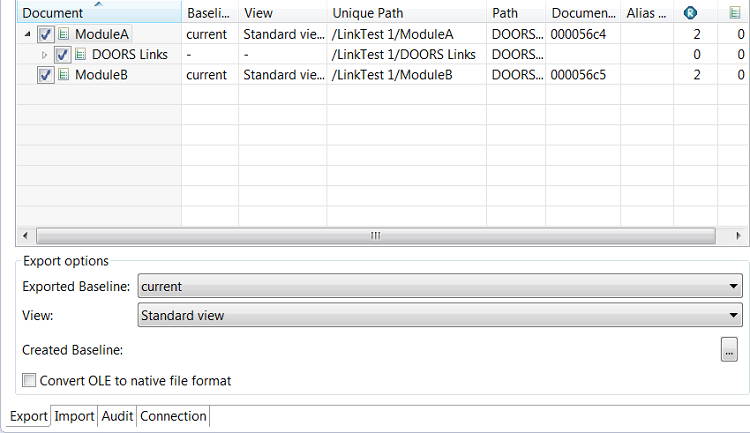
The selected document is highlighted . The attributes of the document are displayed in the Attributes table.
2. Select the Baseline field. From the drop-down menu, select the baseline you want to export.
Figure 188. Choose baseline

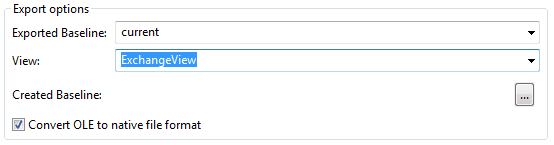
3. Select the View field. From the drop-down menu select the view to be exported.
Figure 189. Choose view
The view determines which attributes are selected for export by default. Take care when designing your export view in your RE/RM database. |
You can disable attributes in the export by clearing the corresponding check box. |
When changing the view, Windchill Requirements Connector automatically determines which attributes are part of this view, and displays them in the Attributes table.  |
4. Chose whether attachments should be kept as OLE files
When using the Windchill Requirements Connector the format needed for the import will be detected automatically and conversion will be done accordingly automatically as well during import. |
5. If you want the file name of the ReqIF file to be different from the document name, specify an alias name in the document table.
6. Select the Links to be exported by ticking the corresponding checkbox.
Figure 190. Choose links to be exported

7. In the Attributes table select the attributes you want to include in the export by selecting their corresponding checkboxes.
The attribute configuration can have three different types of attributes: • Document-Attributes: These attributes are attributes of the document itself, they cannot be part of any view. These attributes are always shown in the attribute configuration table (except when the filter Selected is applied) and are usually not selected, but can be if desired. These attributes have a blue background. • Object-Attributes: Object attributes are part of the individual objects in a document. ◦ Object attribute as part of the current selected view: such attributes have a green background. They get automatically added to the configuration if a view is selected that contains the attribute. They get removed if the attribute has not been added to the configuration previously (when a view not containing the attribute is selected) and the selected view is changed to a view not containing the attribute. ◦ Object attributes not part of the selected view: these attributes do not appear in the configuration when the view is first selected. They can be added or removed from the configuration by selecting a different filter e.g. All Once added these attributes stay part of the configuration even if the selected view is changed. However they can become view-attributes, depending on the new selected view. Attributes which are not part of the view but have been added to the configuration have a pink background. |
The document is always synchronized if you change the export options like View and Baseline. |
Figure 191. Select attributes for export
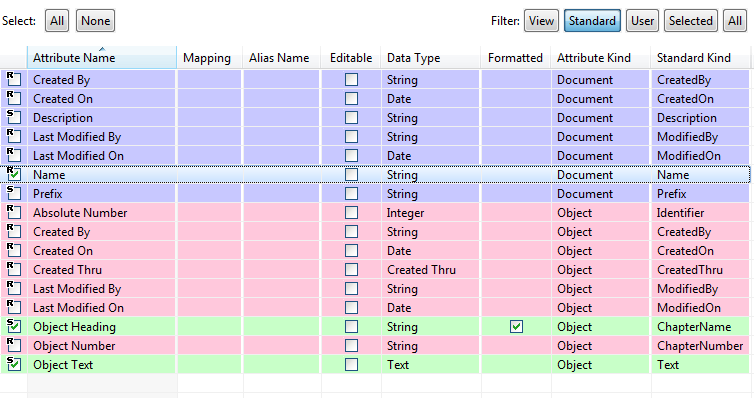
The Kind column shows whether an attribute is a document or an object attribute.
a. To change the name of an attribute in the ReqIF file, enter an alias name in the Alias name field.
The e.g. Absolute Number attribute of an object is assigned by the RE/RM tool and cannot be imported with its original name. If you rename it, for example as Foreign Absolute Number, your business partner is able to import it for reference purpose. |
b. Define the edit rights in the Editable column. These rights will be synchronized with the attribute selection on import and written into the ReqIF file.
8. Decide whether to create a baseline at Export. This setting has to be set for each module in the configuration. By default no baseline will be created.
a. Select  at Created Baseline to open the baseline dialog.
at Created Baseline to open the baseline dialog.Figure 192. Baseline Dialog
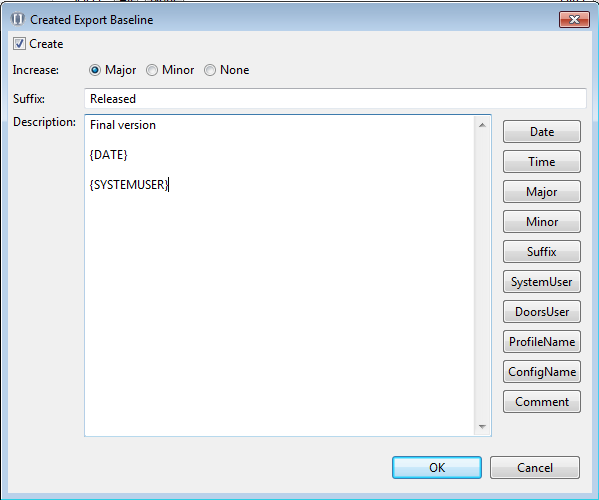
▪ Select the kind of increment for the baseline:
▪ Major: The version number of the new baseline will have the major part incremented and the minor part reset to 0. For example: 2.0 => 3.0, 2.1 => 3.0.
▪ Minor: The version number of the new Baseline will have the minor part incremented, the major part will not change. For example: 2.3 => 2.4, 2.9 => 2.10.
▪ None: The version number of the new baseline will not change.
Windchill Requirements Connector will show an error message if a baseline with the same suffix already exists in the DOORS-Module. Avoid this by typing a unique suffix. |
If a baseline is created during export this baseline can used to be exported by selecting Last Baseline. PTC Requirements Connector will show a warning if a baseline is created and Last Baseline has not been selected for export |
▪ In the Suffix box, optionally specify the suffix part of the name for the new baseline. This must be unique if None has been selected.
▪ In the Description box, optionally specify a description which will be stored as part of the baseline. There are a few keywords that can be used, which will be replaced when the baseline is created.
▪ {MAJOR} => Major part of the baseline version number.
▪ {MINOR} => Minor part of the baseline version number.
▪ {SUFFIX} => Add the suffix text with the baseline version.
▪ {DATE} => Date of the export.
▪ {TIME} => Time when the export has finished and the baseline is created.
▪ {SYSTEMUSER} => User logged into Windows at the time of the export.
▪ {DOORSUSER} => DOORS-user who executed the export.
▪ {PROFILENAME}=> Name of the executor given in the Export Wizard.
▪ {CONFIGNAME} => Name of the roundtrip configuration.
▪ {COMMENT} => Comment given in the export dialog.
The export settings are defined.
Parent topic