Adding a Zone in the Routing Plan Tab
A zone-based manufacturing approach is applied to manufacturing processes at an assembly line's workstation. Consider a workstation where the process of assembling four car doors is taking place. Four different operators are engaged at the same workstation. The operators are assembling the left front, right front, rear left, and rear right doors, respectively. In such scenario, the workstation can be considered to be virtually divided into four zones, where each zone consists of different operations being performed.
Creating a Zone
Consider that the following structure is present in the Manufacturing Resource Browser:
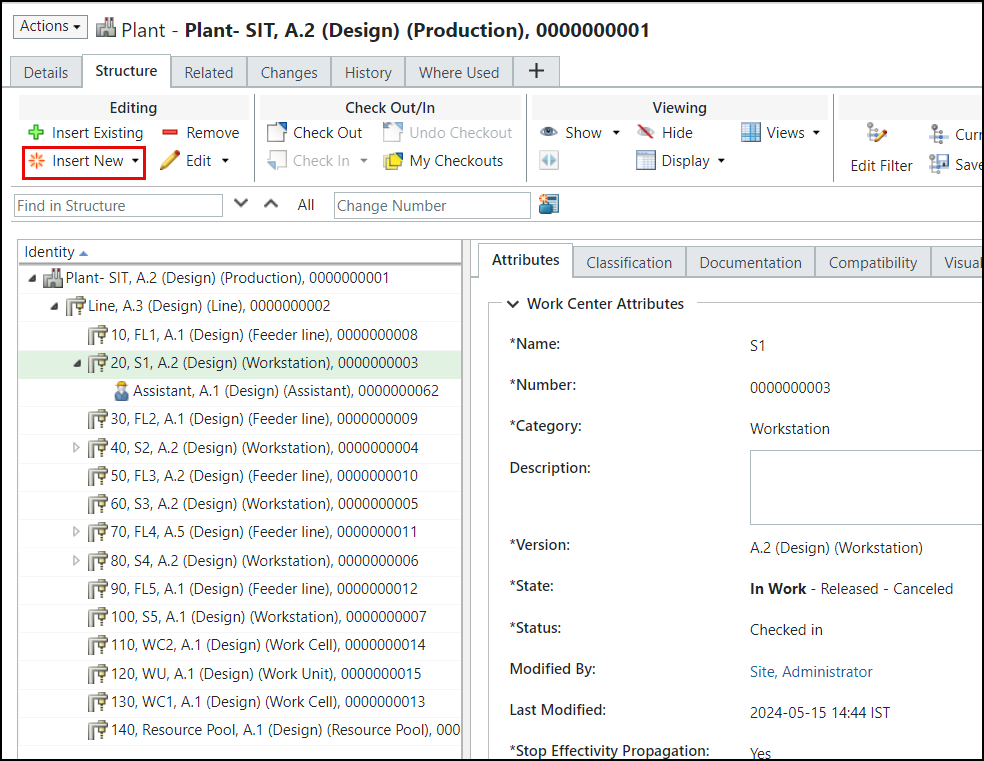
1. Select a workstation.
2. Click > . The New Resource dialog box opens.
3. In the Type field, select Work Center.
4. In the Category field, select Zone.
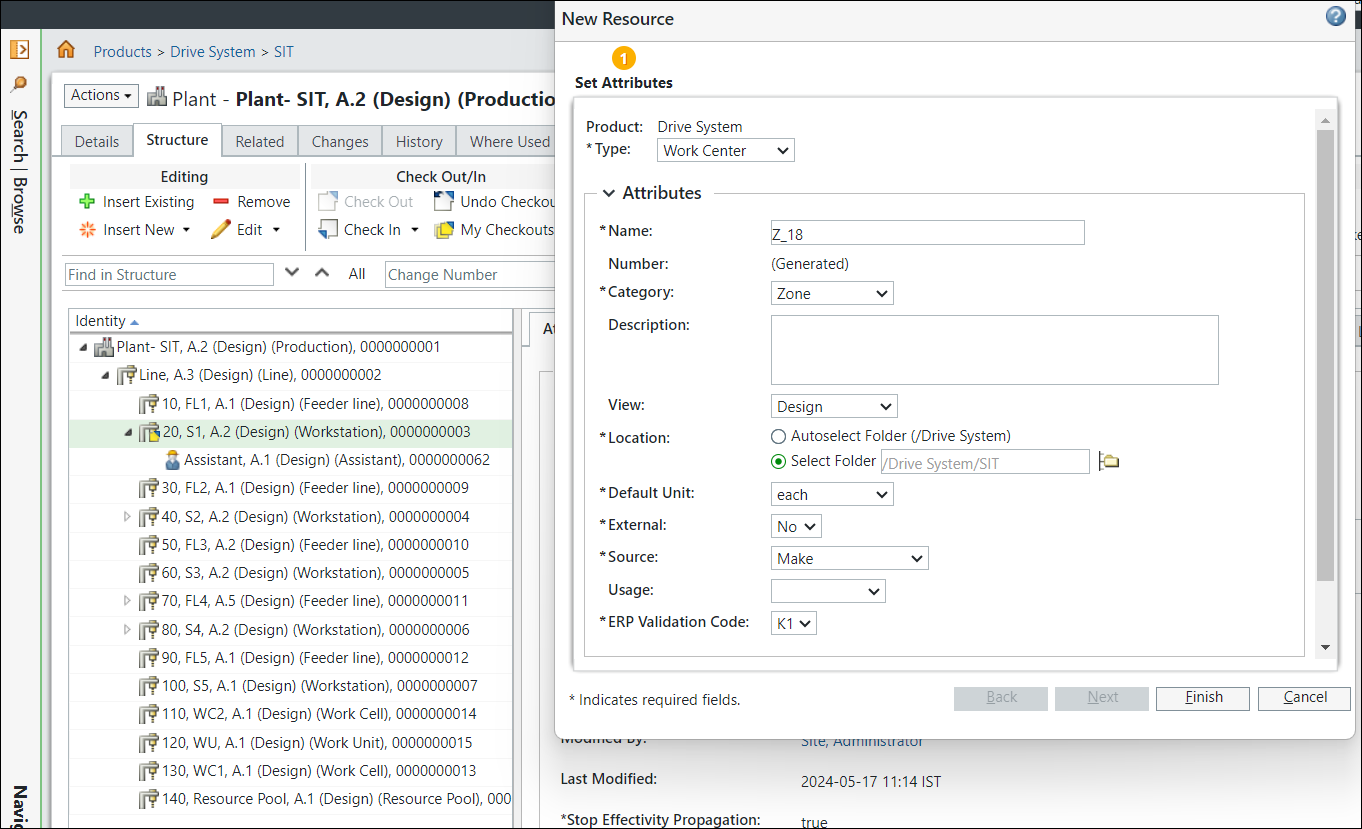
5. Fill the necessary information in the required fields indicated by an asterisk, such as Name, Location, and so on.
To immediately check out the new resource, select Keep checked out after checkin checkbox. |
6. Click Finish. The zone is added under the workstation.
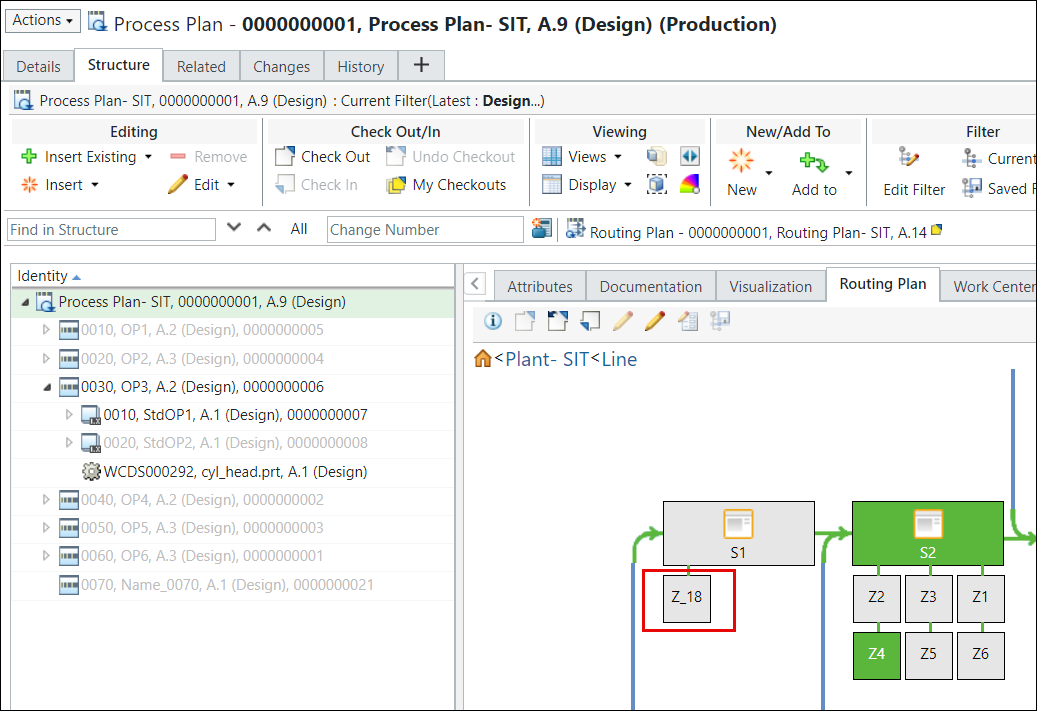
In a Routing Plan tab, a workstation or line always moves from left to right. In this case, workstation S2 is present to the right of workstation S1. When you add a zone under a workstation, by default the system adds it to the right side of the workstation. In this case, the newly added zone Z_18 is added to the right of workstation S1. You can change the side on which the workstation is added. For more information, see Using the Side and Level Attributes. |
Additional Information
• You can create a zone only under a workstation.
• A zone is displayed on two levels in the Routing Plan tab. Side and Level are the attributes associated with a zone. For more information, see Using the Side and Level Attributes.
The concept of a Level attribute can be explained with the help of an assembly process of an airplane. During an assembly of an airplane, two individuals can work on the bottom level, and two different individuals can work on the top level. Accordingly, you set the values of the Level attribute.
• If you try to create a new workcenter of type zone under a non-workstation type, the system displays the following message: A usage relationship between the selected object type is disallowed.
• You can allocate different operations to different zones.
• You cannot add a zone under a line.
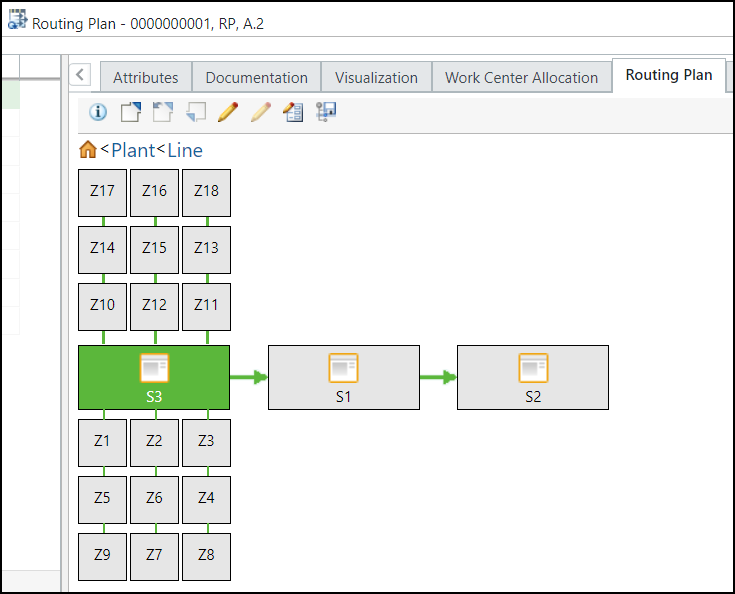
• If you localize an operation on the zone, the system highlights the following entities in green:
◦ The zone
◦ The workstation associated with the zone
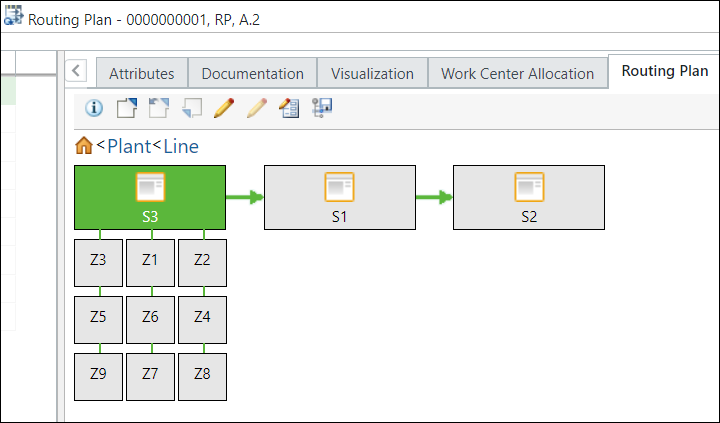
• Out of the box, you can add three zones on a level. Also, out of the box, the system allows you add two levels. However, you can configure the level settings to add a third level. That means you can add maximum nine zones on each side of a workstation. Refer the following images:
Localizing Operations on the Zone
• To localize, you can directly drag an operation on the zone.
• You can localize the operations or suboperations to any required stations or zones.
You cannot localize the same operation twice in the same zone or workstation. |
• The precedence of the zones within the stations is based on the line numbers of the zone.
• The routing plan is checked out when localized.