Creating and Deploying a Build Package
The code and configuration scripts are located in the /bin/customization folder of Windchill. Build a deployment package using CCD by following the steps in Using the CCD Utility in the Development Environment topic.
For more information about the external targets, see External Targets.
The code and configuration package deployment process can modify some Windchill artifacts. A few examples of the artifacts are as follows:
• Customization modules
◦ Custom properties
◦ XML files
◦ Java
• Configuration changes
◦ Property settings
◦ Schema changes
◦ BAC packages
◦ Load files
You can create and deploy build packages automatically. There are three main steps to deploy configuration changes with the PTC cloud:
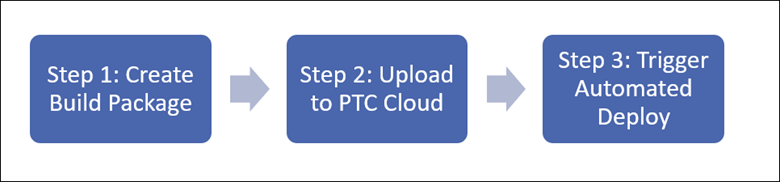
Step 1. Create a Code and Configuration Package
You can create a build package by using a configuration management system.
Create a Build Package Using a Configuration Management System
This method is specific to your configuration management plan and is equivalent to the first method of creating a build package using a package template.
The SCM branch must follow the CCD folder structure. |
To generate a package out of an SCM tool, create a .zip file.
Step 2. Upload a Build Package to PTC Cloud
The generated ZIP file can be uploaded to Azure Blob storage. This section explains the procedure for uploading the package to the Azure Blob storage.
Prerequisite:
An Azure Blob storage should be set up and authorization details should be obtained from PTC Cloud.
You must enter the Azure Blob Storage name in the following format : ptccustomerxxxxrrr Where, xxxx is the customer short name. Example: acme. rrr is the region where the blob storage has been provisioned. Example: euw. Based on our example, the Blob Storage name would be: ptccustomeracmeeuw. |
You can upload the build to Azure Blob from your local computer.
Upload a Build from a Local Computer
You can upload the build to Azure Blob from your local computer using Unix Shell, Windows CMD, PowerShell, or Microsoft Azure Storage Explorer. As a prerequisite, you must have AzCopy installed on your machine. Use this link to download AzCopy.
To upload the build to Azure Blob from Linux Shell, execute the following commands:
cd /<path>
azcopy cp <build>.zip https://ptccustomerxxxxrrr.blob.core.windows.net/data/builds/
azcopy cp <build>.zip https://ptccustomerxxxxrrr.blob.core.windows.net/data/builds/
To upload the build from Windows CMD or PowerShell, execute the following commands:
cd \<path>
azcopy cp <build>.zip https://ptccustomerxxxxrrr.blob.core.windows.net/data/builds/
azcopy cp <build>.zip https://ptccustomerxxxxrrr.blob.core.windows.net/data/builds/
To upload the build using Microsoft Azure Storage Explorer:
1. Locate the build file locally. Locate the target folder (data/builds) in the Blob Container.
2. Either drag and drop or upload the build file to the target folder.
If you are prompted for Storage Access Policy, click OK. |
3. After the transaction is complete, verify that the transfer status is successful.