部品の検索
任意の部品をクリックしてその部品のメタデータを表示できるだけでなく、エクスペリエンスにサーチバーを追加することもできます。部品番号はわかっているが、モデルのどの部品かが正確にわからない場合は、部品番号をサーチすると、その部品がハイライトされます。これを行うには、findMeta という関数を作成します。この関数の入力情報として部品番号を指定し、その部品番号をクワッドコプターのモデルデータと比較します。これにより、指定した部品番号を持つ部品がハイライトされます。
|
|
進行状況をこのセクションの完全なコードと比較する場合は、GitHub の Appendix 1 で完全なコードを参照できます。 |
1. 「ホーム」ビューで「2D」キャンバスを開きます。
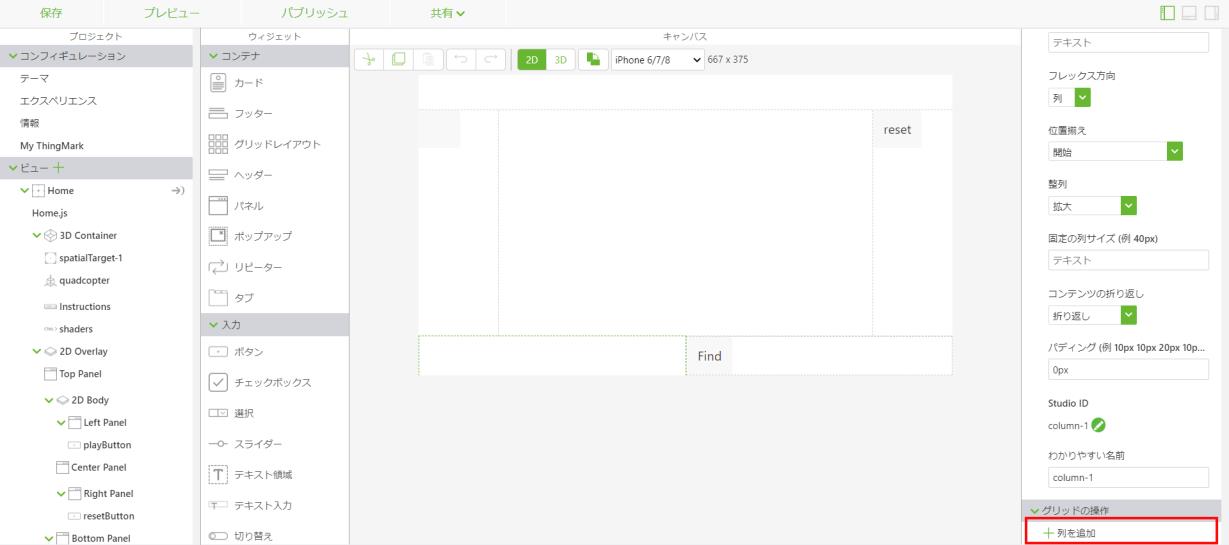
2. 「グリッドレイアウト」ウィジェットを、キャンバス上の下部パネルにドラッグアンドドロップします。画面左側の「ビュー」ツリーで、「column-1」をクリックします。「グリッドの操作」の「列を追加」を選択して、下部パネルを 2 つの列に分割します。
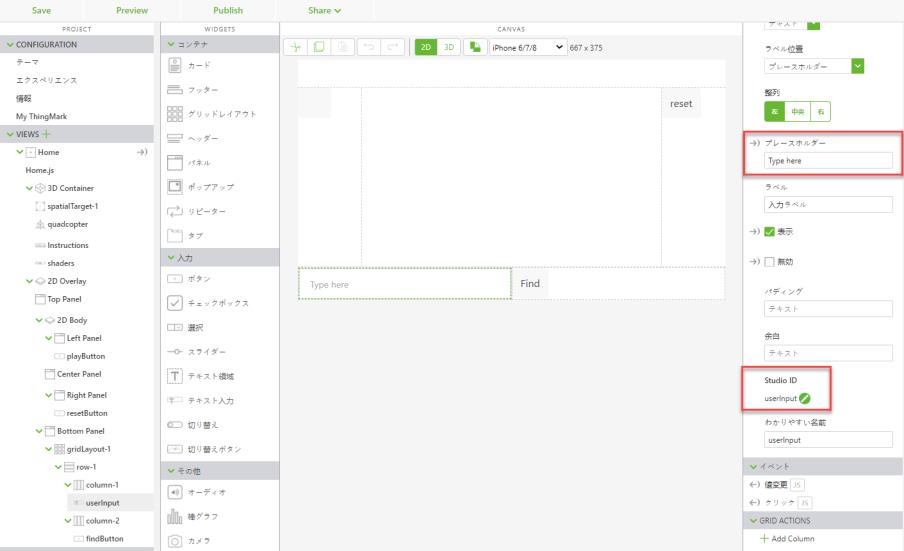
3. 「テキスト入力」ウィジェットを、下部パネルの「column-1」にドラッグアンドドロップします。「テキスト入力」ウィジェットを使用して、部品名や部品番号をサーチするためのテキストを入力します。「プレースホルダー」フィールドに「Type here」と入力します。「Studio ID」の値を「userInput」に設定します。
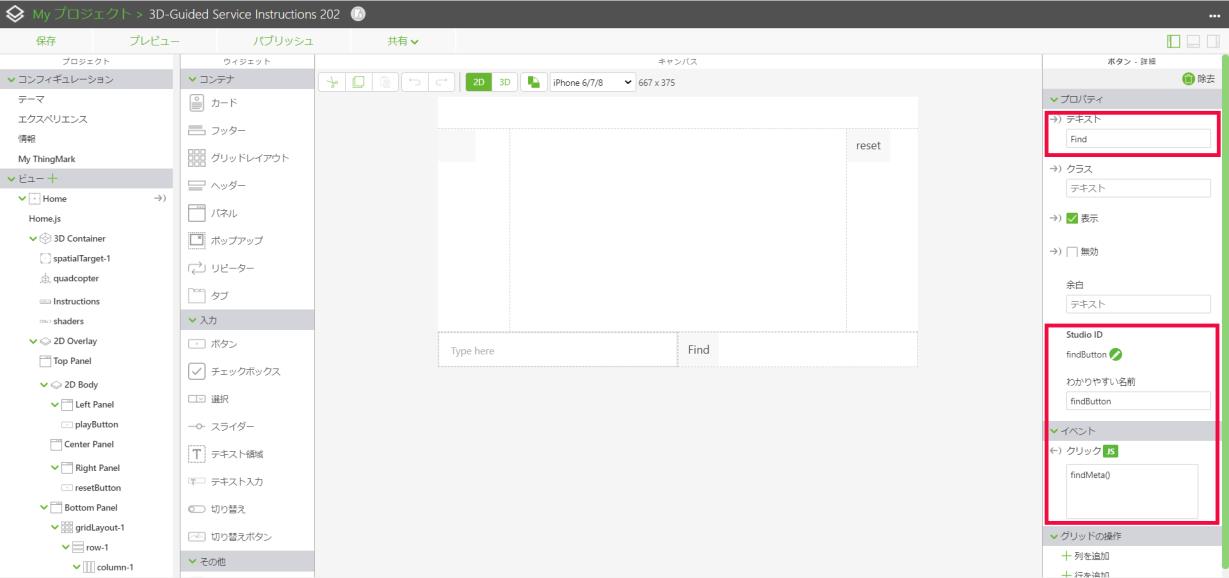
4. 「column-2」で、「ボタン」ウィジェットを追加します。「テキスト」フィールドに「Find」と入力します。「Studio ID」の値を「findButton」に変更します。「クリック」イベントの「JS」セクションで「findMeta()」と入力します。この関数は、「Home.js」タブで作成します。
5. 画面右上隅の

をクリックして
「データ」枠を開きます (以下を参照)。「
userInput」ウィジェットで入力したテキストをモデル属性に接続するには、アプリケーションパラメータを作成する必要があります。
a. 新しいアプリケーションパラメータを作成するために、「アプリケーションパラメータ」の横にある緑の「+」を選択します。アプリケーションパラメータの名前として「partno」と入力して「追加」をクリックします。
b. userInput の「テキスト入力」ウィジェットを開きます。「userInput」ウィジェットの「テキスト」プロパティを、partnoアプリケーションパラメータ上にドラッグアンドドロップします。これにより、「userInput」ボックスに入力されたテキストが partno 変数にバインドされます。バインドの対象となる 2 つのオブジェクトの横にある矢印が黒の塗りつぶしで表示されていれば、バインドが正しく作成されています。
6. 「ビュー」ツリーの
「Home.js」をクリックします。サーチバーを使用して、特定の部品番号を持つ部品を検索するには、新しい関数を作成する必要があります。この関数は、「
userInput」ボックスに入力されたテキストを取得し、そのテキストを
searchNum という変数に設定します。この変数の値が、クワッドコプターモデル内のすべての有効な部品番号と比較されます。この変数の値に一致する部品番号を持つ部品が見つかった場合は、その部品 (同じ部品番号を持つ部品が複数存在する場合はそれらの部品) が、
3D-Guided Service Instructions 201セクションで作成したシェーダーを使用してハイライトされます。部品のハイライト時間は 3 秒間です。この関数を、
userpick 関数と
playit 関数の間に挿入します。
a. findMeta という関数を作成します。この関数を使用して、「userInput」テキストボックスに入力された情報を持つ部品のメタデータを検索します。この関数の最初のステップで、「再生」ボタンからテキストを除去し、任意のシーケンスからモデルの関連付けを解除します。次に、上の手順で作成したアプリケーションパラメータに基づいて、「userInput」テキストボックスに入力されたテキストと同じ値を格納するための変数を作成する必要があります。
//function for using the userInput text box to search for parts
$scope.findMeta = function () {
//reset the text property of the play button to be blank
$scope.view.wdg.playButton.text='';
//
//set the toPlay object for the play button to be undefined
$scope.view.wdg.playButton.toPlay = undefined;
//
//set a variable for comparing the user input to the value of the partno application parameter
var searchNum = $scope.app.params.partno;
//
// instead of using metadata from just the picked part, use metadata from the whole model. If resolved, proceed
PTC.Metadata.fromId('quadcopter')
.then ( (metadata) => {
b. この関数の次のセクションで、「userInput」テキストボックスに入力されたデータを取得し、そのデータをモデルの Part Number 属性と比較します。options 変数は、入力されたテキストに対応するデータが格納される ID パスの配列として作成されます。これを行うには、.find メソッドと .like メソッドを組み合わせて使用します。ユーザーが「userInput」ボックスにテキストを入力すると、そのテキストが partno アプリケーションパラメータに渡されます。これは、入力テキストとアプリケーションパラメータがバインドされているためです。そのため、searchNum 変数が partno アプリケーションパラメータの値に設定されます。次に、モデルの属性について .find メソッドを使用して検索された既存の partNumber の値に対して、searchNum 変数の値が比較されます。その後、.like メソッドを使用して、入力ボックスに入力されたテキストに完全に一致する部品番号と部分的に一致する部品番号をすべて検索できます。このサーチ結果は、getSelected によって options 変数の値のリストとして保存されます。
//
//set a variable for comparing the user input to the value of the partno application parameter
var searchNum = $scope.app.params.partno;
//
// instead of using metadata from just the picked part, use metadata from the whole model. If resolved, proceed
PTC.Metadata.fromId('quadcopter')
.then((metadata) => {
//
// set a variable named options. this variable will become an array of ID paths that fit the input text.
// 'like' will look for a partial text match to what is typed in. use 'same' to get an exact match
var options = metadata.find('partNumber').like(searchNum).getSelected();
//
// if the text input leads to a part number so that there is an entry in the options array
if (options != undefined && options.length > 0) {
//
// set an empty array called ID. This array will house the parts that contain the entered part number
var identifiers = []
//
// for each entry in the options array, push that value with 'quadcopter-' at the beginning into the ID array
options.forEach(function (i) {
identifiers.push('quadcopter-' + i)
}) //end forEach
//
// highlight each object in the identifiers array with the shader
$scope.hilite(identifiers, true)
//
// function for removing the highlight
var removeHilite = function (refitems) {
//
// return the hilite function with a value of false to the given part(s)
return function () {
$scope.hilite(refitems, false)
} // end of return function
} // end of turning off hilite
//
// remove the highlight of the selected part(s) after 3000 ms
$timeout(removeHilite(identifiers), 3000)
} //end if statement
}) // end .then
//catch statement if the promise of having a part with metadata is not met
.catch((err) => { console.log('metadata extraction failed with reason : ' + err) })
} // end findMeta function
7. 「プレビュー」をクリックします。「userInput」ボックスに「1234」と入力して「Find」をクリックします。すべてのローターが緑でハイライトされてから消えると、このチュートリアルは正常に完了したことになります。
このセクションに記載されているコードの完全版は、GitHub の
3D-Guided Service Instructions 202 で見つかります。