Create and Bind Play and Reset Buttons
In
3D-Guided Service Instructions 101, you created illustration sequences for the model and added the illustration attribute to parts associated with the sequence. This attribute will be used to tell
Vuforia Studio which disassembly sequence to display on the model. In this experience, if a selected part has an associated illustration sequence with it,
Vuforia Studio will gather that illustration attribute value and you will be given the option to play the illustration sequence. You will also add a
Reset button to the experience to reset the model at any given time. These buttons will be added to the 2D canvas of the experience.
|
|
If you want to compare your progress with the complete code for this section, you can find it in Appendix 6 in GitHub. |
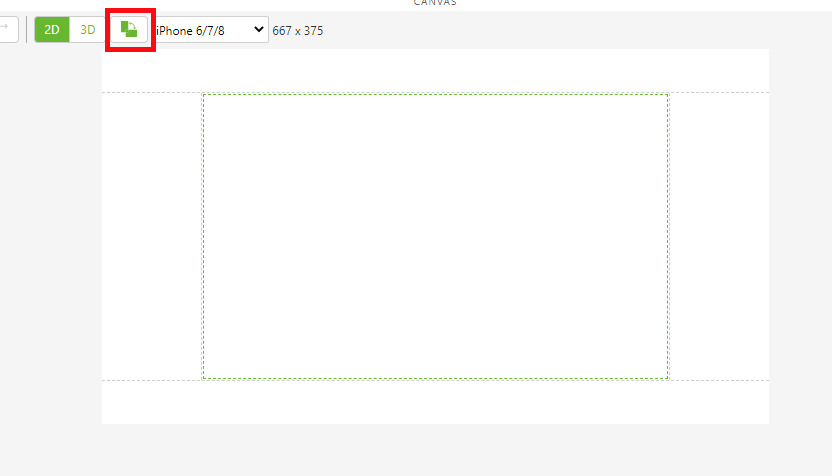
1. Navigate to the Home view and open the 2D canvas.
2. Flip the orientation of the 2D canvas.
| It’s recommended that the user viewing the experience holds the phone or mobile device in a landscape orientation. |
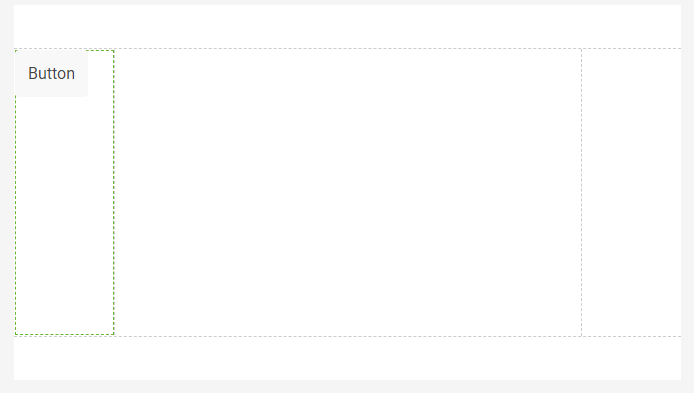
3. Add a Button widget to the left panel of the canvas.
4. UnderPROPERTIES for the button, update the following:
◦ Text — remove the text from this field and leave it blank.
◦ Studio ID — change this to playButton.
◦ Click JS next to the Click event and enter playit(). This will bind the button to a function in the Home.js section that will be created in a later step.
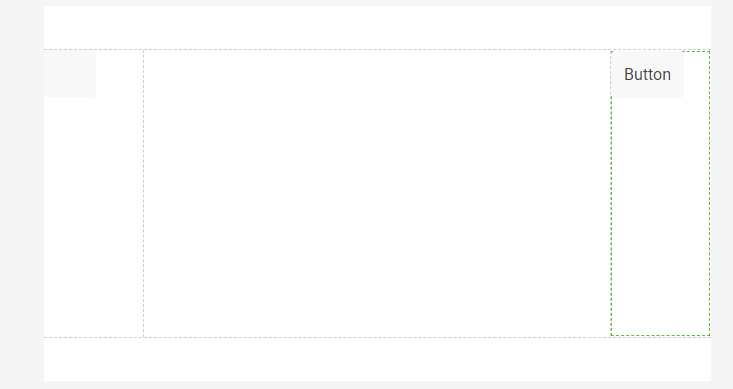
5. Add another Button widget to the right panel.
6. Under PROPERTIES for the button, update the following:
◦ Text — change this to Reset.
◦ Studio ID — change this to resetButton.
◦ Click JS next to the Click event and enter resetit(). This will bind the button to a function in the Home.js section that will be created in a later step.
7. Earlier, you created an Ionic popup to display the name and part number of a given part. Some parts will also have an attribute named
illustration that was added in
3D-Guided Service Instructions 101. The
illustration attribute contains the name of an animated sequence that was created in Creo Illustrate. A sequence is the combination of steps needed to perform a certain procedure. The sequence is included in the
.pvz file that is uploaded into
Vuforia Studio. The
Play and
Reset buttons will allow you to start or reset playback of the sequences associated with the quadcopter model.
| The information in this section will only work if the illustration attribute has been filled out correctly for the model. Any part that does not have an illustration attribute will not be able to play a sequence. |
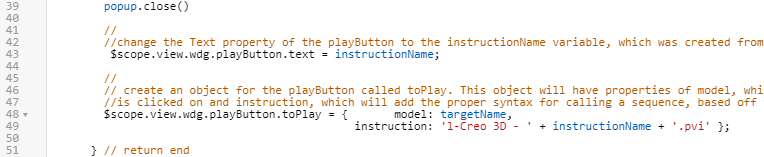
a. After the popup disappears, the playButton widget displays the name of the sequence (if applicable) of the selected part. Add the code below inside the closePopup function after popup.close() is run to change the Text property of the playButton and edit an object called toPlay that holds information about the model.
The toPlay object stores the name of the model, which is defined by the targetName argument, and the illustration sequence of the model. Illustration sequences are stored as .pvi files inside .pvz files that are created in Creo Illustrate, and are then imported into Vuforia Studio with the completed model from Illustrate. The format of these files is 1-Creo 3D- (figure name).pvi (unless you changed the publish options, in which case Creo 3D may not be the string for the file format). In this experience, the instructionName variable holds the value from the illustration attribute for the selected part for the figure in Creo Illustrate which holds the animated sequence. The instructionName value is then called into the string of text that is used to create the instruction property in the toPlay object.
//
//change the Text property of the playButton to the instructionName variable, which was created from the JSON data of the model
$scope.view.wdg.playButton.text = instructionName;
//
// create an object for the playButton called toPlay. This object will have properties of model, which will be the name of the object that
//is clicked on and instruction, which will add the proper syntax for calling a sequence, based off the instructionName variable, into Studio
$scope.view.wdg.playButton.toPlay = { model: targetName,
instruction: 'l-Creo 3D - ' + instructionName + '.pvi' };
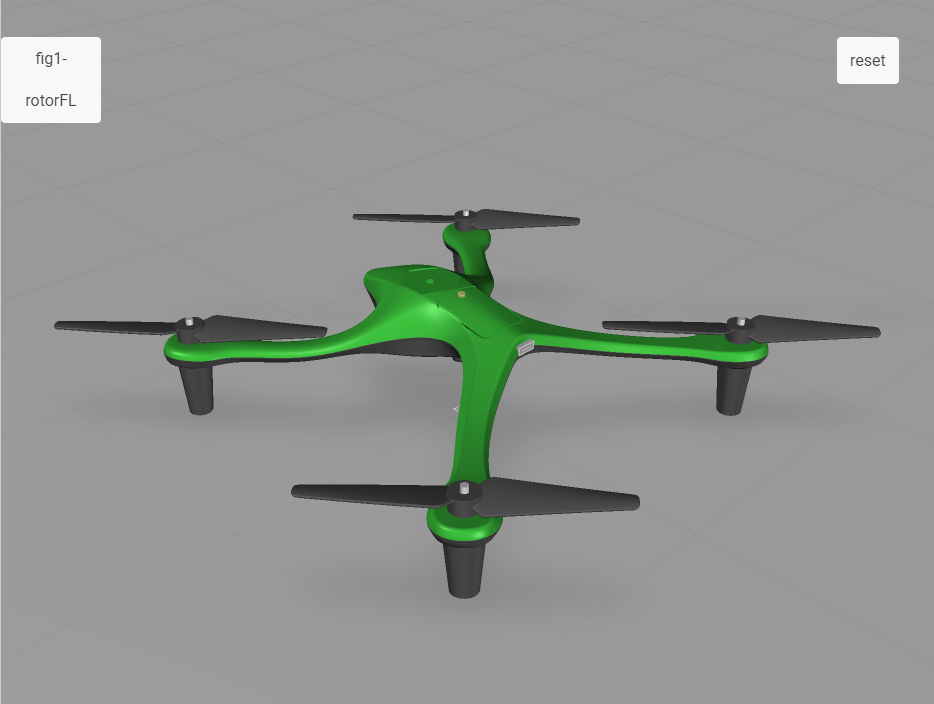
b. Click Preview. Once the preview tab opens, click on the front-left rotor of the quadcopter when it appears. You should notice a change to the playButton after the popup disappears. Try this to other parts to see the difference between ones that have sequences associated with them and the ones that do not.
c. Now that the text for the button is changed, a function must be bound to the button to play the sequence. If you remember, the function named playit() was added as a Click JS event for the playButton widget. The playit() function sets the value of the Sequence property of the quadcopter model equal to the instruction property of the toPlay object of playButton. In this case, quadcopter in the code below references the name of the model widget that was added.
| If the Studio ID of the widget was not changed to quadcopter earlier in the project, this code will not work and the name of the model in the code will need to be changed. |
Place the following at the bottom of the code, as it is a separate function from userpick.
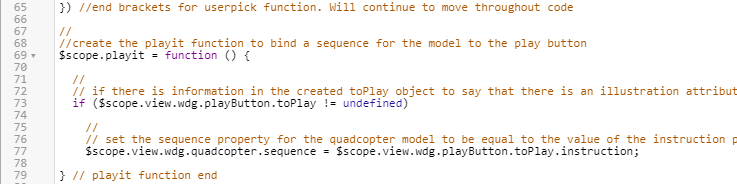
//
//create the playit function to bind a sequence for the model to the play button
$scope.playit = function () {
//
// if there is information in the created toPlay object to say that there is an illustration attribute for the part
if ($scope.view.wdg.playButton.toPlay != undefined)
//
// set the sequence property for the quadcopter model to be equal to the value of the instruction property of the toPlay object
$scope.view.wdg.quadcopter.sequence = $scope.view.wdg.playButton.toPlay.instruction;
} // playit function end
d. Once the Sequence property has been set for the model, the playButton widget must signal the sequence to start. This can be accomplished by using a new event listener named sequenceloaded, and widget service calls which will start the playback of the sequence. Like in the last step, the Studio ID for the model widget must be set to quadcopter, otherwise the code will need to be edited. Place the following code below the playit function that you just created.
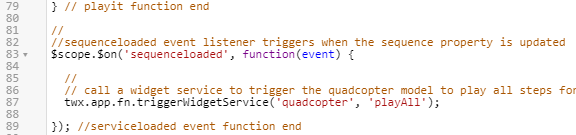
//
//sequenceloaded event listener triggers when the sequence property is updated
$scope.$on('sequenceloaded', function(event) {
//
// call a widget service to trigger the quadcopter model to play all steps for the given sequence
twx.app.fn.triggerWidgetService('quadcopter', 'playAll');
}); //serviceloaded event function end
e. Similar to the playButton widget, the resetButton also has a JS event attached to it. This JS event is called resetit(). This standalone function resets the model back to its original state, regardless if it is mid-playback or after a finished sequence. This happens by updating the Sequence property of the quadcopter model so that it’s blank. Place the following code below the sequenceloaded event listener.
//
//resetit function
$scope.resetit = function () {
//
//set the sequence property of the quadcopter model to blank
$scope.view.wdg.quadcopter.sequence = ''
} //resetit function end
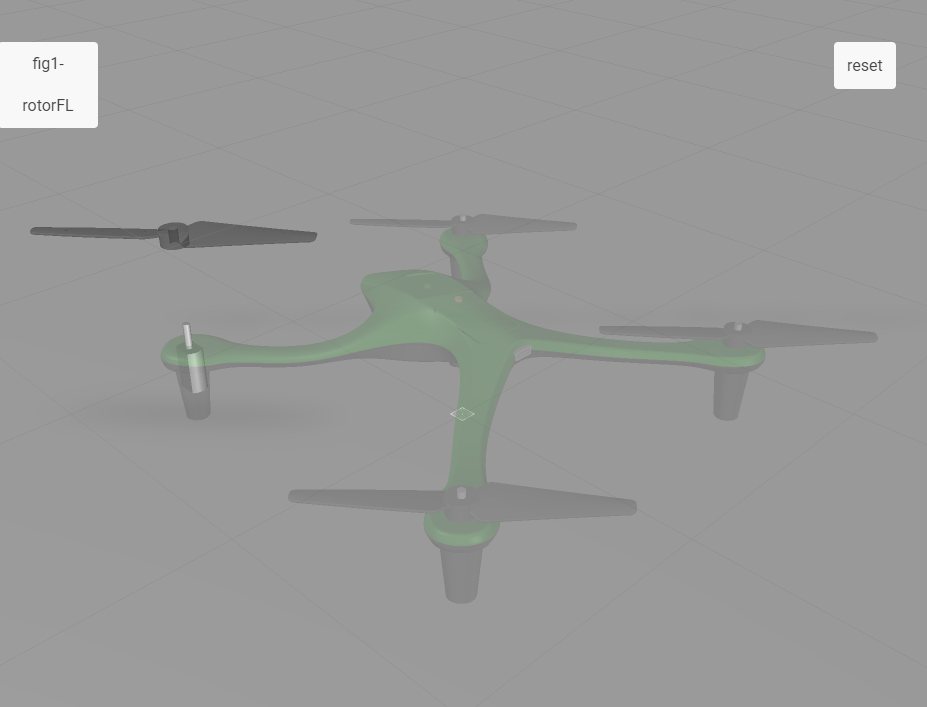
f. Once all of the code has been added to Home.js, click Preview. Once the preview tab opens, click on the front-left rotor. If this section has been completed successfully, the popup will appear, the play button will be populated with text, and the repair sequence will start when the button is clicked.