Highlight Parts
This experience uses a dynamic structure for selecting parts on the model. In a Vuforia Studio context, this means that parts of a model can be selected on their own without the need for a Model Item to separate the parts. Using the tml3DRenderer, a Vuforia Studio renderer based on WebGL, and the occurrence data offers users a set of services for changing 3D components based on their node IDs, which is what allows dynamic changes based on which part is selected by the user.
This allows the model to be more interactive without needing to add widgets to the experience. When selected, parts should not only have an Ionic popup appear with their part information, they should also be highlighted. Using JavaScript code and TML Text widgets to create shaders; this section will explain how to do just that.
|
|
If you want to compare your progress with the complete code for this section, you can find it in Appendix 7 in GitHub. The completed project file for this section is also provided in the 3D-Guided Service Instructions 201 folder in GitHub. |
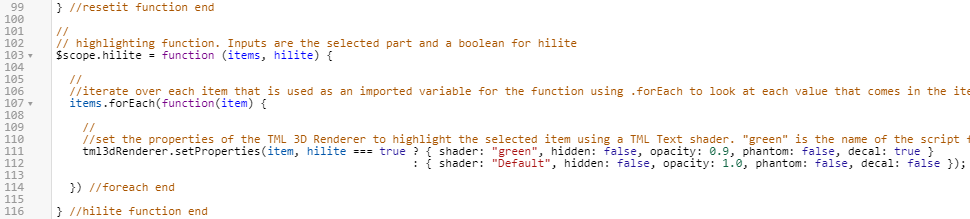
1. In Home.js, a new function for highlighting parts called hilite must be created. This function will have inputs of items, which will be the part that is selected, and hilite, which is a Boolean that decides if a part needs to be highlighted. Inside the function, the tml3DRenderer object will be edited, which corresponds to the TML Text widget that will be added in the next step.
The tml3DRenderer object calls the .setProperties service to set the properties of the object. This service intakes the item that is supposed to be highlighted and then checks to see if the Boolean value hilite that has been input to the function is true or not. The ? conditional operator evaluates if hilite is true or false and then returns a set of object properties based on if it is true or false. If hilite is true, then the following properties will be set for the object: { shader:"green", hidden:false, opacity:0.9, phantom:false, decal:true }. In this case, green is the name given to the TML Text widget that will be added to the next step so this line of code is what calls the TML Text widget to activate. If hilite is false, then {shader:"", hidden:false, opacity:1.0, phantom:false, decal:false} will be set as the properties, which signal the parts to just stay their default views. This portion of the function is editing the graphic interface of Vuforia Studio using WebGL. This code will not highlight the selected part until the TML Text widget is added.
//
// highlighting function. Inputs are the selected part and a boolean for hilite
$scope.hilite = function (items, hilite) {
//
//iterate over each item that is used as an imported variable for the function using .forEach to look at each value that comes in the items input
items.forEach(function(item) {
//
//set the properties of the TML 3D Renderer to highlight the selected item using a TML Text shader. "green" is the name of the script for the TML Text.
tml3dRenderer.setProperties(item, hilite === true ? { shader: "green", hidden: false, opacity: 0.9, phantom: false, decal: true }
: { shader: "", hidden: false, opacity: 1.0, phantom: false, decal: false });
}) //foreach end
} //hilite function end
2. Navigate back to Home in the PROJECT pane to view the 3D canvas. Drag and drop a TML Text widget onto the canvas, and change the Studio ID of the widget to shaders.
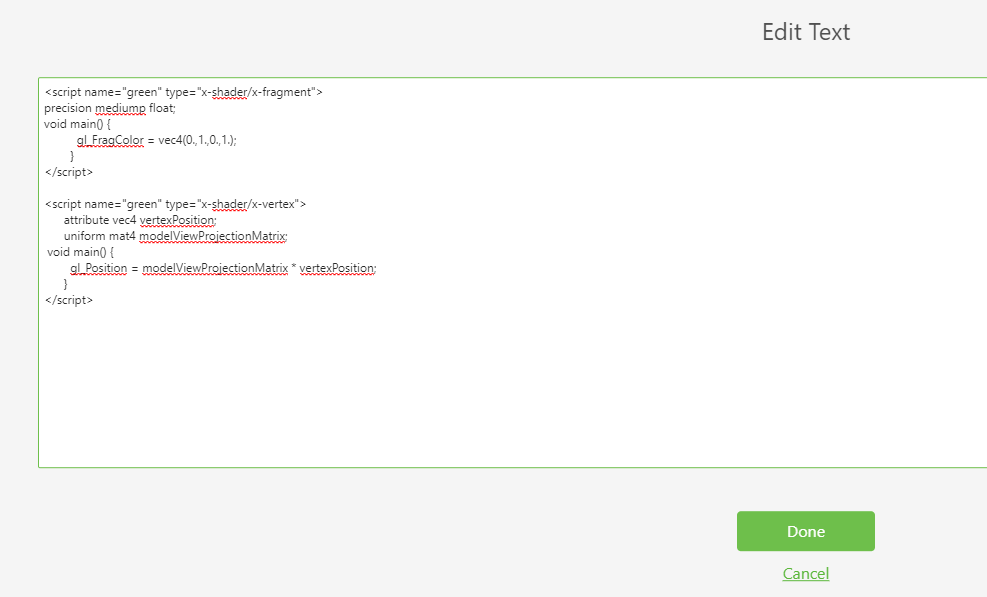
3. Click the green edit icon next to the Text property to open the Edit Text box, and enter ONLY the code below. Do not enter the comments. Click Done when you are finished.
This code will allow the shader to be applied whenever the function is called in the script.
| The comments are only for explaining the code in this context. If included with the code, they will appear on the screen. |
//name of the shader is green, the type is setting the color.
//
<script name="green" type="x-shader/x-fragment">
//
// setting the precision of the shader. medium is fine for this application.
precision mediump float;
//
// function to set the color of the shader. Syntax is vec4(R, G, B, A) format and the values are on a 0.0-1.0 scale
void main() {
gl_FragColor = vec4(0.,1.,0.,1.);
}
</script>
// name of the shader is green, this time the type sets the position
<script name="green" type="x-shader/x-vertex">
attribute vec4 vertexPosition;
uniform mat4 modelViewProjectionMatrix;
//
// sets the position of the vertex
void main() {
gl_Position = modelViewProjectionMatrix * vertexPosition;
}
</script>
4. Now that the function is set up, you’ll add it to the code that will be called when a part is clicked. In the userpick function after the popup, add the code below.
The code uses the currentSelection variable that was created earlier to determine which part has been clicked on by inputting the name of the model that was selected along with the selected part occurrence in the model to determine the highlighted portion. For example, if the front-left rotor is selected, [$scope.currentSelection] becomes [quadcopter + “-“ + /0/18/0/0], or quadcopter-/0/18/0/0 if the string is written out. True sets the Boolean to be true so that the highlight shader is applied.
//
//highlight the chosen item and set the shader to true
$scope.hilite([$scope.currentSelection], true);
5. Click Preview to make sure that the shader works correctly. If a part turns green when clicked, then the shader has been successfully added.
6. Notice that the shader does not disappear when the popup does. In order to make the shader disappear, refitems must be added as an input to the closePopup function for determining which parts the shader is removed from. The hilite function will then be called inside the closePopup function using the Boolean input of false, along with the refitems input, to turn the shader off the selected part(s). This will also be added to the code in Home.js so that the shader disappears in the same function.
| Make sure that refitems is added in as a new input for the closePopup function. Otherwise the experience will not work as intended. |
Add the additional code to the existing closePopup function:
//
// create a function to close the popup and turn off shading. popup is the popup, refitems is the input for the part(s) that is being highlighted
var closePopup = function (popup, refitems) {
//
//The function returns a method for removing the popup from the screen and turns off the shader
return function () {
//
//using the input parts, set the hilite function to be false, removing the shading
$scope.hilite(refitems, false)
//
//apply the .close method, which removes a certain section of a selected object, to the popup variable
popup.close()
//
//change the Text property of the playButton to the instructionName variable, which was created from the JSON data of the model
$scope.view.wdg.playButton.text = instructionName;
//
// create an object for the playButton called toPlay. This object will have properties of model, which will be the name of the object that
//is clicked on and instruction, which will add the proper syntax for calling a sequence, based off the instructionName variable, into Studio
$scope.view.wdg.playButton.toPlay = { model: targetName,
instruction: 'l-Creo 3D - ' + instructionName + '.pvi' };
} //return end
} // closepopup function end
7. Update the target of the closePopup function to be the selected part.
$timeout(closePopup(popup, [$scope.currentSelection]), 3000);
8. Click Preview to view the experience again. If the shader disappears when the popup disappears, then this step has been completed successfully.
9. Be sure to save the project so that it can be used again to complete the following 3D-Guided Service Instructions 202 section.