Add Widgets for Data Loading
Two views are required for this experience:
• Identification—2D view to help navigate the experience
• Visualization—AR view for model and Model Target loading
1. Open Vuforia Studio.
2. Create a new project and select Mobile - Default as the template type.
3. In the New Project window, enter Physical - Digital Comparison Example in the Project Name field, and confirm that the correct Experience Service URL is being used.
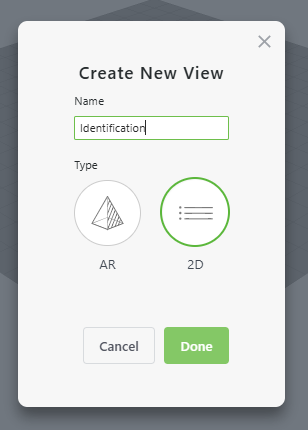
4. Create a new view by clicking the green plus icon next to VIEWS. Select 2D and name the view Identification, and click Done.
5. Delete the default Home view by selecting the view and then clicking Delete in the DETAILS pane.
6. On the Identification view, click the orientation icon ( ) to change the orientation from portrait to landscape, and select iPad from the canvas size drop-down.
) to change the orientation from portrait to landscape, and select iPad from the canvas size drop-down.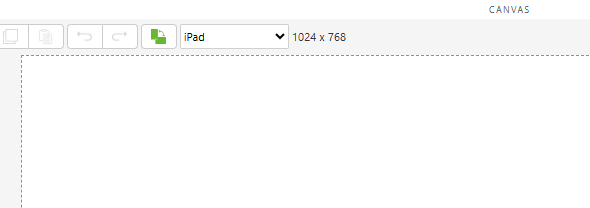
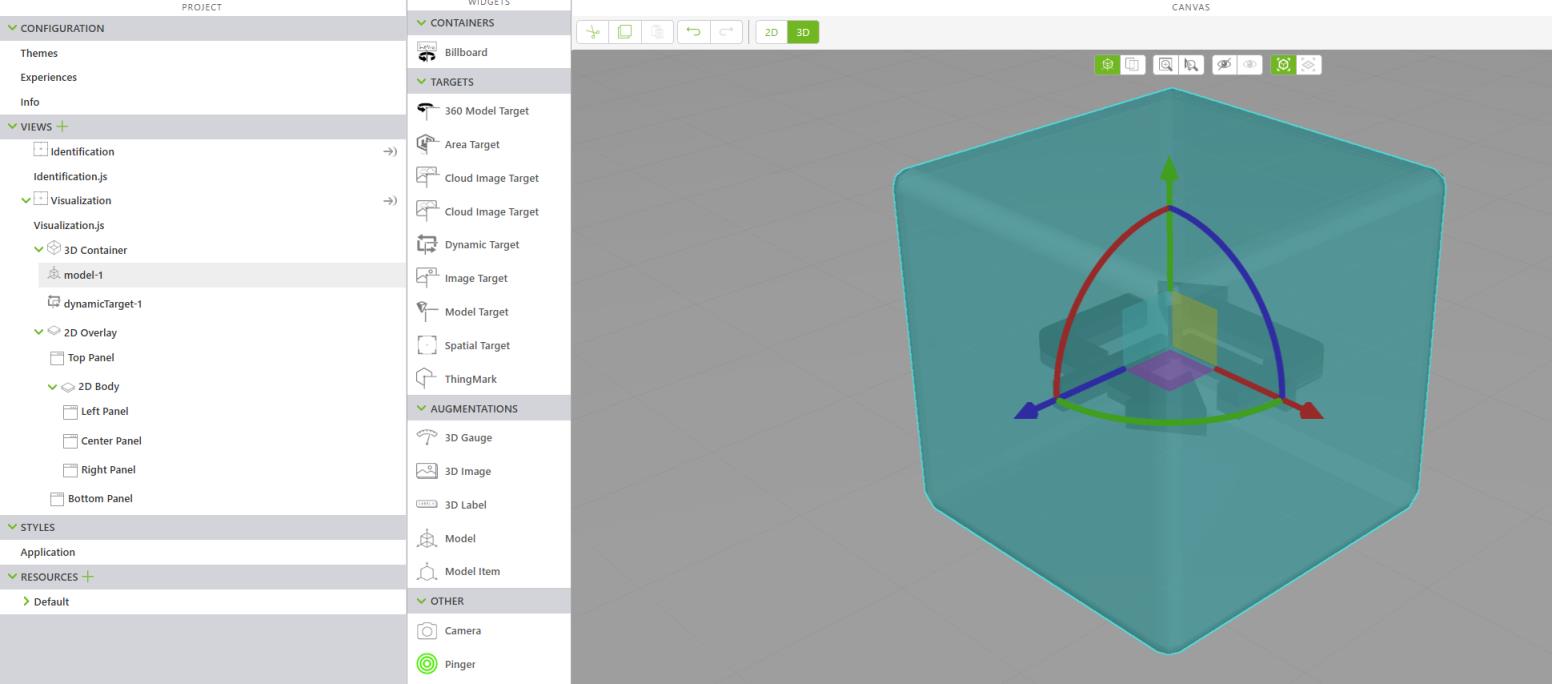
7. Create another new view, and select AR as the Type, and name the view Visualization.
8. On the 3D canvas:
◦ Add a Model widget and update the Studio ID property to dynamicModel.
◦ Add a Dynamic Target widget and update the following properties:
▪ X Coordinate, Y Coordinate, and Z Coordinate—match these coordinates to the Model widget
▪ Studio ID—enter dynamicTarget
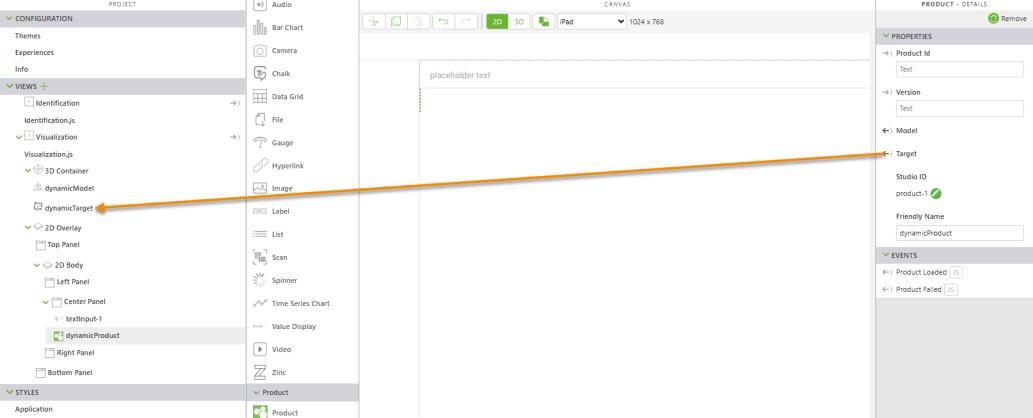
9. While still on the Visualization view, switch to the 2D canvas and add a Product widget. Enter dynamicProduct for the Studio ID property.
10. With the Product widget selected, create the following bindings:
◦ Drag and drop the Model property of the Product widget onto dynamicModel in the project tree to create a binding. On the Select Binding Target window, select Resource and click Bind.
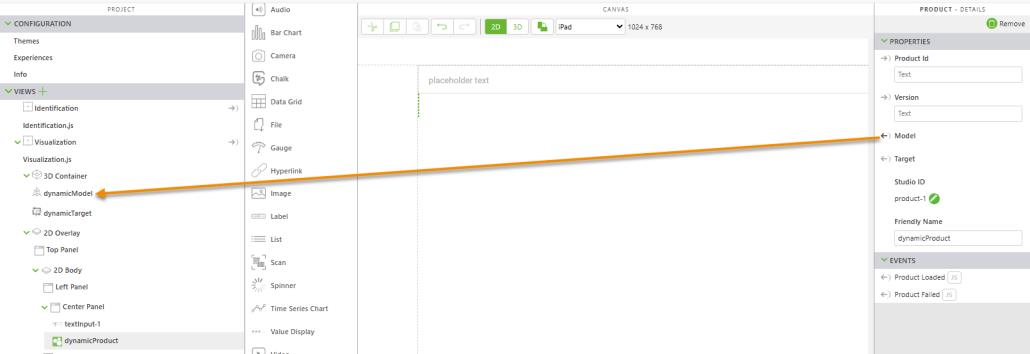
◦ Drag and drop the Target property of the Product widget onto dynamicTarget in the project tree to create a binding. On the Select Binding Target window, select Resource and click Bind.
11. Next, navigate to the Identification view and complete the following::
◦ Add a Panel widget to the canvas.
◦ Drag and drop a Scan widget onto the Panel widget.
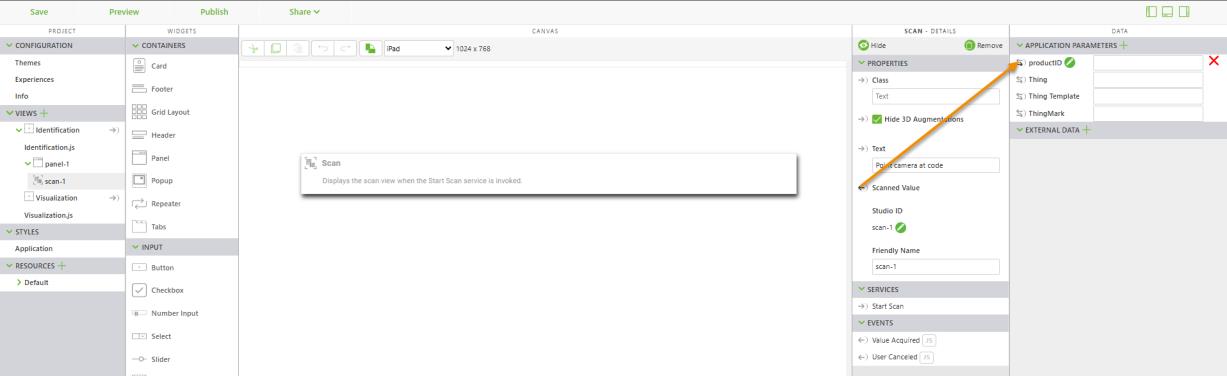
12. In the DATA pane, click the green plus next to APPLICATION PARAMETERS. When the Add Application Parameter window appears, enter productID in the Name field, and click Add.
13. Drag and drop the Scanned Value property of the Scan widget onto the new productID application parameter to create a binding.
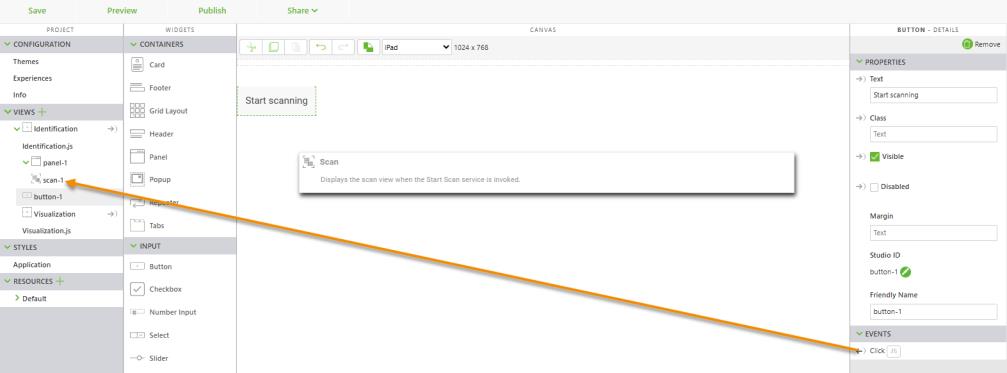
14. Add a Button widget to the canvas, and complete the following:
◦ In the Text property, enter Start Scanning.
◦ Drag and drop the Click event of the Button widget onto scan-1 in the project tree to create a binding. Select Start Scan on the Select Binding Target window, and click Bind.
15. Navigate to the Visualization view, and drag and drop the productID application parameter onto dynamicProduct in the project tree to create a binding. Select Product ID on the Select Binding Target window, and click Bind.
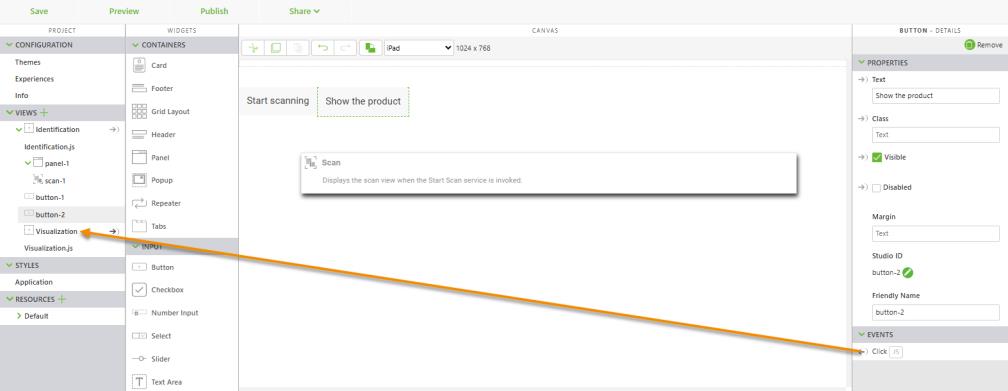
16. Navigate to the Identification view, and complete the following:
◦ Add a Button widget to the canvas, and enter Show the product in the Text property field.
◦ Drag and drop the Click event of the new Show the product button onto the Visualization view in the project tree to create a binding. Select Navigate on the Select Binding Target window, and click Bind.
17. Your experience so far should look similar to the project files in GitHub.
18. At this point, you can go ahead and scan the barcodes provided in Dynamic Load 101: Pre-generate Assets (or your own if you decided to use those) to test the base navigation that should allow you to load the following:
◦ The latest version of your pre-generated products
◦ The original or “medium” quality version of your model depending on whether or not it was simplified at provisioning
◦ The best quality and latest version of the available linked targets
19. Now, let’s load the Contour shader into the experience.