Configure a Model Target
Additional Information
For more detailed information about Model Targets, see the Vuforia Developer Library. Please keep in mind that not all content in the Vuforia Developer Library applies to Model Target generation and configuration in Vuforia Studio.
Model Target Data Processing
For information about how data is transmitted when generating Model Targets, see Model Target Generator Data Processing in the Vuforia Developer Library.
Configure the Model Target
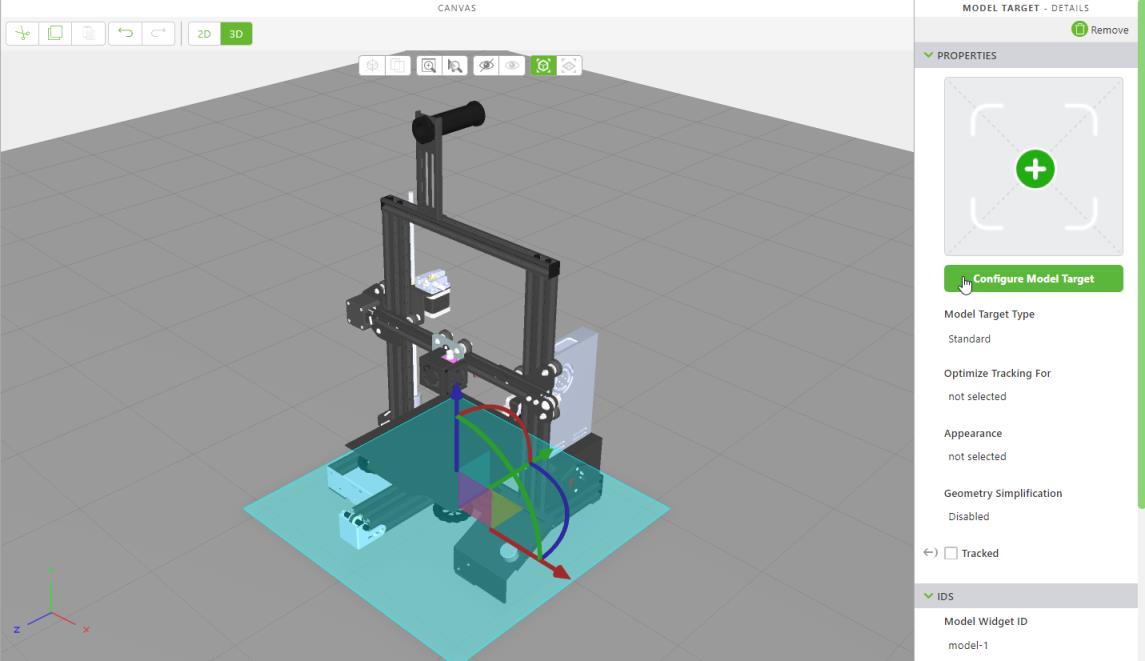
Once you’ve dragged and dropped a Model Target widget onto the canvas, you can then configure the Model Target as you like.
|
|
To ensure you’re choosing the best options for your Model Target and usage scenario, see Optimize Model Target Tracking in the Vuforia Engine Developer Portal.
|
1. Click Configure Model Target.
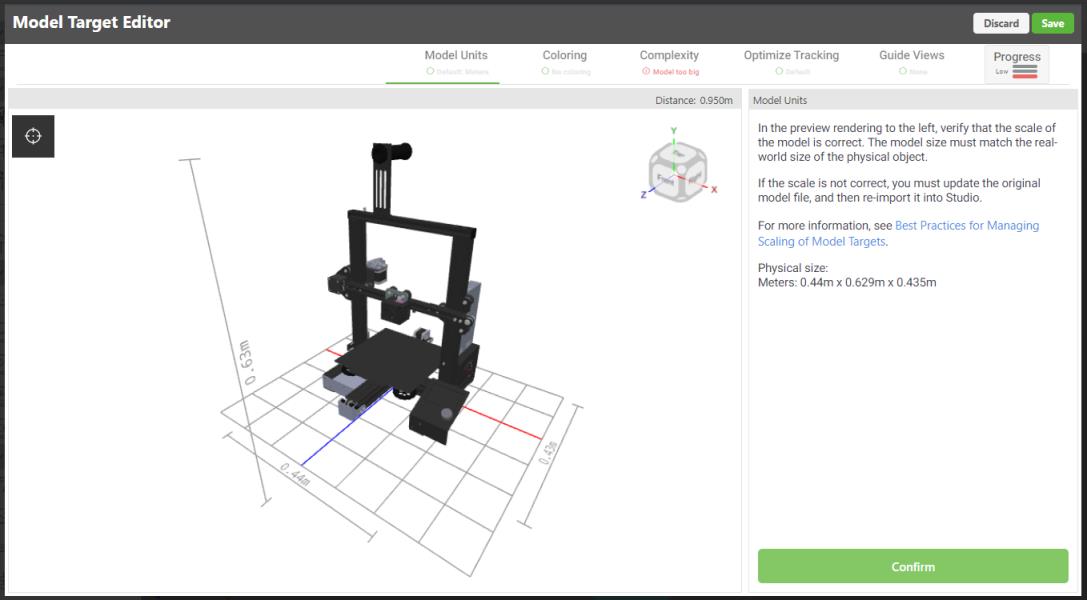
2. The Model Target Editor opens. Confirm that information is correct on the Model Units tab and click Next Step.
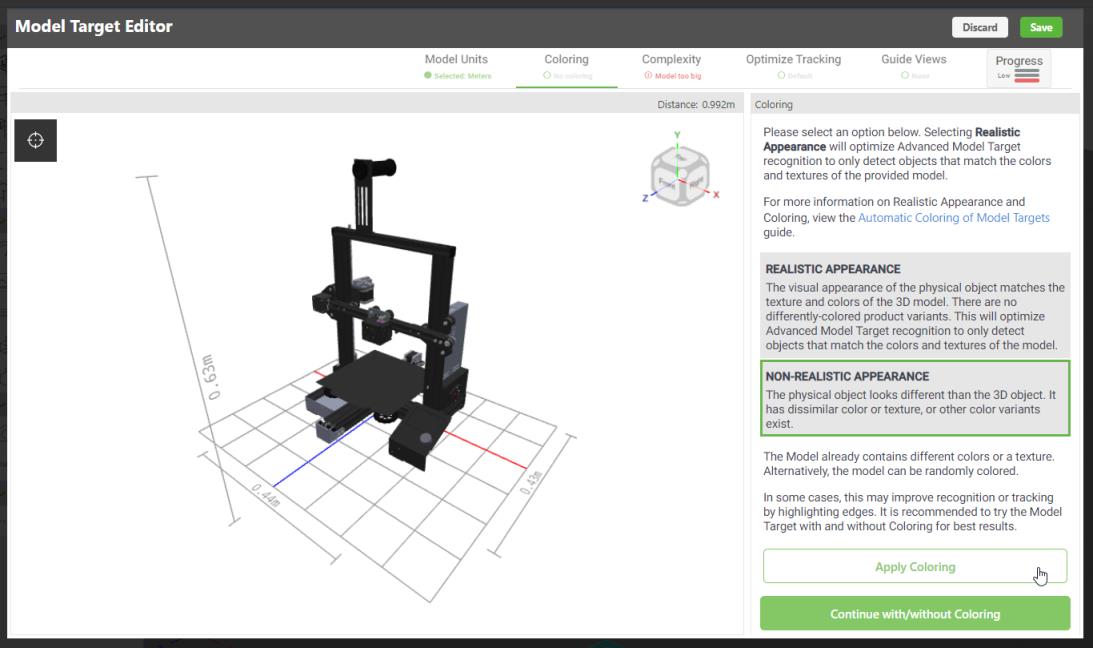
3. On the Coloring tab, select the coloring for your model. Models consist of multiple parts, and may not include texture or multiple colors, which is recommended to help improve tracking performance.
|
If your model...
|
Then select...
|
|---|---|
|
Is a single color with texture
|
Realistic Appearance and then Next Step
|
|
Is a single color with no texture
|
>
If you selected this option, your model will be randomly colored automatically to improve tracking performance. For more information, see Automatic Color of Model Targets in the Vuforia Developer Library.
|
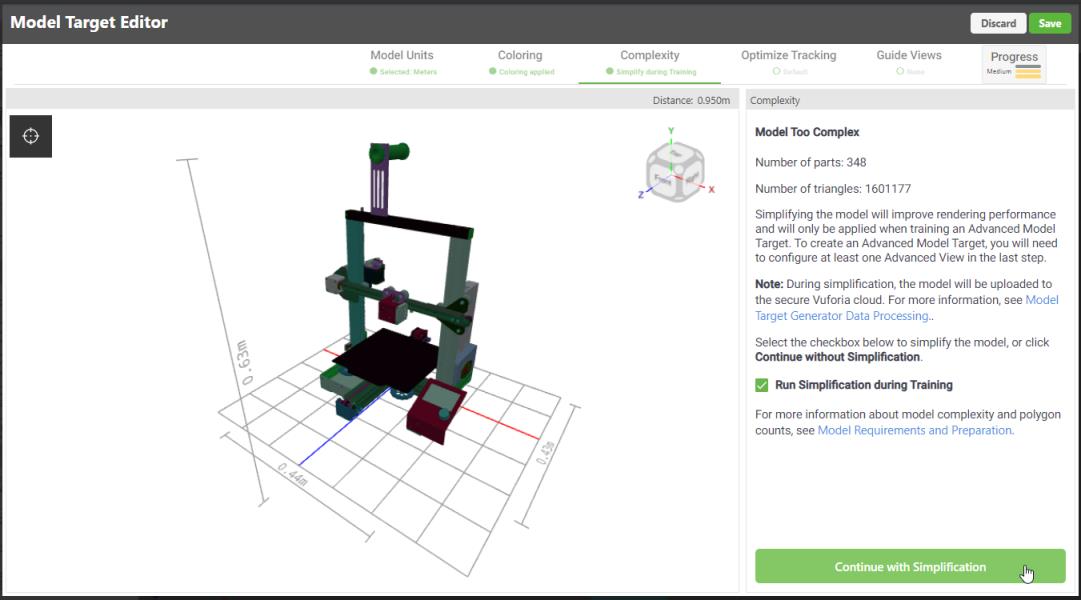
4. On the Complexity tab, select whether you want to simplify your model or not. If your model has too many parts or triangles, rendering performance may be poor. If the Model Target Generator finds that your model is too complex, we recommend selecting the Run Simplification during Training, then click Continue with Simplification.
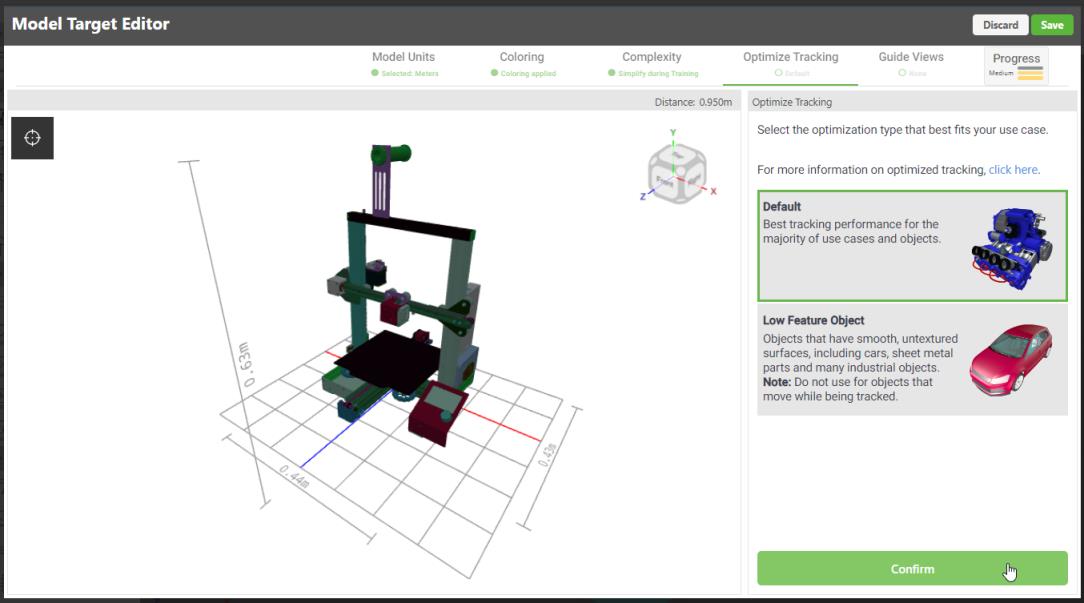
5. On the Optimize Tracking tab, select the optimization mode that is best for your Model Target and click Confirm.
|
If your model object...
|
Then select...
|
|---|---|
|
Has a non-reflective or textured surface (most model objects)
|
Default
|
|
Has a reflective, untextured, or smooth surface (for example, a car)
|
Low Feature Object
|
6. On the Guide Views tab, you’ll need to create a guide view for your Model Target. A guide view is an important element in initiating the tracking of a Model Target. The guide view is displayed as a rendered outline of your model. Select one of the following options, and then click Next Step.

|
Option
|
Description
|
|---|---|
|
Create Guide View
|
When creating a Guide View, you’ll want to make sure you define the position from which the experience consumer will need to look at the physical object from to initiate tracking. For example, if the user will approach and initiate tracking from the front of the printer, make sure that your Guide View reflects that.
Selecting this option creates a Standard Model Target.
|
|
Create Advanced View (Cloud Trained)
|
An Advanced View can be recognized from any angle, and no alignment with the view and physical object is necessary. This option does require training of the Model Target.
You can create multiple Advanced Views. For example, if your experience includes a model of a car and the user will need to start outside the car and move into the interior to access the fuse box inside of the driver’s door, you could create separate Advanced Views for:
• The exterior of the car with all doors closed
• The exterior of the car with the driver’s door open and the fuse box door
• The interior of the fuse box with the door to the fuse box removed
|
|
Create On-Prem Advanced View (Beta)
|
An On-Prem Advanced View can be recognized from any angle. No alignment with the guide view is needed, and the model does not need to be uploaded to the secure Vuforia cloud. If you select this option, the Observation for Stationary Objects will be the only view available in the next step. For more information, see the following topics:
|
7. Based on the type of view you selected, follow one of the following sets of instructions.
|
Guide View
|
Advanced View
|
|---|---|
|
1. In the 3D viewer, position your model in the desired position for your guide view. The guide view position should match the angle from which a viewer will approach the object to initiate tracking.
2. Once the model is in the correct position, click Create Guide View.
|
1. Select one of the following advanced view presets, and then click Next Step.
◦ Observation for Stationary Objects—best for stationary objects that can be recognized from any angle (except for below)
◦ Full 360°—best for objects that can freely moved or placed in different locations
◦ Constrained Angle Range and Target Extent—best for objects that can only be approached from specific angles
◦ Constrained User Positions and Target Extent—best for cases where environments users can move within a specific space inside or outside the object
2. In the 3D viewer, position your model in the desired position for your guide view. The guide view position should match the angle from which a viewer will approach the object to initiate tracking. This guide view will be used to generate the Standard Model Target that is used until the Advanced Model Target is ready for use.
3. Once the model is in the correct position, click Create Guide View.
4. Depending on the type of advanced view you selected, you’ll need to complete the configuration for that view. For more information, see Advanced Views in the Vuforia Developer Library.
|
8. Once your guide view or advanced guide view has been created, it is displayed in the Guide Views panel. Once you are happy with your generated guide views, click Save.
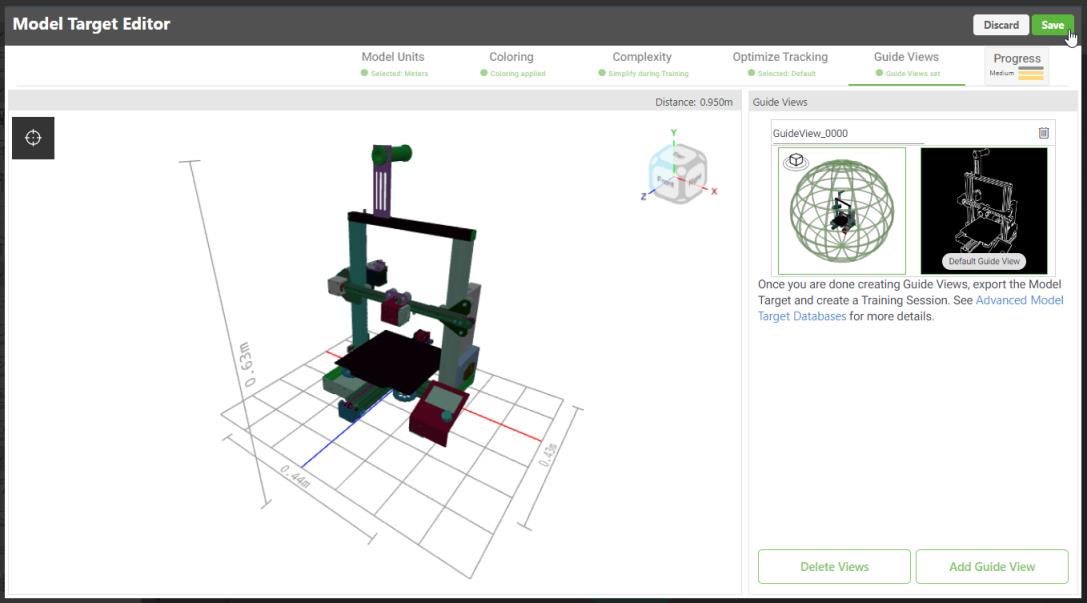
For more information, see Standard and Advanced Model Targets.