Help Chalk Learn Your Environment
If you’re sharing your view during a Chalk session, you’ll need to help Chalk learn your environment at the very beginning of the session.
The following things help create the best environment when in a Chalk session:
• The environment where you Chalk should have a lot of defined features.
• A well lit area will perform better. You can use your device’s light if necessary.
• Avoid reflective or plain colored (blank) surfaces.
• Chalk marks stick best to objects which do not move.
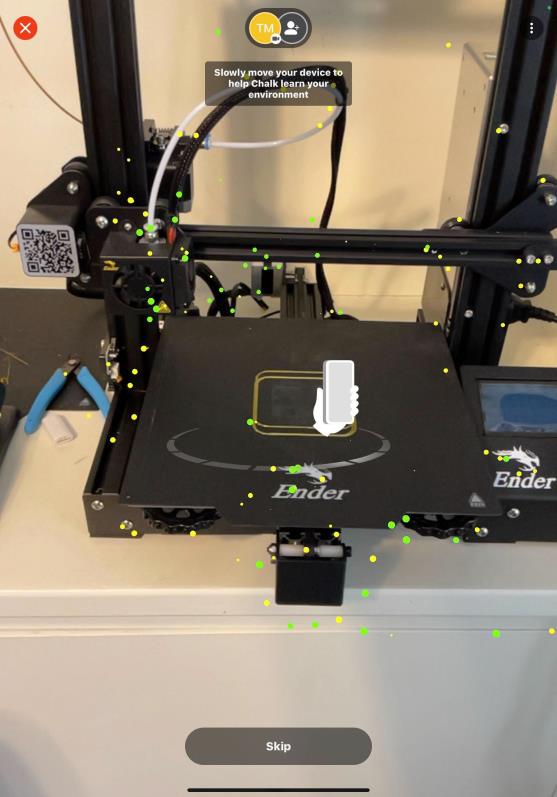
Once you’ve optimized your environment and begin sharing your view, you should see the following message along with point cloud visualization dots) showing you the mapping progress:
|
|
If your environment meets the criteria in the list above, you’ll see dots accumulate in the point cloud. Green dots indicate successful points that have initialized the area, and yellow dots indicate they are still working to initialize.
|
Once this message appears, move slowly and steadily around the area you’ll be showing the other user for help. It’s important that the camera sees the environment from different angles so it can map it successfully.
| If Chalk does not successfully map your environment, either re-try or skip this step by tapping . However, if you choose to skip this step your session will be Audio/Video only, and you will not be able to use live annotations. |
When helping Chalk learn your environment keep the following in mind in regard to you movements:
• Keep movement fluid and slow
• Forward and backward smooth motion is best to allow device to create mapping
• Small circles in front of the object are also good
• Do not rotate your device. Keep the device’s orientation fixed, moving in parallel to the object of interest and keeping the latter in view during initialization movement.