Create New Alarm
To create a new alarm, click + Add on the main Alarm Configuration display.
Step One: General Configuration
1. Add the following required fields:
a. Name — Must be unique
b. Display Name — What users will see when interacting with the alarm.
c. Description — Shown in the Acknowledge Alarm Event display.
d. Alarm Severity — The severity levelof the alarm
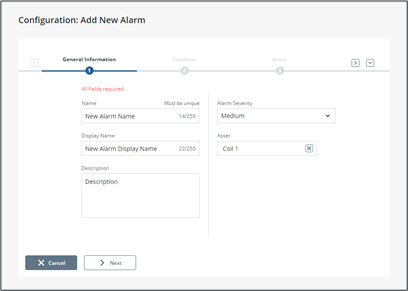
2. Assign the equipment for the alarm.
a. Click Asset to launch the equipment selection popup. Search for and select the appropriate Asset.
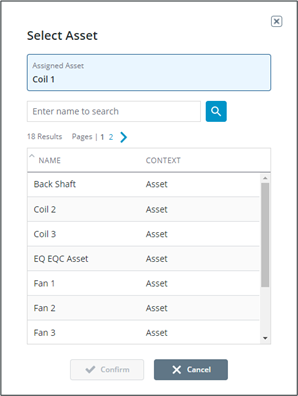
b. Click Confirm to add the Asset ti the alarm.
c. The Asset field will be replaced by the chosen asset.
3. Once all fields are entered, click Next to go to the Alarm Conditionconfiguration screen.
The alarm is not saved until the Condition step is completed. |
Step Two: Alarm Condition
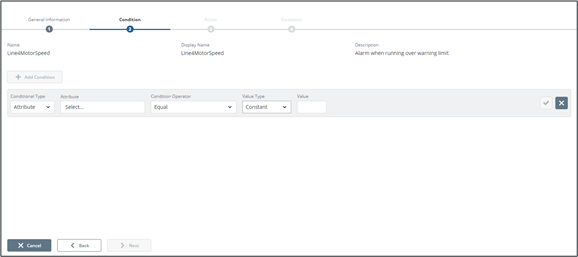
The condition determines the scenario that will trigger the alarm. A condition must be added to the alarm before it can be saved.
1. Click Add Condition. A row with field to enter condition details appears.
2. Condition Type is preselected on Attribute. Configure the equipment attribute for the condition:
a. Click the Attribute Selection field to launch the attribute selection popup.
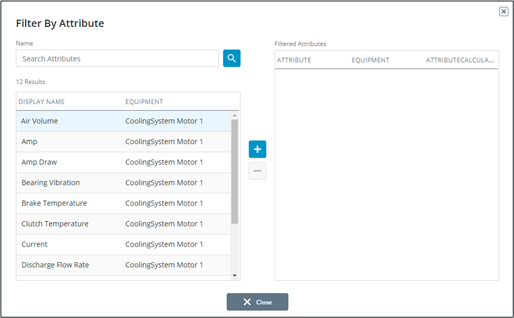
b. Select an attribute from the results grid on the left and click  to add it to the list on the right.
Only attributes assigned to the alarm’s equipment are available for selection. Only one attribute can be chosen for a condition. |
a. Users can search by name or partial name of an attribute.
b. To remove the selection, select the attribute in the right panel and click  .
.
.c. Click Close.
3. Select a conditional operator from the list.
a. Depending on the selection, other fields may update.
If using an attribute that is the BOOLEAN data format, conditional operators representing a range (Between, In Range, etc.) are unavailable to be used with a Limit value type. |
If using an attribute that is the String data format, the only conditional operators available with be Equal and not Equal. |
The Between operator will trigger the alarm if the value is between – but not equal to – the configured minimum and maximum.
The Within Range operator will trigger the alarm if the value is equal to or between the configured minimum and maximum.
4. Select a valuetype.
a. Constant allows users to enter a specific value for this alarm.Enter a numeric value or minimum and maximum values if the condition requires both.
b. Limits allow linking the condition to configurable limits.
a. Click the Limits Selection field to launch the limits selection popup. Select a control characteristic from the list.
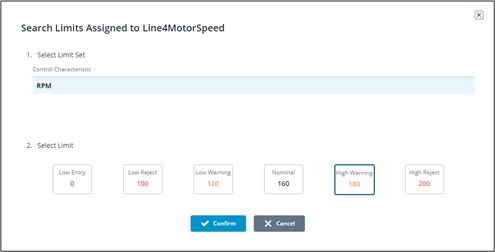
b. Select a control characteristic from the list.
Only control characteristics with limits defined for the attribute and equipment are available in the list. |
c. Select a limit by clicking it. The limit is highlighted and the configured value is displayed.
d. Click Confirm. The Limits field will show the name of the limit.
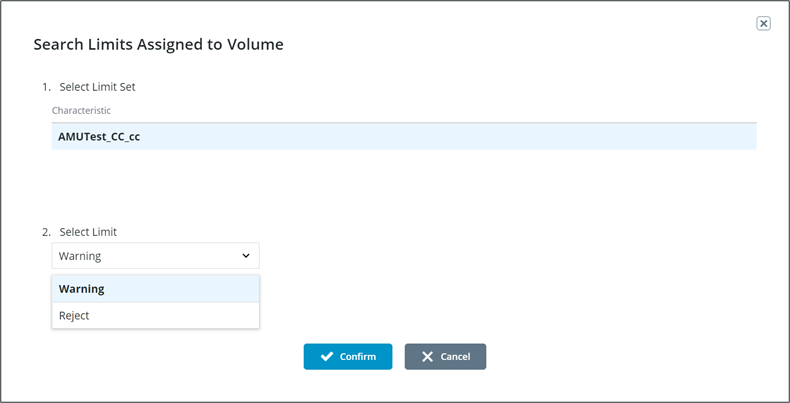
If the conditional operator is Between the limit display will differ (see image below). Users can select whether the range should span the warning or the reject limit values. |
To change the limit value, use the Characteristic Configuration Display. |
c. Click  on the right side of the condition row to save the alarm. Additional steps are optional.
on the right side of the condition row to save the alarm. Additional steps are optional.5. Click Next to navigate to the Alarm Actions display.
Step Three: Alarm Actions
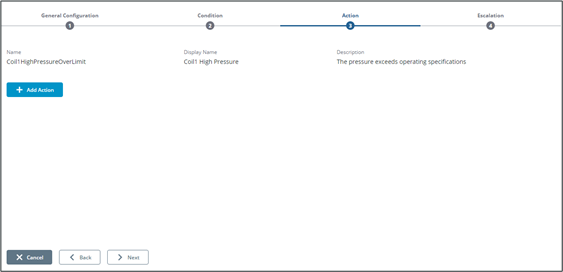
When an alarm is triggered, the configured action will occur. Currently, the application supports email notifications for action types.
1. Click + Add Action to launch the Action Config popup.
2. Select an action type. Currently, Send Email is the only available action.
3. To include a link to the Acknowledge Alarm display within the notification, select Include Acknowledge Alarm Link.
4. In the Add Recipients field, users can enter multiple email addresses that will receive the email notification, separated by a semicolon (;). Press Enter to save the entered email addresses.
5. Email addresses are added to the notification appearin the Recipients field.They can be removed by clicking  .
.
6. Enter a subject line for the email. By default, the subject line will read “New Alarm” and the name of the alarm.
7. Enter an email body. By default the alarm description is included.
8. Click Confirm to add theaction. The action will appear as a new row on the alarm action display. An alarm can have multiple actions.
9. Click Next to go to the Alarm Escalations display.
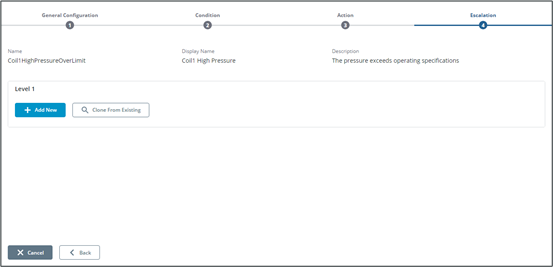
Step Four: Alarm Escalations
Escalations are time-based actions that occur when an alarm is not acknowledged or closed. Users can configure up to three escalation levels with one or more associated actions each. Currently, only email notification actions are supported.
Escalation can be made new or cloned from existing ones.
New Escalation
1. Click + Add New on the Level row to launch the New Escalation popup.
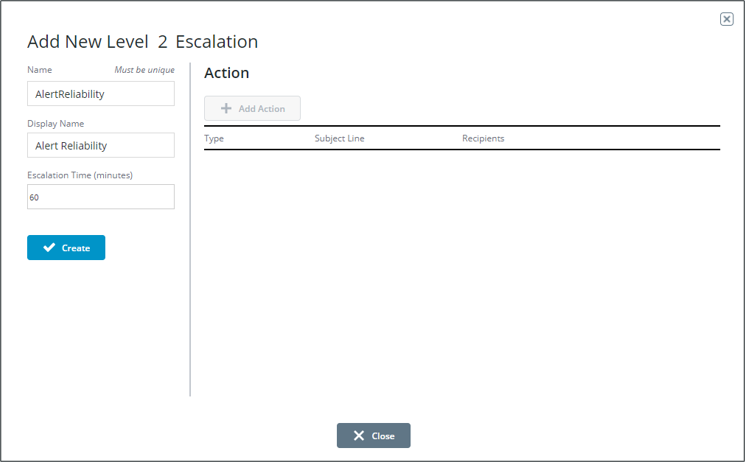
2. Enter a unique name for this escalation.
3. In the Display Name field, enter a name to be used on displays.
4. Enter an escalation time in minutes. If entering a time for level 2 or 3, it must occur after a longer amount of time than the previous levels.
5. Click Create to save the escalation.
6. Click Add Action to add a new action.To review process steps to add an action, see Step Three above.
7. Click the Close button.
8. To add levels 2 and 3 to the escalations, repeat the above steps.
Clone From Escalation
1. Click Clone from Existing to launch the Clone From Existing Escalation popup.
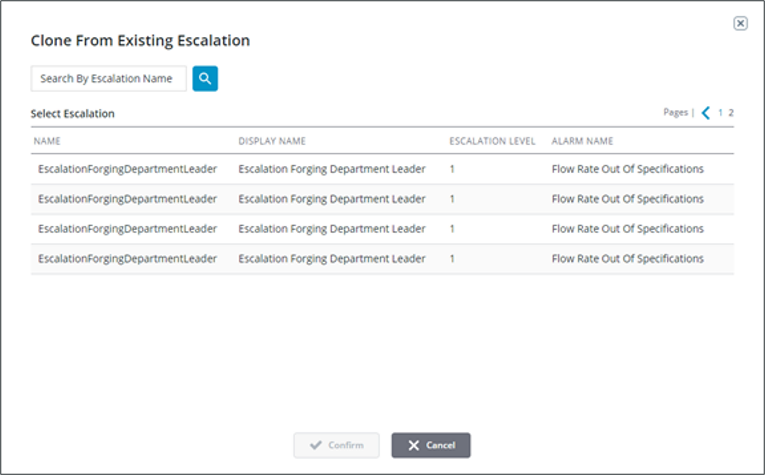
2. Search for and select an existing escalation from thetable.
3. Click Confirm.
Escalations are saved after each level is configured. After Step Four: Alarm Escalations is complete, click Back to make changes to previous entries orclick Cancel to return to the main Alarms Configuration display.