Configuring Container Scrolling
In a responsive layout, containers are used to divide and organize widgets into sections to which you can apply layout options. By default, all the content of a responsive mashup is displayed based on the available screen size. When content within one container is larger than the available space required to display the content, scroll bars are displayed on the container. This preserves the container layout that you define when the available space on the screen changes. The required container size can also change based on the type of widgets that you want to display within the container. For example, you can group buttons with a static text labels in a container that has a minimum width and height required to display the buttons. In this example, the container is not expected to grow, as it has static UI elements.
As you add nested containers and use contained mashups to build more complex layouts, the available space for each container becomes smaller. This can affect widgets such as grids, lists, and other widgets that are used to display data dynamically, based on data retrieved from data services or user input. When one or more widgets grows larger than the available space in the container, part of the container is hidden and scroll bars are displayed. In some cases, this can affect the user experience, and you may want to display the full content of a container without showing a scroll bar.
You can use the Container Scrolling options on the Layout panel to configure how a container behaves when it has content that is too large to fit in the available space. These options are available for any containers in a layout with two or more embedded containers. When a mashup layout contains two or more embedded container with scroll bars, you can display the scroll bar on the parent and allow the embedded containers to grow as required. This hides any scroll bars within embedded containers and displays their full content. Depending on how many container levels you have in your layout, you can choose to display a scroll bar on the top-level container, or an embedded container with multiple embedded containers. This option enables you to create responsive mashups that are more dynamic when working with widgets or contained mashups that may have an unpredictable size.
Configuring Scrolling in ThingWorx 9.3 or Later
By default, containers in a mashup display horizontal and vertical scroll bars when their content exceed the available space. The scroll bar position is determined by the content of each container in the layout. However, enabling scroll bars for every container may cause a complex layouts to show multiple scroll bars, which can affect usability. You can now configure horizontal and vertical scrolling to control the location of scroll bars in a layout.
You can only disable scrolling for a container when it contains one of the following:
• Non-responsive widgets such as Buttons, Labels, and Text Fields.
• Responsive widgets that are set to a fixed size.
• A Grid Advanced widget that has its EnableContainerScroll property is set to true.
To disable vertical scrolling:
1. on the Explorer panel, select a container, then open the Layout panel.
2. Under > , select Disabled.
3. Click Save.
To disable horizontal scrolling:
• On the Explorer panel, select a container, then open the Layout panel.
• Under > , select Disabled.
• Optionally, use the Properties panel to set a minimum size for each widget in the container.
|
|
Setting a minimum size prevents widgets from becoming too small when the available space is limited. In addition, the labels for widgets such as Button, Link, and Label are truncated.
|
• Click Save.
Configuring Scrolling in ThingWorx 9.2 or Earlier
|
|
This option affects only the current mashup. To apply this option to a layout with contained mashups, disable embedded scrolling for the top-level container of each contained mashup in the layout.
|
To configure the scrolling options for a container, do the following:
1. On the Explorer panel, select any container with two or more direct children. The selected container is highlighted in the model tree and on the canvas.

2. On the Layout panel, under Container Scrolling, select Scroll Current Container.
3. Make sure that the alignment and distribution options for the container are not centered:
◦ When the orientation is set to Vertical, align the items to the top or bottom.
◦ When the orientation is set to Horizontal, align the items to the left or right.
Using center alignment may hide part of the content within the embedded containers. |
When an embedded container grows more than the available space, scroll bars are displayed on the selected container. Embedded containers with content that requires more space expand and display their full content under the following conditions:
• When a widget or a child container has a fixed size that is larger than the parent container.
• When a responsive widget changes its height or width based on content and becomes larger than the parent container.
When you disable embedded scrolling for one container, the same option is automatically applied to all the containers on the same level. To enable embedded scrolling on one of these containers, you must select the container, and then set a fixed size or a size range on the Layout panel.
Consider the following layout example where a mashup is divided into several containers:
• A menu container with a fixed height at the top
• A side bar container with a fixed width on the left
• A main container with three embedded containers that are stacked vertically in the middle
• A fixed container with buttons at the bottom
The following figure shows the layout structure of the main container on the Explorer panel.
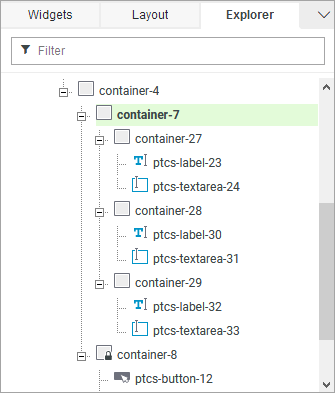
The middle container is named container-7. Each one of its embedded containers has a Label and a Text Field widget that displays data from a data service. By default, when the content overflows out of the available space in a specific container, a scroll bar is displayed. The following figure shows the mashup with the middle container that is divided into three containers. Each container has responsive widgets that are larger than the available space and a scroll bar is displayed.
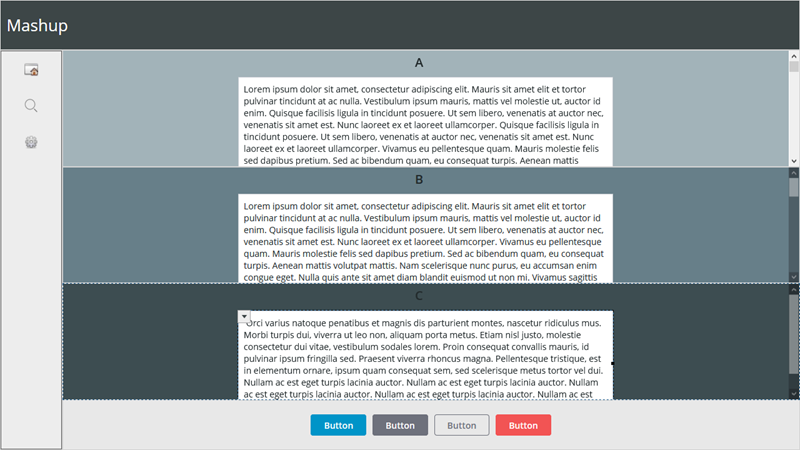
To view the content of each container, you must scroll each container separately. You can use the container scrolling options on the Layout panel to control how the embedded containers are sized. The following figure shows the mashup with the Scroll Current Container option selected for container-7. Items within the container are aligned to the top.
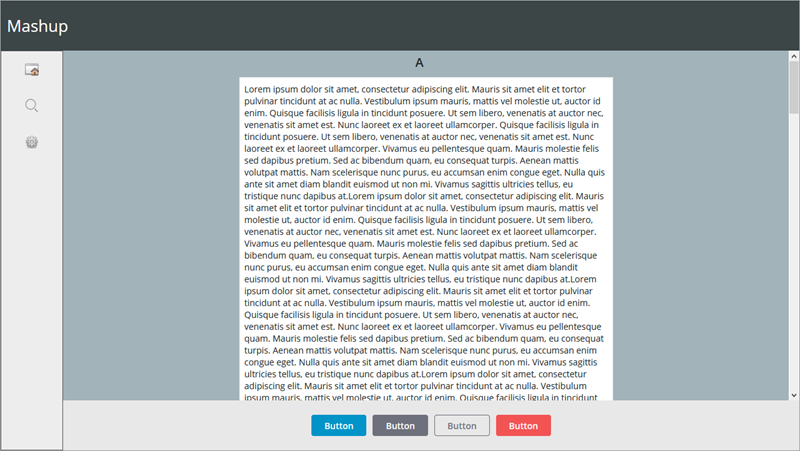
The embedded containers are expanded within the layout to fit their content and a single scroll bar is displayed on the parent container. You can scroll the parent container to view the contents of all three embedded containers.