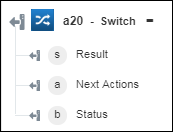
Switch
Use the Switch action to define a number of possible execution paths for your workflow.
In the Switch action, you can add one or more cases. Each case contains one or more conditions, and the next step is performed only if the defined conditions are met. The action also includes a default block that specifies the action that must be executed if none of the conditions are met. This action allows you to create complex workflows and reduce the overall workflow execution time.
Complete the following steps to use the Switch action in your workflow:
1. Click  and drag the Switch action under Developer Tools to the canvas, place the pointer on the action, and then click
  or double-click the action. The Switch window opens.
and drag the Switch action under Developer Tools to the canvas, place the pointer on the action, and then click or double-click the action. The Switch window opens.2. Click Case, and enter the following details:
a. Input—Input for which you want to apply the condition. Here, you can map the output of the previous action.
b. Condition—Select the conditional operator that you wish to apply on the specified input data.
If you set the condition to Is True, Is Date, Is Number, Is Alphanumeric, Is Empty, Is An Array, then do not enter the Expected value.
c. Expected—Output value that you want to check against the specified input.
3. Click AND if you want to specify a number of interrelated conditions. When all the conditions specified with AND operator return true, then workflow execution continues. If any of the conditions return false, the workflow execution stops immediately.
Click  to delete a specific condition, or click
  to delete a group of AND conditions.
to delete a specific condition, or click to delete a group of AND conditions.4. Click OR if you want to specify a number of independent conditions. When any of the conditions specified with OR operator return true, then the workflow ignores the rest of the conditions and continues with the execution. If none of the conditions return true, then the workflow execution is terminated.
You cannot add multiple OR conditions inside a group.
Click to delete a specific OR condition.
to delete a specific OR condition.5. In the Select Action list, select the action that you want to execute if the specified condition under Case 1 is met.
It automatically fetches all available actions on the canvas and displays it in the list.
6. Click Add Case to add multiple cases.
7. Under the Default section, in the Select Action list, select the action that you want to execute if none of the conditions are met.
Select Stop if you do not want any action to be execution, and the workflow to end.
8. Click Done.
It automatically creates connections between Switch and the selected actions.
You cannot manually create, edit, or delete these connections. If you want to make changes to these connections, modify the settings in the Switch configuration window.
Output schema