Managing Non-Serialzed, Serialized, Batched, and Non-Batched Transactions
To post transferring of batched, and serialized stock from one stocking location to another, perform the following steps:
1. Navigate to the Stocking Location record.
2. Click the Product Stock Related List component.
3. Verify the total Quantity value for Batched/Serialized stock.
4. Select Product Stock Transfer. The New Stock Transfer screen is displayed as shown:
5. Enter the following:Source Location, Destination Location information.
6. Click Save. The Stock Transfer line is created with source location and destination location using the transfer lines.
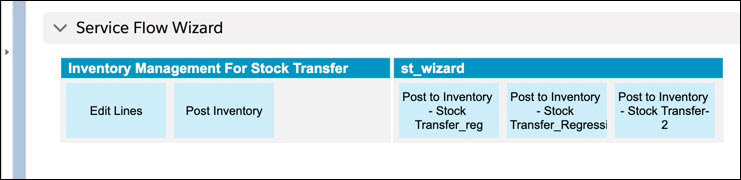
7. Navigate to the Service Flow Wizard.
8. Select Post to Inventory.
9. The Inventory Transaction screen is displayed. A tabular format with details for Batched and Serialized transfer is displayed as shown below:
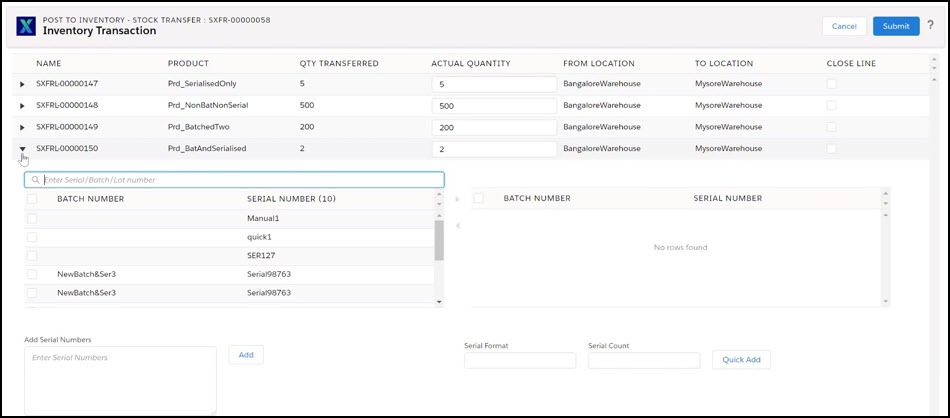
10. Manually select the Batch Number and Serial Number records from the left column.
11. Select > to move the batched and serialized record to the right column. This represents transferring the batched and serialized stock one Location to another location. Or, Select < to remove the batched and serialized record from the right column.
12. Click Submit.
To manually add serial number, perform the following steps:
1. Navigate to the Inventory Processing screen.
2. Expand the Batched/Serialized record. The Batched and Serialized record screen is displayed.
3. Enter the serial number in the Add Serial Numbers field.
4. Click Quick Add.
5. Click Submit.