Setup Steps Misc Receipts
The following are the setup steps for Misc Receipts:
1. Create custom objects Misc Receipt and Misc Receipt Line as described above. Grant object permissions to profiles that are allowed to use the feature.
2. Create a tab Misc Receipts. Give access to this tab to profiles that are allowed to use the feature.
3. Add custom lookup fields in the Stock History object for Misc Receipt and Misc Receipt Line objects.
4. Click Home > ServiceMax Setup > Modules, and then click New in the Custom Modules section.
5. Create a new custom module as shown in the figure below, and then click Save.

6. Click Home > ServiceMax Setup > Service Flow Manager > Inventory Process to view the Manage Inventory Process screen, and then click New in the Custom Inventory Process section.
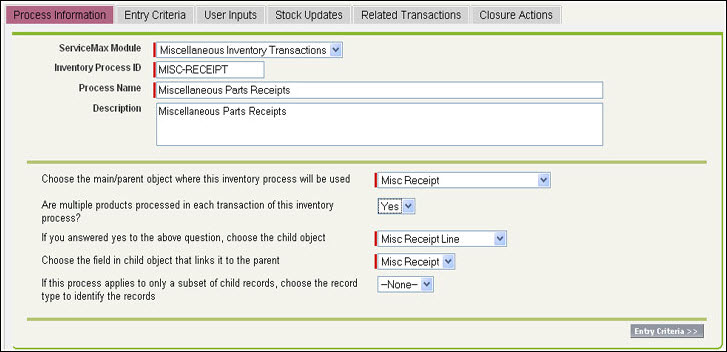
7. In the Process Information tab, enter the information as shown below:
8. In the Entry Criteria tab, enter the information as shown below:
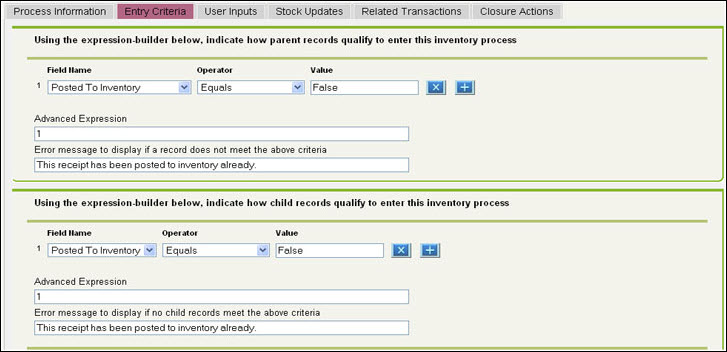
No entry criterion is specified for miscellaneous receipt lines. We want to consider all lines as long as the receipt has not been posted to inventory.
9. In the User Inputs tab, enter the information as shown below:
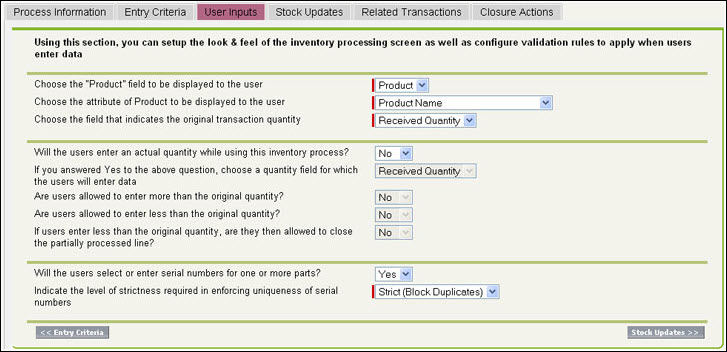
Since this is a multi-line transaction, Product is displayed from Misc Receipt Line. Since the Received Quantity is entered when creating the lines, no data entry is required (except serial numbers) when users post the receipts to inventory. We have also selected Strict enforcement of uniqueness of serial numbers.
10. In the Stock Updates tab, enter the information as shown below:
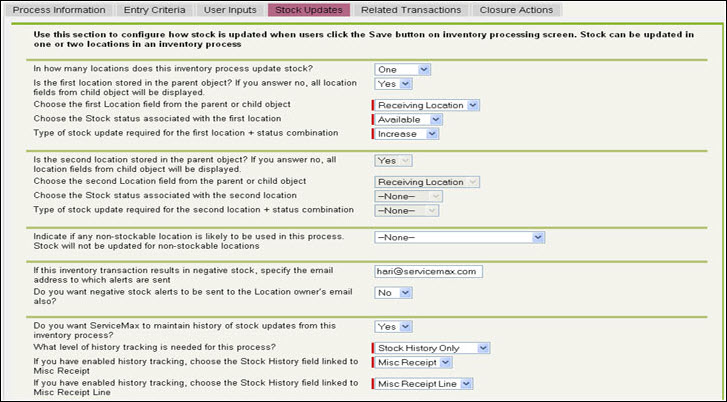
The expected outcome of miscellaneous receipt is to increase the Available Stock at the Receiving Location. We have also enabled Stock History tracking for this process.
11. Since Miscellaneous Receipts is an independent transaction, we will skip the Related Transactions tab.
12. In the Closure Actions tab, enter the information as shown below:
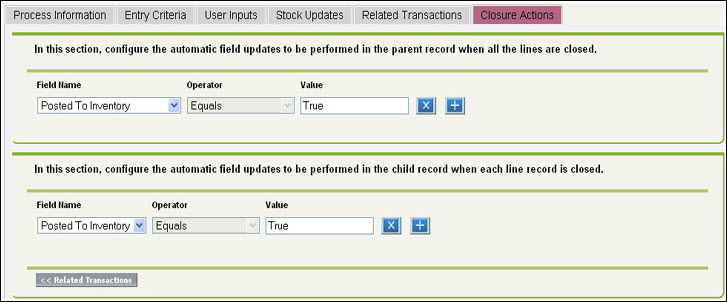
Upon successful completion, we will update the Posted To Inventory flag to true. As a result, the receipt cannot be posted to inventory more than once.
13. Click Save.
14. Navigate to Misc Receipt Object to create a new custom button.
15. Create a button as shown below and then click Save.

16. Edit the page layout named Misc Receipt Layout and add the Post To Inventory button to the page layout.
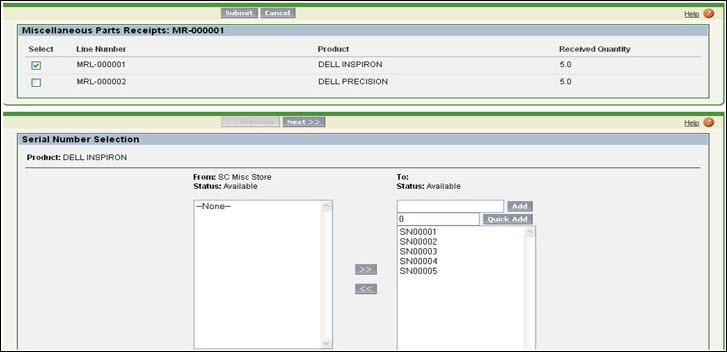
17. After creating a Misc receipt record and adding receipt lines, when users click the Post To Inventory button from a Misc Receipt record, the inventory processing screen appears similar to this: