Creating Hierarchy Configurations
To create a hierarchy configuration:
1. Click New on the Hierarchy page. The Hierarchy page is displayed.
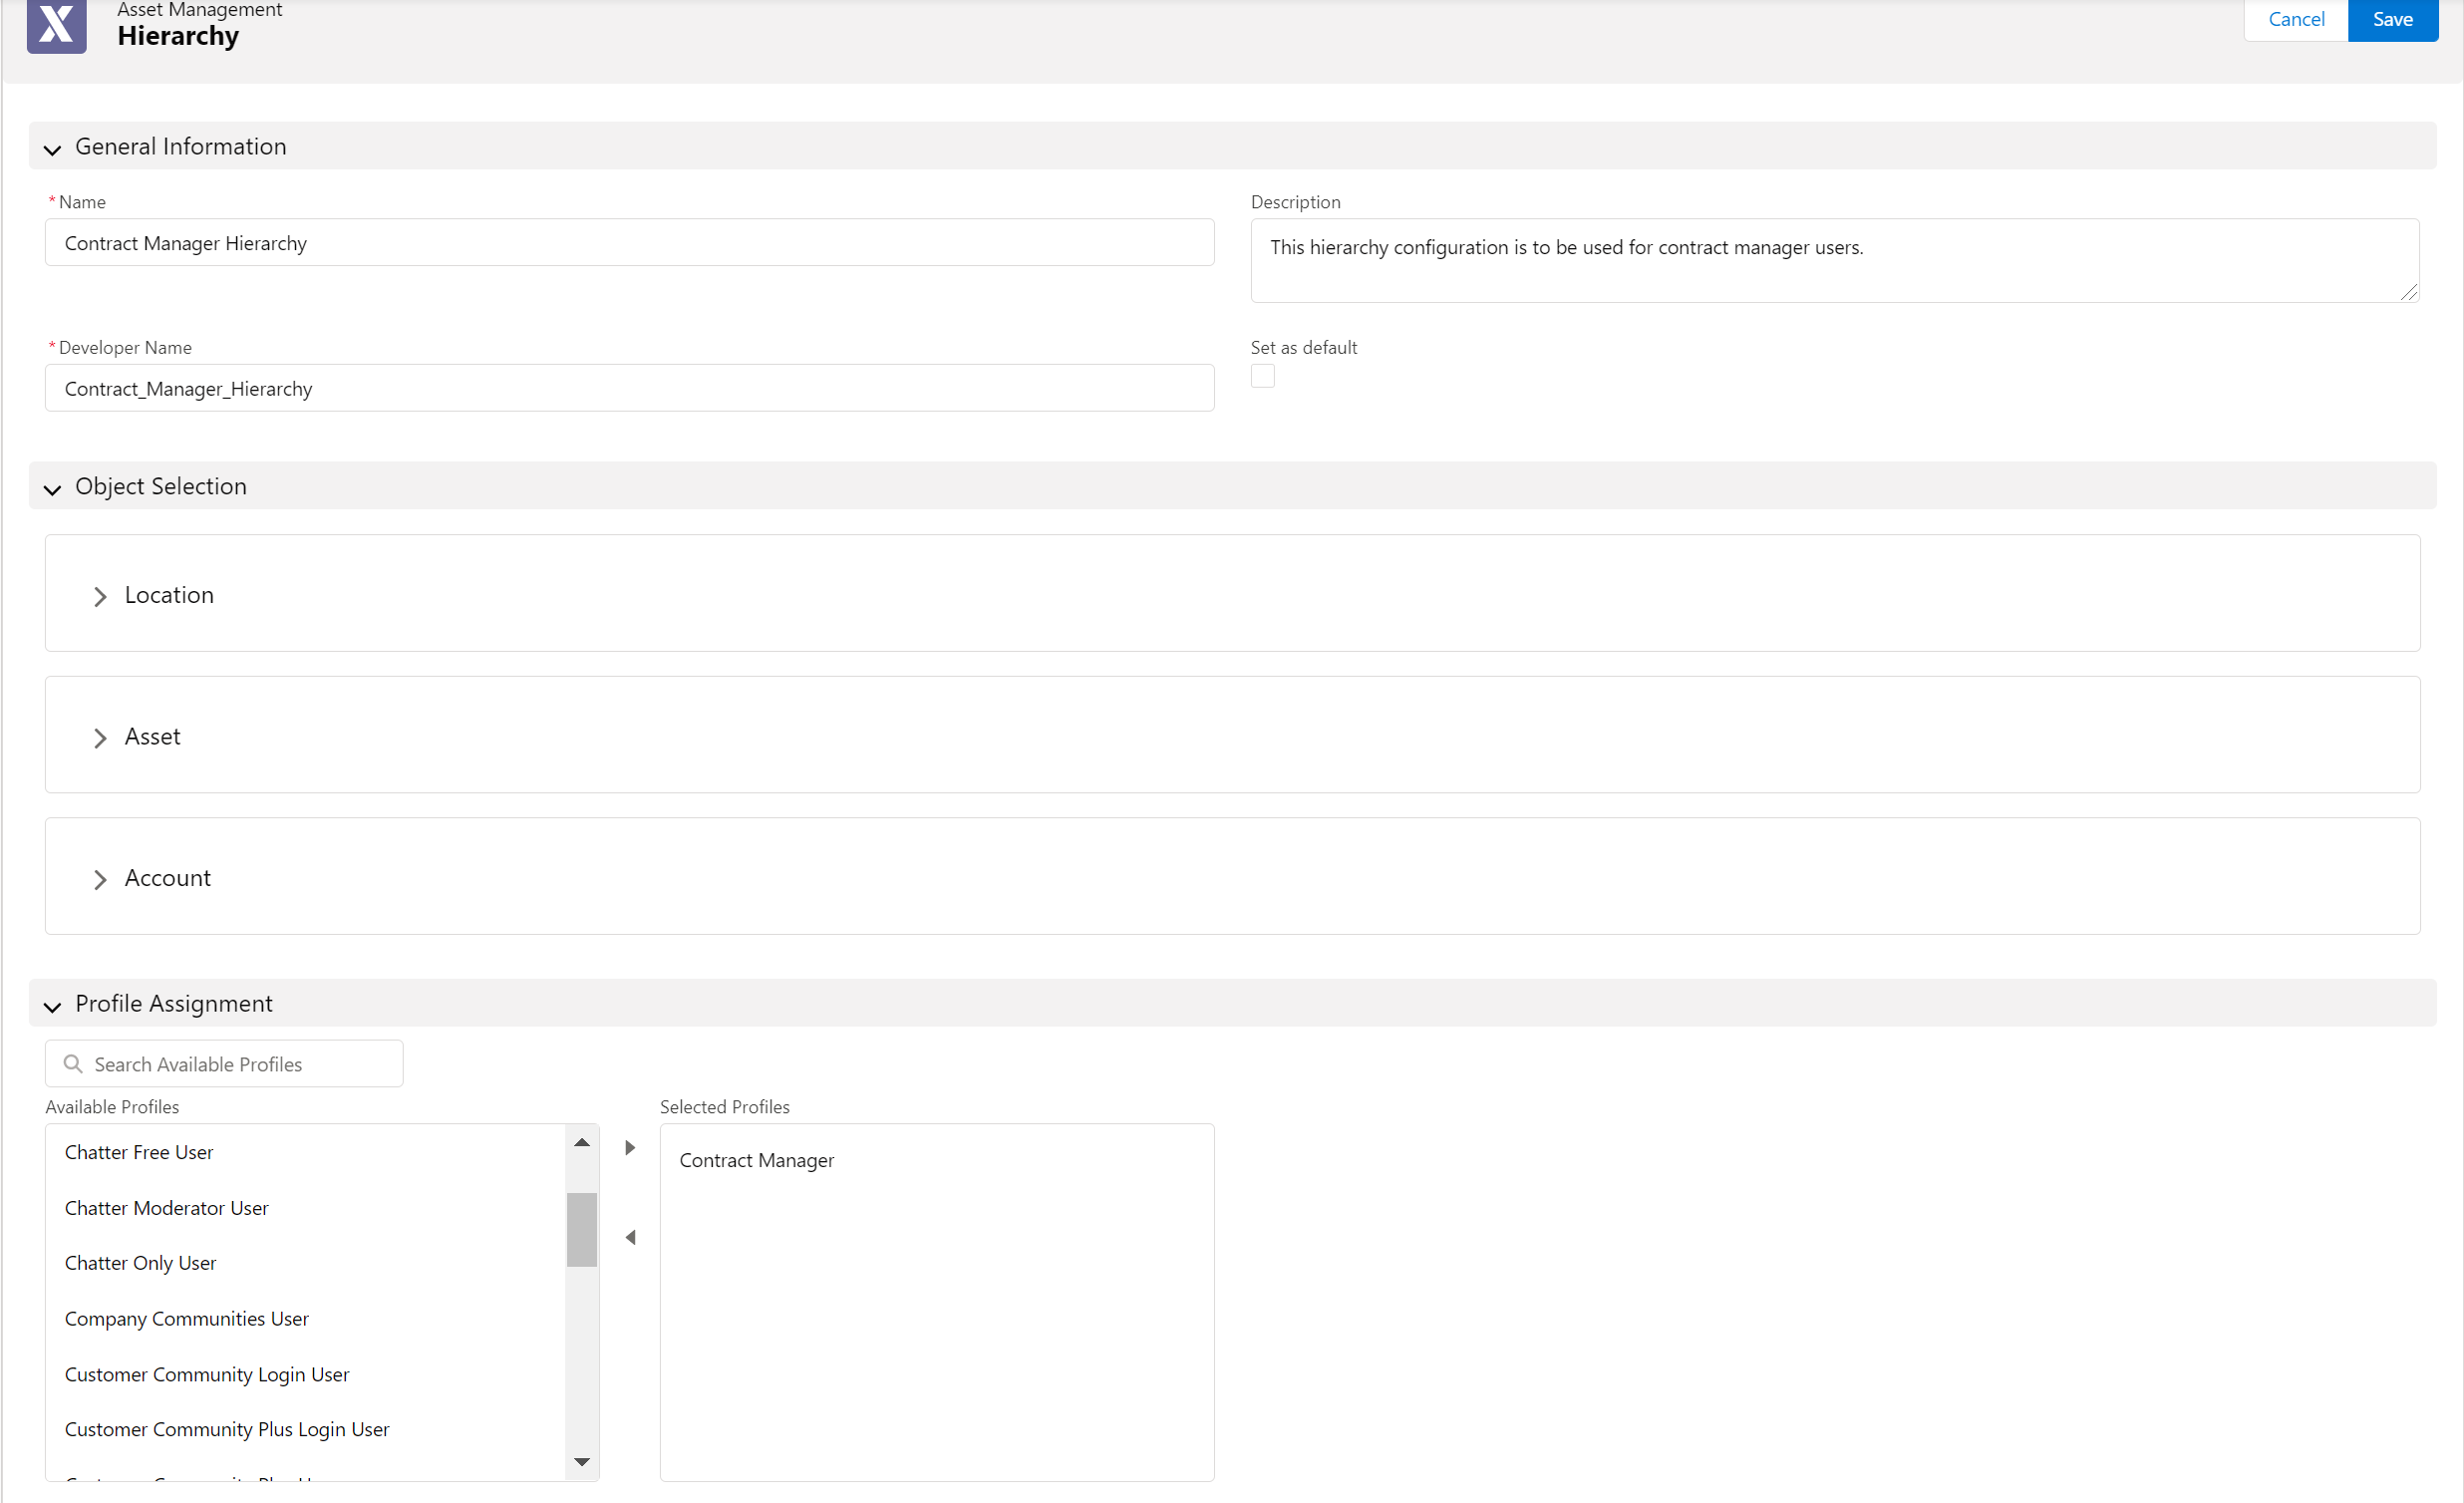
2. Provide the details for the fields in the General Information section as described in the following table.
|
Field
|
Description
|
|---|---|
|
Fields marked with * are mandatory.
|
|
|
Name*
|
Name of the asset hierarchy configuration you are creating.
|
|
Description
|
Description of the asset hierarchy configuration.
|
|
Developer Name*
|
The ID of the hierarchy configuration.
The ID is derived from the name of the hierarchy configuration. For example, if you enter Helpdesk Hierarchy 1, the Developer Name value is populated as Helpdesk_Hierarchy_1 by default. You can change the ID and enter a new value manually.
|
|
Set as default
|
Select this checkbox to mark the hierarchy configuration as the default configuration for all the end-users accessing the Asset Hierarchy component.
|
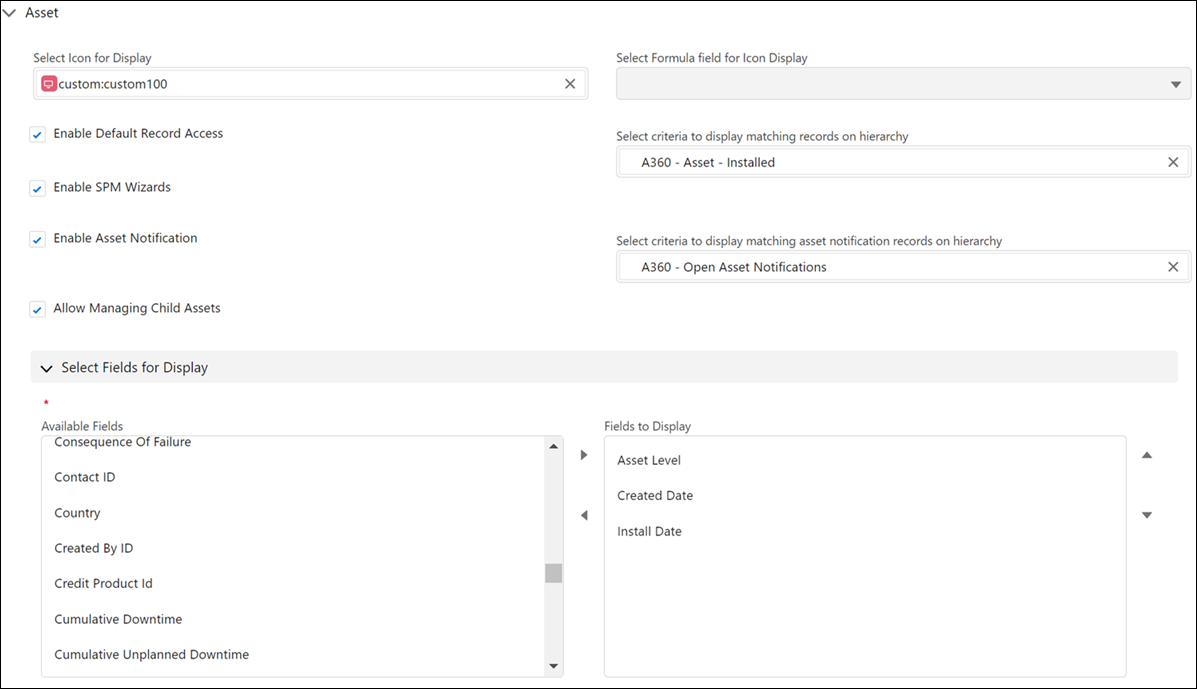
3. Define the default actions, display icon, and display fields for Location, Account, and Asset records in the Object Selection section.
|
|
Records are displayed in the asset hierarchy based on your selections in this section.
|
4. Provide the details as described in the following table:
|
Field
|
Description
|
Notes
|
|---|---|---|
|
Fields marked with * are mandatory.
|
||
|
Select Icon for Display
|
Select an icon from the available list. The selected icon is displayed in the tree view for the object.
|
This field is disabled if you have selected a value in the Select Formula Field for the Icon Display field.
|
|
Select Formula Field for Icon Display
|
Select a formula field of the object for icon display. The icon is displayed in the tree view based on the selected formula field.
|
• This field is disabled if you have selected an icon in the Select Icon for Display field.
• Only the formula fields of the type text are supported.
• When you select the formula field for display, the image associated with the formula field is displayed. The image can be a custom icon, or you can directly reference the SLDS icon. For information about images in formula fields, see Use Images in 'Formula' Fields.
• This field is disabled if you have not configured an image for the formula field for the respective object.
• The icon is not rendered on the UI if the image is not accessible or configured correctly.
|
|
Enable Default Record Access
|
This checkbox is selected by default. The end-user can perform standard edit, clone, and delete actions on the record from the hierarchy view when this checkbox is selected.
|
Clear the checkbox if you do not want to enable default record access for the end user.
|
|
Enable SPM Wizards
|
Select this checkbox if you want to enable access to SPM wizards from the record for the end-user in the hierarchy view. The list of wizards displayed is assigned to the selected profiles in wizard properties.
|
|
|
Select criteria to display matching records on hierarchy
|
Select an expression to filter and display matching records. For example, if you select the Inventory expression, only locations matching the filter expression are displayed on the hierarchy.
Click the Search icon in this field to invoke the Select Expression From Library pop-up window. Select an expression from the available list of expressions and click Apply.
|
• If the expression you want to filter is unavailable in the list, click New to create an expression.
• If the parent record does not meet the criteria, its child records are also not displayed in the tree. For example, if the parent location does not satisfy the filter Inventory expression, its sub-location is not displayed though it is marked as an inventory location.
|
|
Enable Asset Notifications
|
Select this checkbox if you want to enable the display of the notifications indicator for assets.
|
This field is available only in the Asset object section.
|
|
Select criteria to display matching asset notification records on hierarchy
|
Select an expression for the criteria to display asset notifications. An expression, A360 - Open Asset Notifications, is selected in this field by default with the following criteria:
• Notification status: Open
• Severity: Moderate OR Critical
You can change the criteria by selecting another expression in the Select Expression from the Library dialog box.
|
• This field is available only in the Asset object section.
• This field is disabled by default. It is enabled only when you select the Enable Asset Notifications checkbox.
|
|
Allow Managing Child Assets
|
Select this checkbox if you want to allow the end user to manage all immediate child assets from a single UI, for any record listed in the hierarchy view.
|
This field is available only in the Asset object section.
|
|
Select Fields for Display*
|
Select the object fields to display in the plotted hierarchy. Use the right and left arrows to select and deselect fields for display.
|
• You must select at least one field for display.
• You can add up to 15 fields.
• All the lookup fields for the selected object are displayed.
|
5. Select the Salesforce profiles from the Available Profiles section and move them to the Selected Profiles section.
|
|
• Perform this step if you create a hierarchy configuration only for specific user profiles.
• Use the search bar to search for the profiles.
• Profiles that are already assigned to a hierarchy configuration are marked with *.
• When you add an already assigned profile to a new configuration and save the hierarchy configuration, the profile is re-assigned to the latest hierarchy configuration.
|
6. Click Save to save the asset hierarchy configuration. You are navigated to the Asset Management > Hierarchy page. The new asset hierarchy configuration is listed on the page.