Adding a new DOORS Next Generation OSLC Server
To allow Modeler users to access a remote DOORS Next Generation system, an OSLC Server must be added to the OSLC browser.
To add a new OSLC Server:
1. Launch Modeler and open a model.
2. Select the OSLC browser.
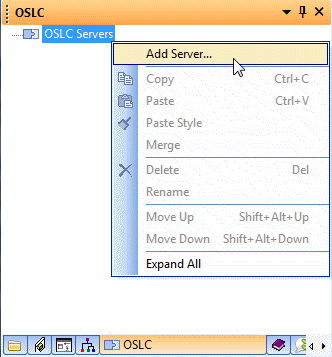
3. Right-click on the OSLC Servers node and select Add Server….

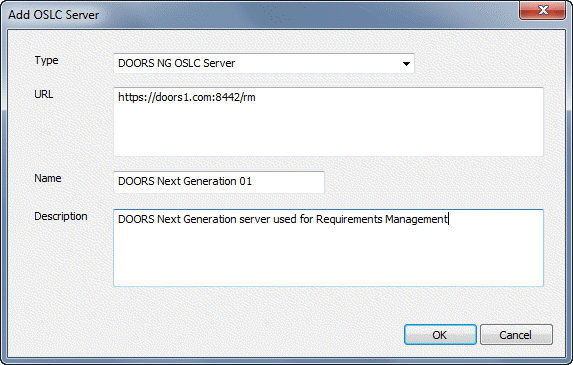
4. Select the DOORS NG OSLC Server option from the Type drop down menu.
5. Enter the URL for the remote system's OSLC Provider Service. For example: https://doors1.com:8442/rm
6. Enter a Name for the new server.
7. Optionally enter a Description for the new server.

8. Click OK.
9. A dialog appears prompting you to enter suitable values for the Consumer Key and Consumer Secret for that DOORS Next Generation server.
These values need to be set just once, the first time you access an OSLC Server. The values should be obtained from your DOORS Next Generation System Administrator.
10. A login dialog for DOORS Next Generation appears. Enter a valid username and password for that DOORS Next Generation server.
11. Confirm that the server has now been added and is visible in the OSLC browser.
As well as allowing Modeler users to access a remote DOORS Next Generation server, it is also possible to connect to the OSLC provider service of the "local" Modeler Server (i.e. the Modeler Server that contains the current model). This allows for creation of OSLC Links to data in other models stored in the same Modeler Server. |