Requirement diagram (SysML diagram)

A Requirement Diagram allows you to model relationships between requirements, and model traceability relationships between requirements and items in the model.
Create a Requirement Diagram through the Model or a Package: right-click the Model or Package, point to New, point to SysML, point to Requirements, and then click Requirement Diagram.
You can use the buttons on the diagram's tab to add Requirements and traceability relationships to the Requirement diagram. You can drag Requirements and model items from an appropriate pane to a Requirement Diagram.
Requirement Diagrams are shown in the  Requirements pane, and then expand the RequirementDiagram folder.
Requirements pane, and then expand the RequirementDiagram folder.You can drag any model item to a Requirement Diagram and then link that item to Requirements through Satisfy, Verify and Trace relationships.
The Requirement Diagram is a UML Class Diagram that is stereotyped by the «requirementDiagram» stereotype from the SysML profile.
The following items and relationships can appear on a Requirement Diagram. In addition, any item can be dragged to a Requirement Diagram.
Allocate
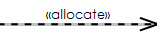
Create new Allocate relationships through the  Allocate button on the diagram's tab: click the Allocate button, click the item that is allocated to, and then click the item that is allocated from. If a popup menu appears, click New or select an existing Allocate relationship to add.
Allocate button on the diagram's tab: click the Allocate button, click the item that is allocated to, and then click the item that is allocated from. If a popup menu appears, click New or select an existing Allocate relationship to add.To populate all Allocate relationships that are missing from the diagram: right-click in free space, point to Populate, point to Links, and then click Allocates. To populate only those Allocate relationships that relate to an item on the diagram, right-click the item, point to Populate, point to Links, and then click Allocates.
Copy
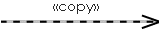
Create new Copy relationships through the  Copy button on the diagram's tab: click the Copy button, click the slave Requirement, and then click the master Requirement. If a popup menu appears, click New or select an existing Copy relationship to add.
Copy button on the diagram's tab: click the Copy button, click the slave Requirement, and then click the master Requirement. If a popup menu appears, click New or select an existing Copy relationship to add.To populate all Copy relationships that are missing from the diagram: right-click in free space, point to Populate, point to Links, and then click Copies. To populate only those Copy relationships that relate to a Requirement on the diagram, right-click the item, point to Populate, point to Links, and then click Copies.
Derive Reqt
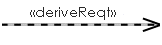
Create new Derive Reqt relationships through the  Derive Reqt button on the diagram's tab: click the Derive Reqt button, click the derived Requirement, and then click the Requirement from which the Requirement you first clicked is derived. If a popup menu appears, click New or select an existing Derive Reqt relationship to add.
Derive Reqt button on the diagram's tab: click the Derive Reqt button, click the derived Requirement, and then click the Requirement from which the Requirement you first clicked is derived. If a popup menu appears, click New or select an existing Derive Reqt relationship to add.To populate all Derive Reqt relationships that are missing from the diagram: right-click in free space, point to Populate, point to Links, and then click Derive Reqts. To populate only those Derive Reqt relationships that relate to a Requirement on the diagram, right-click the Requirement, point to Populate, point to Links, and then click Derive Reqts.
Problem
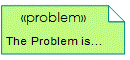
Create new Problems through the  Problem Note button on the diagram's tab: click the Problem Note button, and then click in free space.
Problem Note button on the diagram's tab: click the Problem Note button, and then click in free space.Rationale
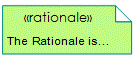
Create new Rationales through the  Rationale Note button on the diagram's tab: click the Rationale Note button, and then click in free space.
Rationale Note button on the diagram's tab: click the Rationale Note button, and then click in free space.Refine (UML Standard Profile)
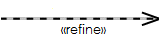
Create new Refine relationships through the  Refine button on the diagram's tab: click the Refine button, click the refining item, and then click the refined item.
Refine button on the diagram's tab: click the Refine button, click the refining item, and then click the refined item.To populate all Refine relationships that are missing from the diagram: right-click in free space, point to Populate, point to Links, and then click Refines. To populate only those Refine relationships that relate to a Requirement on the diagram, right-click the Requirement, point to Populate, point to Links, and then click Refines.
Requirement
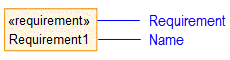
Create new Requirements through the  Requirement button on the diagram's tab: click the Requirement button, and then click in free space.
Requirement button on the diagram's tab: click the Requirement button, and then click in free space.To add an existing Requirement to the diagram: click the Requirement tab button,right-click in free space, and then select the Requirement you want to add to the diagram.
Requirement tab button,right-click in free space, and then select the Requirement you want to add to the diagram.Requirement Extension
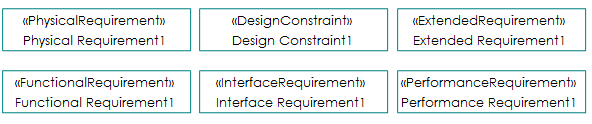
Create new Requirement Extensions through the appropriate Requirement Extension button on the diagram's tab: click the appropriate Requirement Extension button, and then click in free space. The following non-normative Requirement Extension buttons are available:
 Design Constraint
 Extended Requirement
 Functional Requirement
 Interface Requirement
 Performance Requirement
 Physical Requirement
To add an existing Requirement Extension to the diagram: click the appropriate Requirement Extension button, right-click in free space, and then select the Requirement you want to add to the diagram.
Satisfy
Create new Satisfy relationships through the  Satisfy button on the diagram's tab: click the Satisfy button, click the item that satisfies the Requirement, and then click the satisfied Requirement.
Satisfy button on the diagram's tab: click the Satisfy button, click the item that satisfies the Requirement, and then click the satisfied Requirement.To populate all Satisfy relationships that are missing from the diagram: right-click in free space, point to Populate, point to Links, and then click Satisfies. To populate only those Satisfy relationships that relate to an item or Requirement on the diagram, right-click the item or Requirement, point to Populate, point to Links, and then click Satisfies.
Trace (UML Standard Profile)
Create new Trace relationships through the  Trace button on the diagram's tab: click the Trace button, click the tracing item, and then click the traced Requirement.
Trace button on the diagram's tab: click the Trace button, click the tracing item, and then click the traced Requirement.To populate all Trace relationships that are missing from the diagram: right-click in free space, point to Populate, point to Links, and then click Traces. To populate only those Trace relationships that relate to an item on the diagram, right-click the item, point to Populate, point to Links, and then click Traces.
Verify
Create new Verify relationships through the  Verify button on the diagram's tab: click the Verify button, click the item that verifies the Requirement, and then click the verified Requirement.
Verify button on the diagram's tab: click the Verify button, click the item that verifies the Requirement, and then click the verified Requirement.To populate all Verify relationships that are missing from the diagram: right-click in free space, point to Populate, point to Links, and then click Verifies. To populate only those Verify relationships that relate to an item or Requirement on the diagram, right-click the item or Requirement, point to Populate, point to Links, and then click Verifies.
The following sections provide information about how a Requirement Diagram is used in the model. For more information about a SysML item - click it.
Owned by
 Model (UML item)
 Package (UML item)
Creates or shows these items
Any model item or diagram can be dragged to a Requirements Diagram.
SysML Properties
• allocatedFrom - lists source items that are linked through Allocate relationships (on Allocated tab when item is allocated).
• allocatedTo - lists target items that are linked through Allocate relationships (on Allocated tab when item is allocated).