Getting started with Windchill Modeler
Purpose of this guide
Welcome to Windchill Modeler, PTC’s model-based system and software engineering solution. This guide is aimed at new users and covers the fundamentals and main functional areas of Windchill Modeler. After reading you will be able to navigate the user interface, create, share and analyze models as well as manage product traceability with other design tools.
Starting Windchill Modeler
To start Windchill Modeler, locate the shortcuts on the Windows Start menu or on your desktop and click the Modeler icon:  .
.
Welcome page
When Windchill Modeler is launched for the first time, a welcome page will be displayed. This provides quick access to key functions such as open model, create model, as well as providing links to Help and PTC Support.
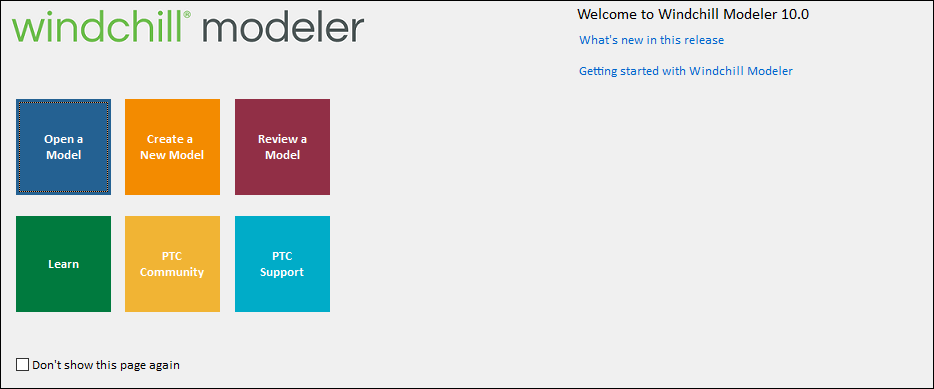
Opening models
Select Open Model from the welcome page or from the ribbon toolbar, shown below:
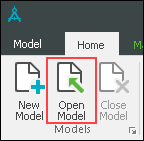
This launches Model Explorer which is used to open, create, and manage Windchill Modeler models. If you have the example models installed, double-click the HSUV model to open. If not, select another model to open.
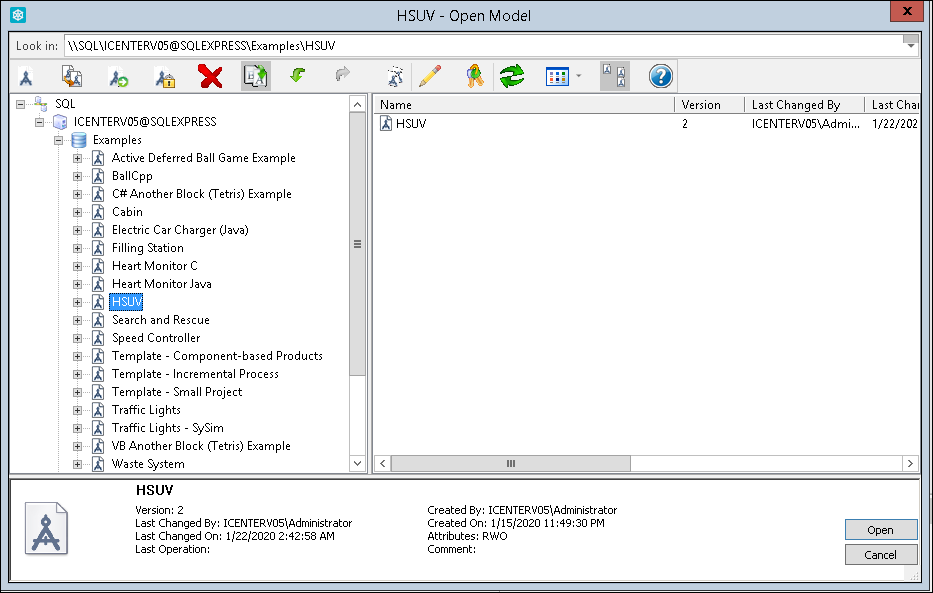
Click here for more information on Model Explorer.
Viewing models, diagrams, and items
You access Windchill Modeler functions using the ribbon toolbars (shown below) or using the context (right-click) menus.

Common functions are located on the Home and Manage tabs. Other tabs provide access to different functional areas including Diagram Tools, Find, Tools, and Help.
User roles provide the ability to hide data, buttons, and menu choices. You can select a user role to provide a focused, role-based user experience. For more information click here. |
In the Packages browser on the left, click + to expand the packages in the model and view model items and diagrams
When you select diagrams or items, their properties are displayed in the Properties pane (located to the bottom-right of the Modeler window).
Double-click a diagram to view in the diagram pane – the example below shows a use case diagram.
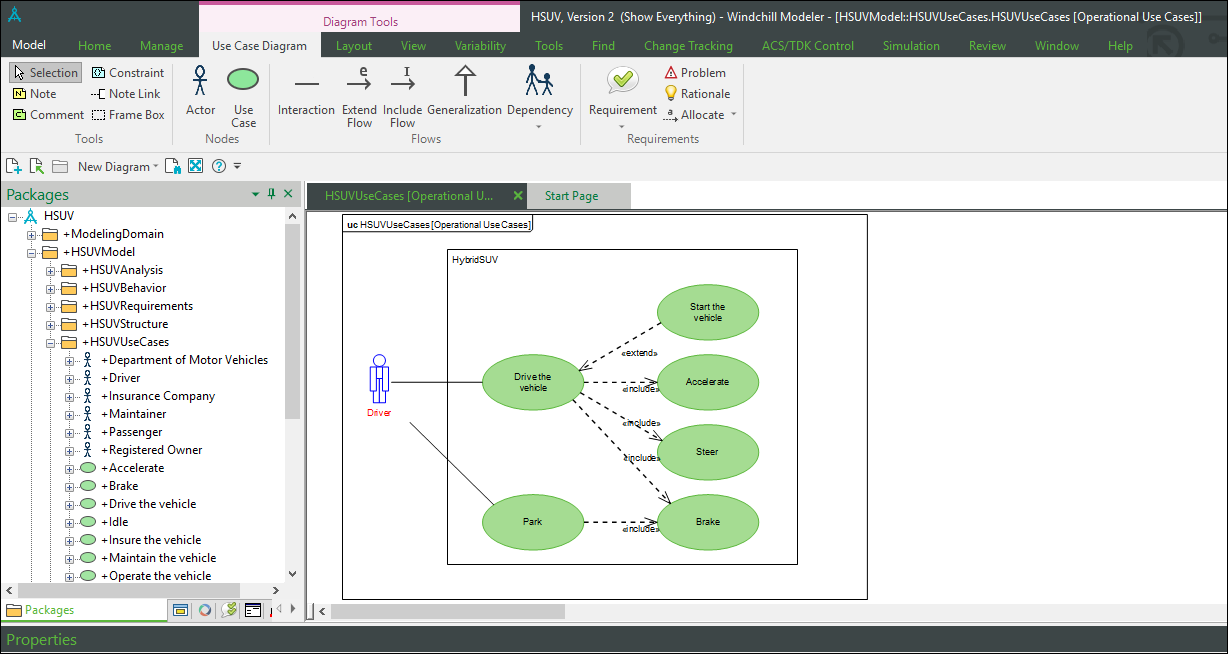
You can easily change the positioning of panes using drag-and-drop. Panes can also be set to floating or auto-hide. For more information, see Modeler panes. |
Creating models
To create a new model, on the Home tab, click the  New Model button.
 New Model button.
In the New Model dialog, select the options to reflect the type of model you want to create. For example, if you plan to create a software design model you can select the UML (Unified Modeling Language) option. If you are creating a system model you can select the SysML (Systems Modeling Language) option. Enter a model and click OK.
Windchill Modeler allows you to create many different types of models to support different types of design activities. Examples include requirements engineering, structure modeling, behavior modeling, model simulation as well as being able to generate software code from models. For more information on the SysML profile, click here. |
Creating diagrams and model items
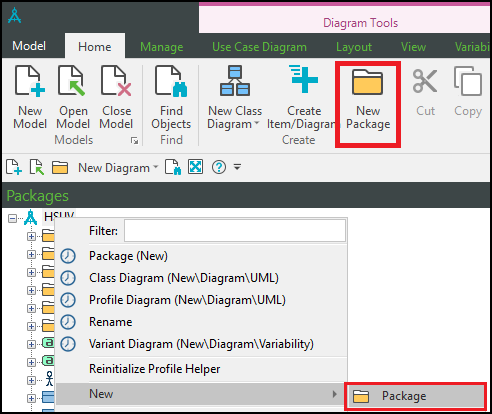
Model diagrams and items are organized using packages. In the Packages browser, right click on the model (root) node and select > or click New Package icon on the Home ribbon. as shown below. Enter a name (for example, Use Cases) for the new package or accept the default name.
Right-click on the new package and select > > > . Enter a name for the new diagram on accept the default name. A new Use Case diagram is now created.
Windchill Modeler stores model data in a live, multi-user database. All updates to models are automatically saved to the database meaning you never have to worry about saving your work or managing model files. |
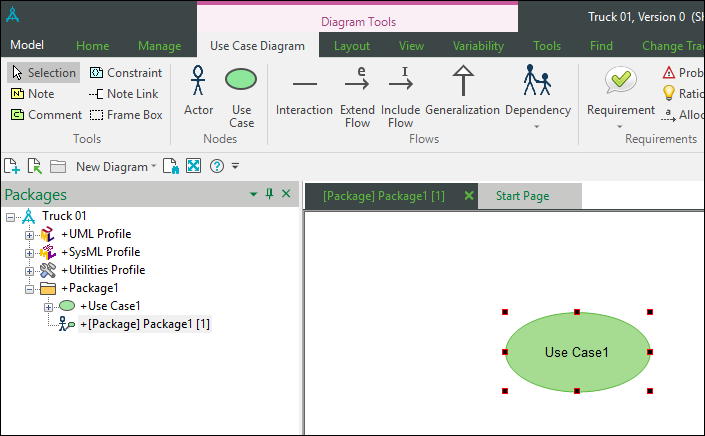
To create a model item and add it to the diagram, on the Use Case Diagram ribbon tab, click Use Case, and then click in empty space in the diagram. This creates a new Use Case item and adds it to the diagram, as shown below. Enter a name or accept the default.
Add an Actor to the diagram and then create an Interaction by clicking on the Use Case on the diagram and dragging the link to the Actor. The resulting use case diagram is shown below.
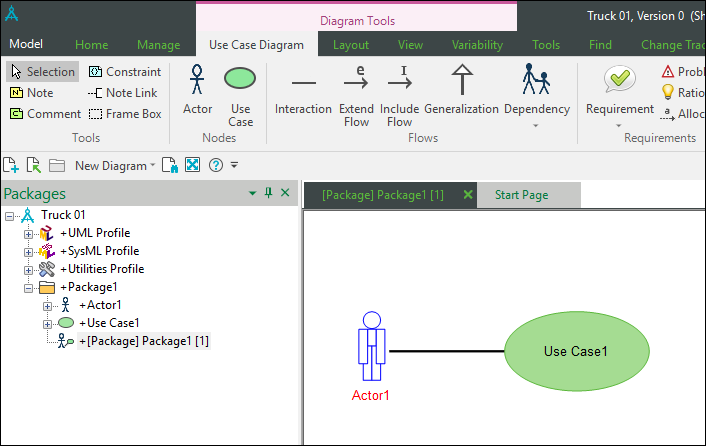
The example above illustrates use case modeling as a simple introduction. Windchill Modeler provides many types of diagrams and items that are used for different aspects of software and systems engineering. Some examples are requirements diagrams, class diagrams, block definition diagrams, and variability diagrams. For more information on UML modeling techniques, click here. |
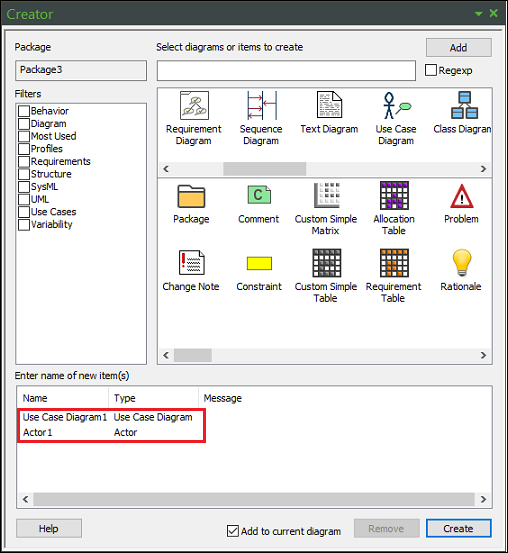
You can also use the Creator pane to select multiple items to add to the selected package. You can add the selected items and diagrams to the selected package as well as to a currently active diagram. You can use the filters as well the search for the items and diagrams to add to the package.
Analyzing and validating models
Windchill Modeler provides several options for analyzing, validating and optimizing your system and software designs. Windchill Modeler Reviewer helps you to quickly verify your models for correctness, completeness, and consistency.
To open Reviewer, on the Review tab, click Reviewer.

You can add favorite functions to the Quick Access toolbar, so they are always easily accessible, For more information, click here. |
Reviewer inspects the model and performs reviews against specific criteria, often relating to model quality. For example, a well-defined model should have key dependencies defined between model items, for example between a requirement and a use case. If these relationships are missing from the model, Reviewer will identify them for you.
To review the current model, click Run Report.

The Overview page is displayed giving a high-level view of the various review checks that have been performed. Scroll down to view the individual reviews and click one to see user actions.
In the example below, HSUVModel::HSUVUseCases.Insure the Vehicle does not have a related sequence diagram, so it has been flagged. The actions available are to ignore this violation for future reviews, add a comment or view the affected item in Modeler.

For more information on Windchill Modeler Reviewer, click here.
The following are some other Windchill Modeler capabilities you can utilize to optimize your designs:
Sharing models
Windchill Modeler is a multi-user system so models are automatically shared with other Windchill Modeler users, based on their access permissions. For more information on multi-user deployments click here.
You can share a read-only view of models using Windchill Modeler Web Interface. This provides a web-based experience that is tailored to non-system engineering users and can be made accessible to all people in your company. For more information click here.
Windchill Modeler Publisher provides capabilities to publish model information into a document format. This is a convenient way for you to share software and system designs with other stakeholders for review and approval. For more information click here.
To share entire models with other Windchill Modeler users you can use import/export features, either for models or for specific packages. For more information click here.
If you wish to work in decompose your models into re-usable components, Windchill Modeler provides component sharing features. In addition, Windchill Modeler has an integration with Windchill Modeler Asset Library, which provides a web-based platform for managing reusable assets. For more information click here.
Model configurations
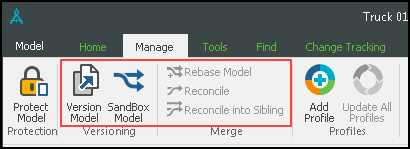
As your software and system design projects evolve over time, it is good practice to create new model versions at significant milestones. Creating a new version of a model acts as a baseline, with the previous version of the model frozen and unable for editing and the new version being the current, active model version. For more information, click here.
Private sandboxes are personal versions, or copies of a model. When you create a private sandbox, you can update this copy of the model without affecting the main trunk version of the model. Model changes made in a private sandbox can be rolled into the main trunk version using the Reconcile function.
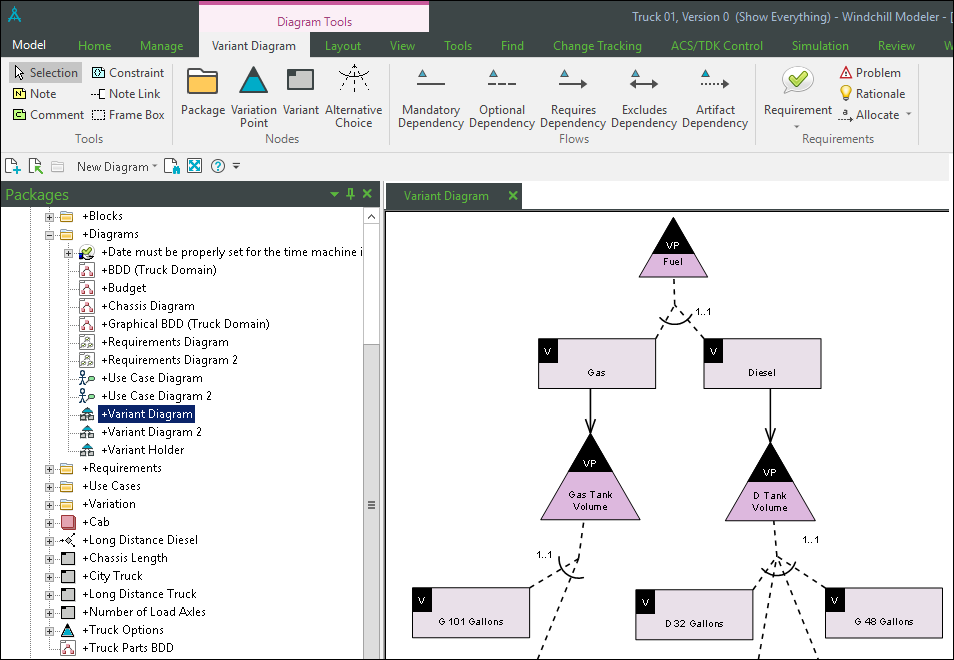
Windchill Modeler has powerful capabilities for defining variability within software and system models. These features enable you to manage variable product line models that can be used to generate configured product models. An example of a Variant diagram is shown below. For more information, click here.
Managing digital product traceability
Windchill Modeler provides a range of features that enable you to define and manage critical dependencies within your software and system designs. These traceability relationships can be captured as links between different elements of your Windchill Modeler model as well as with external links to design information in other tools.
The following are some of the Windchill Modeler features you can use to manage digital product traceability:
Next steps
Now you understand some of the fundamentals of using Windchill Modeler. The following are some additional resources you can use to further your learning:
• PTC Help Center — Windchill Modeler Help is also available online here.
• Windchill Modeler MBSE tutorial — a detailed end-to-end tutorial for Windchill Modeler is available here.
• PTC Community — engage in the PTC user community to ask questions, discuss solutions, and raise product ideas.
• YouTube — various demos and tutorials available here.