Scaling
In
Arbortext IsoDraw you can enlarge or reduce elements in size. To do this, select the relevant elements with the mouse. Then choose the
Scale 
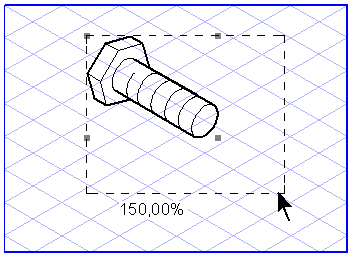
tool. A dotted rectangle will appear around the selected object.
Position the
center
cursor at one of the four corners of this rectangle. If you now move the cursor towards the element while holding down the mouse button, the rectangle is reduced in size proportionally and a percentage value under 100 will appear to indicate you are reducing in size. If you move the cursor away from the selected object, you will enlarge the rectangle proportionally and the displayed percentage value will rise above 100.
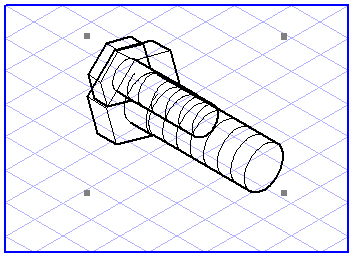
If you drag on a corner of the dotted rectangle and then hold down the CTRL key, the size of the rectangle changes non-proportionally. The width and height of the rectangle are enlarged or reduced in accordance with the movement of the mouse. A percentage value is displayed for the width and the height respectively.
You can also scale your selection by means of the dialog box. Press the SHIFT key while you use the center cursor to click the point which is to form the scaling center.
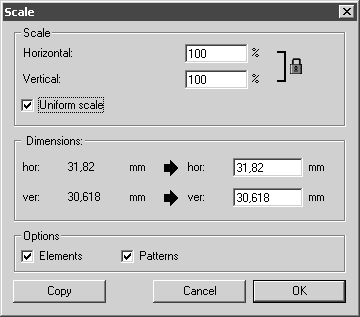
Scale
When Uniform scale is selected, a tick appears in the box next to it. You can then simply enter a percentage value in one of the two entry fields next to Horizontal or Vertical. The illustration is then enlarged or reduced proportionally in accordance with the value entered.
If Uniform scale is not selected, the scaling is performed in accordance with the values entered in the Horizontal and Vertical fields. If the entries have different values, the selected element is scaled non-proportionally.
Alternatively, you can also enter the value using a mathematical formula. This may save you having to work out a percentage value. When entering values, observe the calculation rules. Information on how to enter values can be found in the Drawing Basics Tutorial.
Dimensions
In the fields next to hor (horizontal) or ver (vertical), the corresponding values appear for the extent of the selection when the percentage values are entered under Scale. If you want to define an exact extent for the selection, you can enter this extent here directly in the entry fields. If uniform (proportional) scaling is selected, you must enter a value in one field. If non-uniform (non-proportional) scaling is set, you must enter a value in both fields. The actual values are indicated to the left of the entry fields.
Options
Under Options you can select Elements and Patterns. If the Elements box is checked, only the elements selected are scaled. If the Patterns box is also checked, existing patterns will also be scaled. If you only want to scale the patterns without changing the elements, check only the Patterns box.
| Bitmap patterns and placed files containing bitmap patterns cannot be scaled. |
You can conclude your entry with OK or by clicking the Copy button. In the latter case, the selection remains unchanged. Instead, a copy of the selection is generated and is scaled in accordance with your specifications.
| If you scale image elements, the size will remain unchanged. The pixels will be scaled instead. A white edge is produced when elements are reduced in size, whereas parts of the pixels are lost when elements are enlarged. The element info dialog box for image elements provides you with further options for changing the size of an image element. |