Starting the Animation Process
When the Edit animation command is selected, the Edit Animation and Timeline dialog boxes appear and are empty.
To begin creating an animation, you must first select an object. To do this, click the object with the arrow cursor, or click on the object’s ID or name in the object window.
If you now select one of the available transformations, the dialog boxes appear as illustrated here:
The upper field of the Edit Animation dialog box shows either the ID or name of the animated object. (What is shown depends on the current Objects window setting; ID or Name .) Below this is the first sequence that has been created, along with the first step. The step contains the action of the transformation that was selected – in this case, rotating the object.
Click the + or - symbol next to a sequence or step to expand or collapse it. Expanding a sequence shows all the steps it contains. Expanding a step shows all the actions it contains.
If you make changes to the setting options for sequences, steps, or actions, the Apply button becomes available. Changes are only applied when you click Apply.
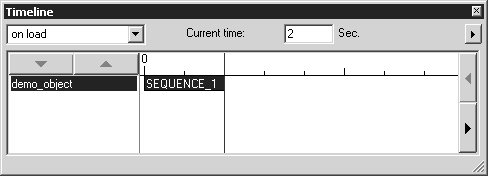
The name or ID of the object appears on the left in the Timeline dialog box. The field next to this shows the timeline at a specified scale. The sequence that has been created appears as a bar with a name. The length of the bar corresponds to the sequence duration. The red timeline indicates the current time and, therefore, the point when the next animation begins.