Generation
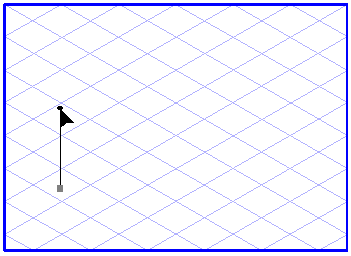
To draw a Bézier path, select the Bézier

tool from the toolbox. The cursor becomes a Bézier

cursor.
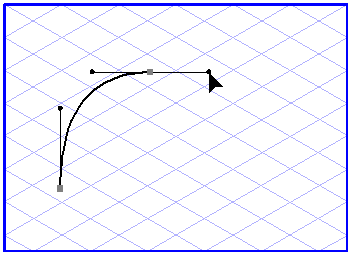
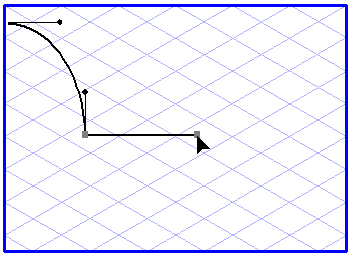
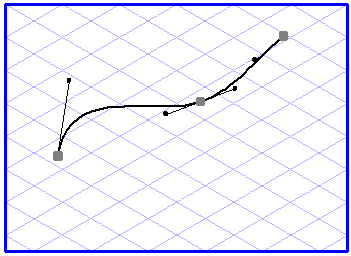
Click the drawing area with the drawing cursor and, holding down the mouse button, drag the cursor in the required direction. This generates the first Bézier point complete with a handle. Release the mouse button and click again, this time slightly further away. Here, too, drag a handle out of the point holding down the mouse button. You have now created a Bézier path with two points, each of which has a handle.
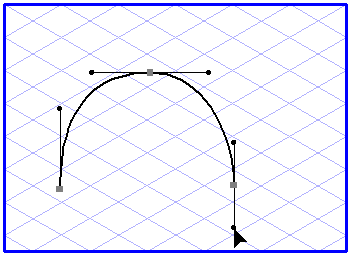
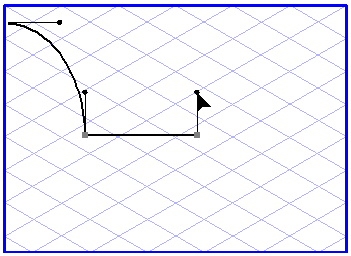
By dragging the cursor while holding down the mouse button, you will have generated curve points with handles. For as long as you hold down the mouse button, you can change the position of a handle point and thus the shape of the curve. Add a further point in the same way. Let us now suppose you wanted the path to make a sharp turn at the last point. To do this, you need to convert the curve point into a corner point. Press the ALT key and click briefly on the last Bézier point
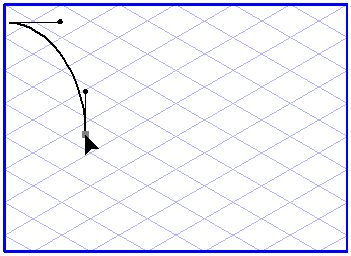
The last handle disappears. Now click the next point of the path briefly but without dragging it. This point, too, then turns into a corner point.
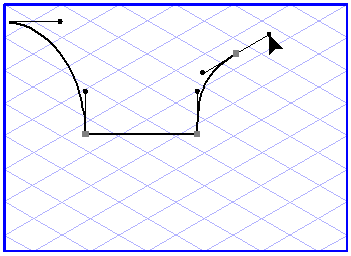
In order to generate a handle for the rest of the path, click the last point again and drag out a handle. Then continue drawing the path at will.
While you are working on a Bézier path, you can perform changes to parts that have already been drawn:
• To insert an additional point, press the SHIFT key and click the location on the path where you want to position the point.
• To delete an existing point press the SHIFT key and quickly click the point you want to delete.
• To move a Bézier point or a handle point, press the CTRL key in order to switch briefly to the arrow cursor. Then click the required point and move it to its new position.
It is possible to terminate creation of a Bézier path automatically if you link the last Bézier point with the start point. This produces a closed Bézier path.
To terminate creation of an open Bézier path, click either the toolbox or the menu bar.
A further way of creating Bézier paths is the Drawing of freehand lines tool. This you can use to draw contours which Arbortext IsoDraw converts automatically to Bézier paths.
Select the
Drawing of freehand lines
tool from the toolbox. The cursor becomes a Bézier
cursor.
Use the cursor to click the drawing area at the point you want the path to begin. Draw the required path by moving the cursor while holding down the mouse button. As you drag the cursor, a dotted line traces your path. When you release the mouse button, Arbortext IsoDraw automatically uses what you have drawn to generate a Bézier path with appropriate points and handles.
Grid Alignment
The orientation of the handles depends on whether or not
Grid Alignment is active when the Bézier path is being generated. If the
Grid Alignment function is active

, the handles are forced into one of the major axes of the current grid or into the horizontal axis.
If
Grid Alignment is switched off

, you can define the orientation of the handles freely.
This setting can be temporarily reversed by holding down the ALT key while dragging the handle.
Both Bézier points and handle points can be attracted by neighboring grid points or element points. Whether or not they are attracted depends on the current setting of
Grid Snap
and
Element Snap
.
Grid Snap and Element Snap
When you are setting Bézier points or dragging handles, you can temporarily reverse the Grid Snap setting by holding down the CTRL key.
Show Dimensions on the Element
Bézier paths cannot be assigned to a perspective plane directly. Consequently, no dimensions are displayed.
Displaying Dimensions in the Dimensions Bar
The Dimensions bar shows no dimensions. This is because Bézier paths cannot be assigned directly to a perspective plane and the positions of the handles cannot be defined easily using dimensions.