Creating the Body Using the Outline Drawing
1. Select the
Ellipse
tool from the toolbox.
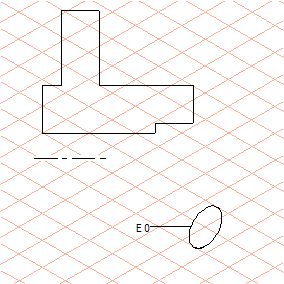
2. Draw an ellipse (E0) with a diameter of 20 mm on the major axis, dragging from the center to the right and up, as depicted in the figure.
| The drag direction and the orientation of the ellipse determine the orientation of the body that will be created. |
3. Select the
Rotational surfaces
tool from the toolbox.
The cursor changes to a move hand

.
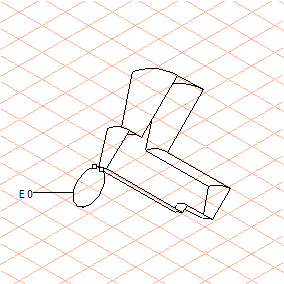
4. Select all the elements in the outline drawing. Grab any element and drag the outline drawing over ellipse (E0).
The cursor changes to a fist

while dragging the drawing.
5. When the cursor comes into contact with the ellipse it is selected.
Now release the mouse button.
You will see a body segment and two green-edged points at the edge of ellipse (E0).
| These points indicate the start and end angles of the body segment. |
6. Move the cursor over the left-hand point.
The cursor turns into an arrow tip

.
7. Click the point and hold down the mouse button.
The point moves on the ellipse as you move the mouse.
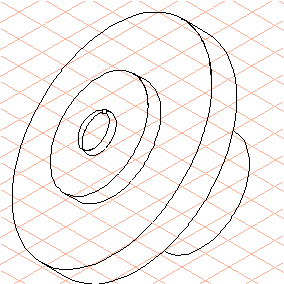
Move the mouse so that both green-edged points are positioned one on top of the other.
This position produces the full rotational body.
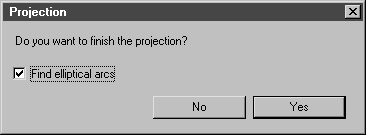
8. Click an empty part of the drawing area.
The dialog box for finishing projection appears.
Confirm by clicking Yes.
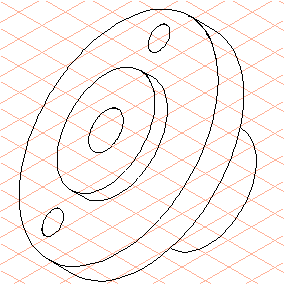
9. Complete the flange drawing by deleting ellipse (E0) and drawing both the outer bores.
The following examples will show you the other ways in which this tool can be used.
All the details on how to use this tool can be found in the Rotational surfaces section of the Arbortext IsoDraw User's Reference.