Complete the Drawing
1. Select the
Line
tool from the toolbox.
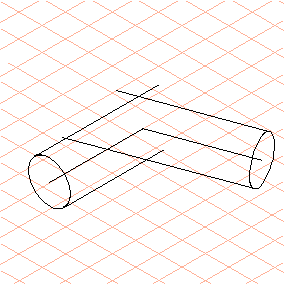
2. Now draw the outer edges of the pipe. Start from each outer point of the ellipses. Make the lines so long that they intersect.
| Hold down the ALT key when drawing lines outside the major axes. This temporarily turns Grid Alignment off. |
Select the
Arrow
tool. Select ellipse (3) and delete it.
3. The curve radii of the pipe’s outer edges still need to be added.
Select the
Drawing of fillets
function from the toolbox to create the curve radii.
| This function forms an ellipse between two straight lines. |
The cursor now has a small
1 next to the arrow

.
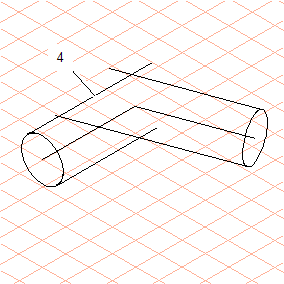
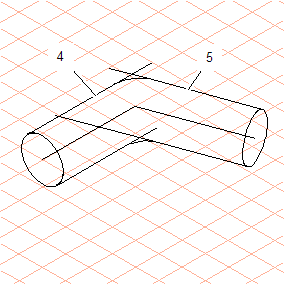
4. Now click on line (4).
The cursor is now followed by a small
2
to indicate that the first line has been found.
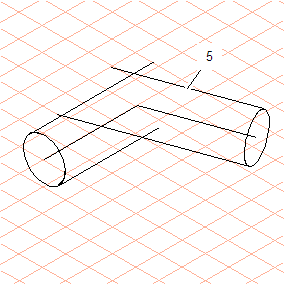
5. Holding down the SHIFT key, click on line (5).
The following element info dialog box appears.
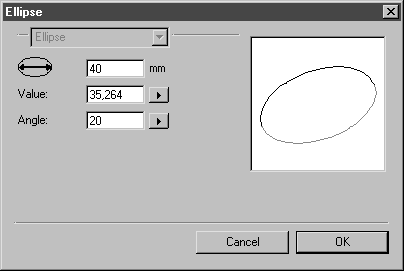
6. Enter the values as indicated in the figure and confirm your entry with OK.
| Alternatively, you can also click on line (5) without holding down the SHIFT key and adjust the ellipse which then appears by moving the mouse. In both cases, an ellipse segment is generated that fits exactly between lines (4) and (5). The lines are cut accordingly. |
Use the Drawing of fillets tool for the lines of the pipe’s lower outer edges too.
7. Select the
Arrow tool.
Select all superfluous line segments one at a time and delete them .
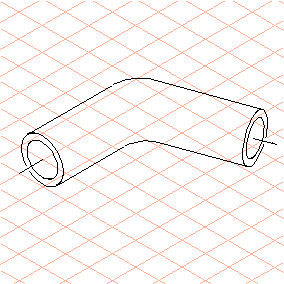
8. Modify the center lines and draw an ellipse with a diameter of 30 mm at each end of the pipe, as illustrated in the figure.