Exercise 2: Automatically Create Hotspots for Callouts
The Create hotspots command can be used to create hotspots automatically. If, for example, hotspots are to be assigned to a spare parts diagram with positioning, the callouts can be used as hotspots instead of the part drawings.
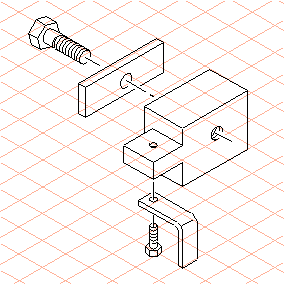
1. Open the file hotspot.idr. Save the file as hotspot_autopos.idr.
2. Select the
Text
tool from the toolbox.
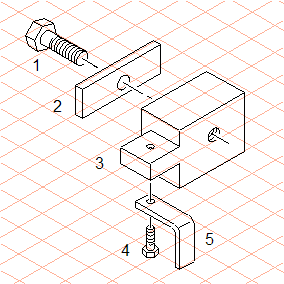
3. Use the Text tool to set the callouts as illustrated in the figure below.
Then select the callouts and set the attributes (font, text size, etc.) for the callouts from the Text menu.
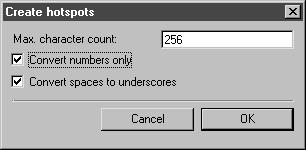
4. Select the > menu.
The following dialog box is displayed.
5. Confirm the settings by clicking OK.
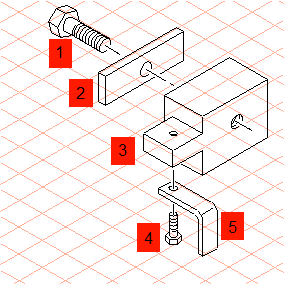
All the callouts now have object info with the name of the respective callout. The contour of the text element is adopted as the hotspot region.
Select the > menu and, in the dialog box, check the box next to Show objects with hotspots and select filled next to options. Confirm the setting by clicking OK.
6. The text elements are now depicted against a colored fill within their contour. The object tip also appears when you move the mouse over a text element.
You can call up the object info for a text object at any point and change or add to the entries. For example, you can change the entry next to Name to the part name.
To do this, select the object and select the Object info command.