Customizing an Installation
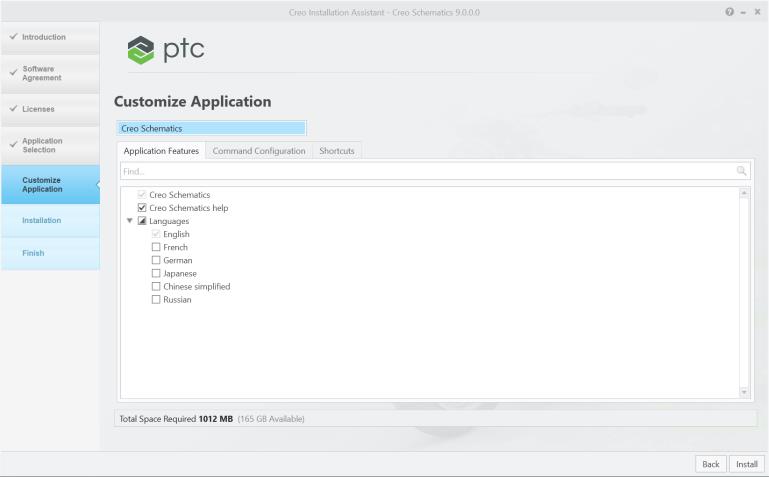
You can customize the installation of Creo Schematics using the following procedure:
1. Perform steps 1 through 8 as described in the section
Installing Creo Schematics: Simple Installation Process.
2. On the Customize Application page, Creo Schematics is selected.

◦ To modify license configurations using the Command Configuration tabbed page, see
Modifying License Configurations.
◦ To configure Windows shortcut preferences using the Shortcuts tabbed page, see
Configuring Windows Shortcuts.
3. To install Creo Schematics without installing the help, clear the Creo Schematics help check box. When the help is not installed, the application opens the Help Center from ptc.com, see
Installing and Accessing Creo Schematics Help.
4. Select a check box to install Creo Schematics in a language listed in addition to the English installation.
5. After selecting the options on all the tabbed pages, perform one of the following actions:
◦ Click Install to start the installation.
◦ Click Back to go back to the Application Selection task.