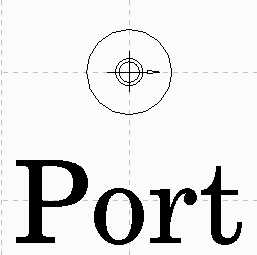
Placing Labels
Use labels to display text for blocks, ports, or fibers on a sheet. The label can display values of properties of the object it is associated with, as well as those of associated objects. A configurable format string governs the content of the text that is displayed in the label. You can add labels to catalog definitions, objects, and sheets.
Labels can be configured as either rigid or scalable. Rigid labels retain their original shape when their parents are scaled. Scalable labels scale along with their respective parent components. All labels are rigid by default.

1. On the Catalog tab Create group, click  Add Label.
 Add Label.
2. In the Create Label for Port dialog box, click <param>.
3. In the Parameter selector dialog box, select name and click OK.
4. In the Create Label for Port dialog box, type 1 in the Height mm box.
5. Select a desired font.
6. Set the text Justification to be center.
7. Place the text under the circle.
8. Close the sheet.
9. From the Explorers group, click  Catalog Explorer.
 Catalog Explorer.
10. In the Catalog Explorer dialog box, select the new port and click  to create a new shape.
 to create a new shape.
11. Click  to open the shape sheet.
 to open the shape sheet.
12. Close the Catalog Explorer.
13. In the Graphics Toolbar, click  .
.
 .
.14. In the Grids: Current Sheet dialog box, select Ports and click Switch.
15. From the Display group, make sure the Display grid on screen check box is selected.
16. Click OK.
17. In the ribbon, click Geometry.
18. From the Line group, click  Circle- Radius or Diameter.
 Circle- Radius or Diameter.
19. Click on the sheet to start the circle.
20. In the bottom right corner of the graphics window, edit the Diameter to 1 and click  .
.
 .
.21. Right-click and choose Exit tool or press ESC to cancel the draw circle command.
22. In the ribbon, click Catalog.
23. From the Info group, click  Set Datum.
 Set Datum.
24. Place the origin of the port to be in the centre of the circle.
25. From the Create group, click  Add Label.
 Add Label.
26. In the Create Label for Port dialog box, click <param>.
27. In the Parameter selector dialog box, select name and click OK.
28. In the Create Label for Port dialog box, type 1 in the Height mm box.
29. Select a desired font.
30. Set the text Justification to be center.
31. Place the text to the left of the circle.
32. Close the sheet.