Generating or Updating Node Locked Licenses
After you have received an e-mail from PTC with the Sales Order Number (SON) or product codes for your software order, generate or update licenses using PTC Installation Assistant as follows:
1. Click setup.exe from your installation media, to start the Assistant. The Welcome screen appears.

2. Select Install new software.
3. Click Next. The Software License Agreement screen appears.

4. Read and accept the software license agreement and click the check box at the bottom of the screen to accept the export agreement.
5. Click Next. The License Identification screen appears.
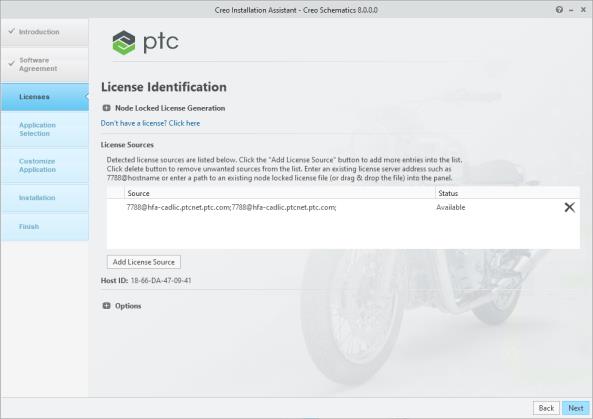
6. Click  to expand the Node Locked License Generation area.
to expand the Node Locked License Generation area.7. Type your sales order number or product code in the corresponding text box.
8. Click Install Licensing. If the sales order number matches your software order, all the available licenses corresponding to the sales order number are automatically generated into the license file. A single set of available node-locked license features are added to the license file and downloaded to the “C:\ProgramData\PTC\licensing\ folder.
9. The complete path of the license file appears in the Source column of the License Sources area.
To select a different license file, click Add License Source and then drag and drop a node locked license file to the license source area, or click  to browse and select a node locked license file.
to browse and select a node locked license file.To remove a previously selected license source click  to delete the license source.
to delete the license source.10. If you don’t already have a license click the
“Don’t have a licence? Click here” link and follow the instructions on the License Management page to obtain a license.
11. Expand the Options area and click Skip Licensing if you want to proceed with the installation without providing the licensing information. You can provide the licensing information at a later stage by re-running the PTC Installation Assistant.
If you click Skip Licensing, the Command Configuration tabbed page on the Customize Application screen is not available during customizing Creo Schematics. You can add, edit, or delete a license configuration using the Command Configuration tabbed page on the Customize Application screen. |
12. To complete the node-locked license setup, click one of the following buttons depending on the options you have selected on the Welcome screen:
◦ Click Finish to close the Assistant if you have selected Reconfigure licenses in an existing installation.
◦ Click Next if you have selected Install new software or Upgrade existing software to proceed with the installation.