To Insert Callouts
Callout annotations are found on the Home tab in the Insert group.
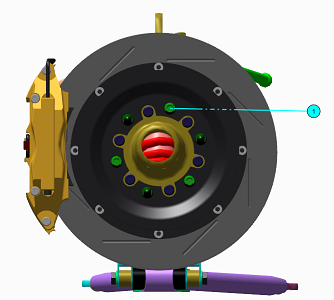
1. Click the callout you want to insert in the figure and point to the figure window. The pointer changes to a

callout insertion pointer.
2. In the figure window, click a part to place the head of the callout leader line and then drag to define the length and direction of the leader line. Release the mouse button to place the callout label. The callout appears in the foreground. In the upper data panel
 View Content
 pane, a corresponding
Callout entry appears.
3. To move the callout in the figure window, perform the following actions:
a. Place the pointer over the callout leader or label.
b. When the pointer changes to a

callout editing pointer, click to select the callout. This also highlights the part, or parts, the callout references, in both the figure window and the item list.
c. Point inside the callout label. The pointer changes to a

move pointer.
d. Drag the callout label to its new position.
4. To insert one callout annotation for multiple instances of the same item using multiple leader lines, perform the following actions:
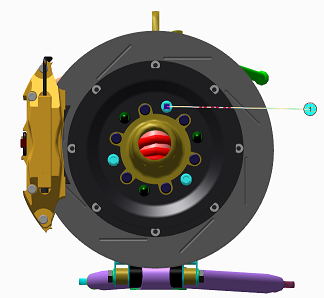
a. Click > . b. Select more than one instance of the same item. c. Click > or Item Number x Quantity. A single callout with multiple leader lines to all instances of the same item appears in the Figure View and is added to the View Content pane. | |
A single callout with one leader line to one instance appears in the Figure View and is added to the View Content pane.
5. To insert one callout annotation for multiple instances of the same item using a single leader line, perform the following actions:
a. Click > . b. Select more than one instance of the same item. c. Click > or Item Number x Quantity. | |
| If you select the callout annotation, all instances of the items are highlighted in the Figure View and View Content pane. |
| |