About the Checkpoint Tree
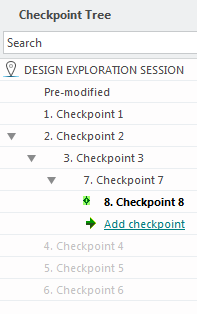
When you create a checkpoint it is added to the Checkpoint Tree. A checkpoint is represented as a sub-level of its predecessor checkpoint. The figure below shows the checkpoints at sub-levels.
However, it can be difficult to work this way when there are multiple checkpoints. You will have to scroll right and left to see all the checkpoints in the branch. To make it easier to view all checkpoints in a branch, one branch in the tree is vertical with a checkpoints under its predecessor checkpoint. Although this branch is called the main branch, it is no different from other branches in the Checkpoint Tree. You can make any branch in the Checkpoint Tree the main branch. In the figure below you can see the vertical display.
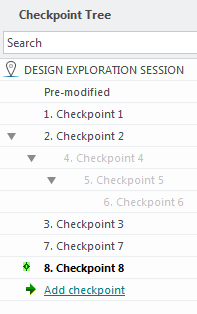
All checkpoints in the active branch are in black and the active checkpoint is bold, irregardless of the way they are displayed.
You can however, set the Checkpoint Tree to display the checkpoints according to the order in which they were created, in a timeline. In the figure below the active branch is checkpoints 1, 2, 4, 5, and 6.


