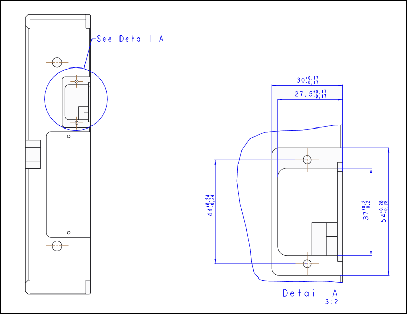
To Insert a Detailed View
A detailed view is a small portion of a model shown enlarged in another view. A reference note and border are included in the parent view as part of the detailed view setup. Once a detailed view is placed on the drawing sheet, you can modify the view, using the Drawing View dialog box.
1. Open a drawing.
2. Click > . Alternatively, right-click and click Insert Detailed View on the shortcut menu. The Select dialog box opens.
3. Select a point in an existing drawing view that you want to enlarge in a detailed view. The drawing item is highlighted. You are prompted to sketch a spline around the point.
4. Sketch a spline encompassing the area that you want to show in detail.
Do not initiate the spline sketch using the commands on the Sketch tab. Click the graphics window to begin the sketching of the spline. |
Middle-click when the sketch is complete. The spline is displayed as a circle and a note with the detailed view name is created.
5. Select the location for the detailed view in the drawing. The area of the parent view within the spline is displayed and labeled with the name and scale of the detailed view.
6. To continue defining other attributes of the drawing view, click Apply and select the appropriate category.
7. Click OK.
• Use the detail_circle_note_text Detail option to set a default value for the note text. For example, if the value of the option is See View <viewname>, the note text reads as SEE DETAIL EARHOLES.  • Use the default_view_label_placement Detail option to specify the location of the view label. |
To restore a removed view label of detailed view, select the view and right-click, on the shortcut menu, click Add View Label.
 Detailed