To Split Bodies
You can split a body into two bodies. The geometry of the original body is divided between the original body and the new body. There are two ways to split a body:
To split a body using a splitting object
Split one body into two bodies using a plane, surface, or quilt as the splitting object.
1. Click  Split Body. The Split Body tab opens.
Split Body. The Split Body tab opens.2. With the Body to split collector active, select the body to split in the Model Tree or graphics window.
3. Make sure the Splitting object collector is active, and select a plane, surface, or quilt to use as the splitting object.
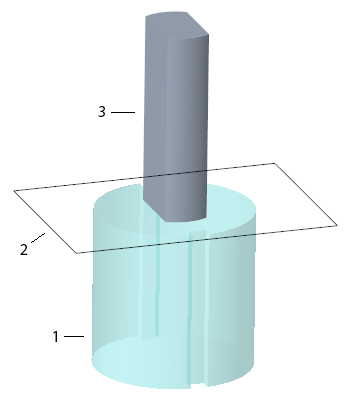
1. Original body
2. Splitting plane
3. New body
4. To change which side of the splitting object is the original body and which side is the new body, click  Flip split side.
Flip split side.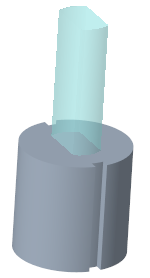
5. To extend the boundaries of the splitting object, click  Extend splitting object.
Extend splitting object.6. Click  OK.
OK.
OK.To split out a disjoint portion of the original body to form a new body
When the geometry of the original body has disjoint volumes, you can split out one or more of these volumes into a new body. Select one or more body surfaces to define that volume as a new body.
1. Click Split Body. The Split Body tab opens.
Split Body. The Split Body tab opens.2. Click  Volume
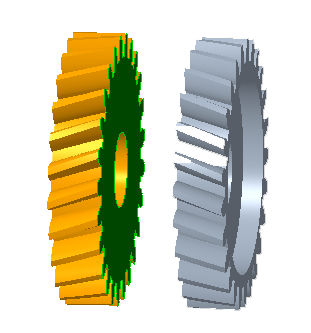
Volume3. To define the volumes to separate as the new body, in the graphics window, select one or more surfaces that belong to these volumes.
4. Click OK.
OK.For both methods of splitting a body: • When you edit the definition of a Split Body feature, flipping the split side only flips the side that will become the new body. It does not flip the features that were created using the geometry (edges or surfaces) of the split body feature. • Bodies that include mixed representation geometry, such as simplified lattice, homogenized lattice, voxelized lattice, or facet geometry, cannot be split. |