Example: Turbine Blade Machining with Leading Edge
In 5-axis machining of turbine blades, it is particularly important to ensure that the tool always cuts with the leading edge, even in areas of high curvature, while maintaining contact with the drive surface.
1. Create a 5-axis Trajectory milling NC sequence.
2. Select the tool and specify the manufacturing parameters. Set the parameter LEADING_EDGE_MACHINING to YES.
3. Create an Automatic Cut motion using Surfaces.
4. Select the drive surface. This is the surface that the tool will follow with its side.
5. Select the height surface. This is the surface that the tool will follow with its leading edge.
6. Adjust the tool path by applying tool axis control, to shift the tool contact to the lead cutting edge of the tool. You can either create axis definitions at specific locations or use the LEAD_ANGLE and TILT_ANGLE parameters.
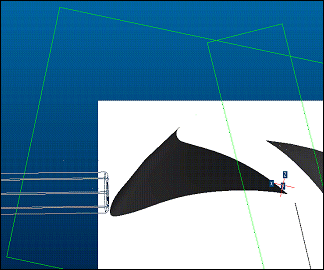
The tool will cut the elliptical fillet with its leading edge, both in areas of low curvature and in areas of high curvature (such as the leading edge and the trailing edge of the turbine blade), as shown in the illustration below.