About the Dragger
Use the dragger to translate and rotate selected curves in Style Move or Copy. You can also translate and rotate the dragger itself.
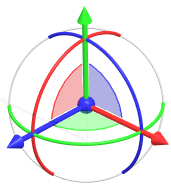
Dragger colors
The dragger colors correspond to the following entities:
Handle | Arc | Plane | |
Red | X | X | YZ |
Green | Y | Y | XZ |
Blue | Z | Z | XY |
Dragger transformations
A dragger transformation is applied to the item you select next to Transform:
• Geometry—Transforms the selected curves.
• Dragger—Transforms only the dragger.
Action | Result |
|---|---|
Drag a handle. 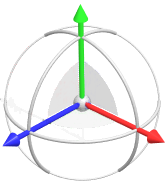 | Translates in one direction along one of the selected handles. |
Drag an arc. 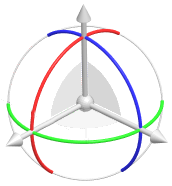 | Rotates around the handle of the same color. |
Drag a plane. 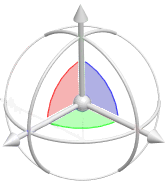 | Translates in two directions parallel to the dragger plane. |
Drag the centerpoint. 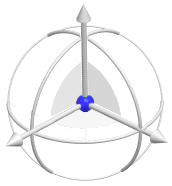 | Translates freely in all three directions. Hold down the SHIFT key while dragging the centerpoint to snap to entities. |
To edit the translation or rotation dimension, double-click the dimension and enter a value.
Dragger position and orientation
• Transform only the dragger
There are two ways to transform only the dragger:
◦ Next to Transform, select Dragger, and drag the dragger.
◦ Regardless of what is selected next to Transform, click the Dragger tab and enter values.
• Center the dragger
Transform the dragger to the center of the marquee by doing one of the following:
◦ Click  Center Dragger.
◦ Right-click the dragger in the graphics window and select Center.
• Reorient the dragger
Rotate the dragger to its original orientation by doing one of the following:
◦ Click  Reorient Dragger.
◦ Right-click the dragger in the graphics window and select Reorient.
• Reset the dragger
Reset the dragger to its original orientation and location inside the marquee by doing one of the following:
◦ Click  Reset Dragger.
◦ Right-click the dragger in the graphics window and select Reset.
• Reorient to screen
Rotate the dragger so the XY plane is parallel to the computer screen:
◦ Right-click the dragger in the graphics window and select Reorient to screen.
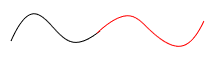
• Example
It can be useful to transform only the dragger to snap it to a curve, and then transform the curve to snap it to another entity.

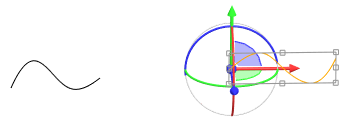
◦ To snap the dragger to a curve:
a. Next to Transform, select Dragger. The dragger appears, centered on the curve.

b. To snap the dragger to the end of a curve, hold down SHIFT, and drag the dragger centerpoint until it snaps to the curve.
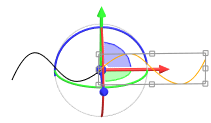
◦ To snap the curve to another curve:
a. Next to Transform, select Geometry.
b. Hold down SHIFT, and drag the curve until it snaps to the other curve.
Visibility
• To show or hide the dragger, click  Display Dragger.
Display Dragger.• To show or hide different parts of the dragger, right-click the dragger in the graphics window to access the following commands:
◦ Show All—Shows the centerpoint, handles, arcs, and planes of the dragger.
◦ Show Move—Shows the centerpoint, handles, and planes of the dragger, and disables the arcs.
◦ Show Rotate—Shows the arcs of the dragger, and disables the centerpoint, handles, and planes.
• To show or hide dimensions, do one of the following:
◦ Click  Display Dimensions.
Display Dimensions.◦ Right-click the dragger in the graphics window and select Display Dimensions.