To Snap a Point to an Intersection
You can snap a point of a curve to the intersection of different combinations of curves, edges, axes, curves and a surface, curves and a plane, axes and a surface, or axes and a plane. For curves on surface or planar curves, the intersecting surface or plane must be the one on which the curve lies.
Two methods exist to snap a point to an intersection:
• Direct
• Indirect
Direct
Snap a point of a curve directly to the desired intersection.
1. In the Model Tree, right-click the Style feature that contains the curve to edit, and select  Edit Definition. The Style tab opens.
Edit Definition. The Style tab opens.2. Click >  Curve Edit. The Curve Edit tab opens.
Curve Edit. The Curve Edit tab opens.3. Select a curve to edit.
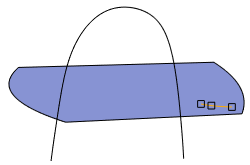
In the example, a COS (curve on surface) is selected.
4. Select a point on the curve.
5. Hold down the SHIFT key while you drag the point and snap it to the intersection. On the Point tab, the soft point type changes to Intersection.
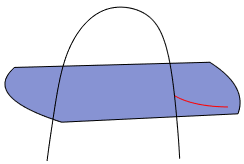
In the example, the soft point of the COS snaps to the intersection between the surface on which the COS lies, and a curve that passes through the surface.
6. Click  OK.
OK.
OK.Indirect
If you cannot snap a point to the desired intersection, use the following workaround.
1. In the Model Tree, right-click the Style feature that contains the curve to edit, and select Edit Definition. The Style tab opens.
Edit Definition. The Style tab opens.2. Click > Curve Edit. The Curve Edit tab opens.
Curve Edit. The Curve Edit tab opens.3. Select a curve to edit.
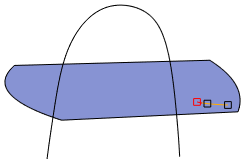
4. Select a point on the curve.
5. Hold down the SHIFT key while you drag the point and snap it to an object, like a curve, edge, or plane.
6. On the Point tab, next to Type, change the soft point type to Intersection.
7. To replace the reference:
a. On the Point tab, in the References box, right-click the object to which you snapped the curve, and select Remove from the shortcut menu.
b. Hold down the CTRL key while you select the intersecting objects to snap to.
8. Click OK.
OK.