With Creo Elements/Direct Annotation, you can generate a flattened (unfolded) view of a sheet metal part that has been designed in Creo Elements/Direct Sheet Metal (or in Creo Elements/Direct Modeling with a material attribute attached). The flattened view can then be dimensioned in the usual manner. Information text is also attached to 2D elements in the flat view. See
Information text for details.
You can also create a flattened view of multi-level sheet metal features such as stamps, punches, or user-defined features. For details, see
Controlling the information output to the flat.
The following summarizes how to create a flat view. For a more detailed description, see Getting Started with Creo Elements/Direct Sheet Metal.
To create a flat view,
1. Click Annotation and then, in the Setup group, click the arrow next to Dep View.
2. Click Create Flat. The Flat View dialog box opens.
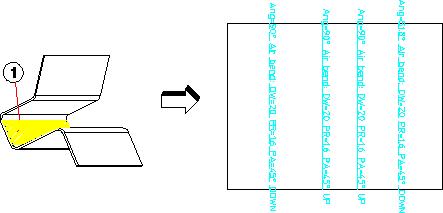
3. Click a base face (face 1 in the figure).
4. If necessary, change the default settings (described below).
5. Click .
6. Move the cursor into the Creo Elements/Direct Annotation Viewport.
Creo Elements/Direct Annotation attaches a view placeholder on the cursor.
7. Click the view position on the sheet.
Creo Elements/Direct Annotation generates a flat view of the part.
Flat view settings
The Flat menu contains the following settings:
Both Sides
Click if you want the flat view to account for both sides.
Blind Feats
Click to project blind features to the flat.
The face of the blind feature must be connected to either the top face or the bottom face of the sheet metal part.
Text File
Click to tell Creo Elements/Direct Annotation to write statistical information into a text file. This additional information includes, among other items, a listing of the bends, the punch and stamp tools used, and the errors which occurred during the unfold. Additionally, the file can be used by other applications and to build customer-specific cost-calculation programs.
by Shop
Click to tell Creo Elements/Direct Annotation to use shop data (which materials, machines, and tools). The specific shop is specified in Creo Elements/Direct Sheet Metal. (The by Shop and K-Factor options under Cylinder Allowance are mutually exclusive.)
K-Factor
The plane in which the length of a curved sheet metal part remains unchanged is identified by the neutral phase. The portions on either side of this neutral phase can become longer or shorter.
The location of this neutral phase relative to the material thickness (T) is described in terms of a parameter known as the k-factor. ANSI defines this k-factor as the offset of the neutral phase relative to T, while DIN defines the k-factor as the offset of this neutral phase relative to T/2.
The k-factor adopted in this menu meets ANSI standards (0.5 = middle of the sheet).
A k-factor under Cone Allowance is independent of the Cylinder Allowance factor.
Radius
This is the radius that is used for the inner radius of sharp bends of the sheet metal design. The outer bend radius is the specified value plus the material thickness.
You can create or modify a detail view or partial view from a parent flat view.
All annotations, detail borders, and section lines added to the parent flat view are lost when you create a partial view. This information is not recovered by restoring the full view later.
Creo Elements/Direct Annotation allows you to correctly flatten side faces that have features like chamfers.
You must activate Creo Elements/Direct Sheet Metal to correctly flatten side faces having features.
The flat view of multi-level features contains the following:
• Flat text of all the multi-level features, placed above each feature and center-aligned.
• Reference points of all the multi-level features, at the center of each feature.
The information text which is attached to 2D elements in the flat view contains, in addition to other details, the level of the feature. An example of the information text is shown below.
For multi-level features, when the 2D element represents coincident projections from multiple higher levels, you can use the sha_set_flat_show_single_feat_attr macro to display a single feature in the information text. For details, see
Controlling the information output to the flat.
Limitations
• You cannot create section views or broken views on flat views, or create cutaways on them.
• You cannot create a flat view from a part with a double bend.
• You cannot create a second-level detail view of a detail view created from a flat view or a second-level partial view of a partial view created from a flat view.
 Dep View.
 Create Flat. The Flat View dialog box opens.
 .
.