When you create a section view, Creo Elements/Direct Annotation automatically adds hatching to the sectioned area of the part. You can also manually hatch an area if the automatic hatching fails, or to distinguish areas of a view. In addition, hatching can be useful to add a patterned or filled region to a sketch or sheet frame.
Hatch patterns consist of a group of individually defined lines, referred to as subpatterns. You can define the angle and distance of the pattern as a whole, and also attributes of the subpatterns.
A hatch border can be defined manually with polygonal edges, or it can be specified implicitly by clicking the face to hatch. This section describes both methods, and also how to change the settings controlling the appearance of both automatically- and manually-created hatching. It also explains the procedure to define new hatch patterns, which can be used as a default or applied to existing hatching.
You can grab the settings of existing hatching for use as the selections in the Modify Hatch dialog box. In the Modify Hatch dialog box, click Grab (under Fill in), and select an instance of hatching on the sheet. The boxes (fields) in the Modify Hatch dialog box are updated to show the selected hatching's settings. Additionally, if the selected hatching is a defined hatch pattern, then the Name box is updated to display its name. Otherwise, User Def is displayed to indicate an unknown hatch pattern has been grabbed.
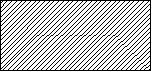
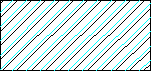
Some examples of standard hatch styles:
Steel
Iron
Copper
To change the appearance of an existing hatch, select the hatch in the viewport, right-click the hatch and select Hatch Properties from the context menu. You can also select the hatch and click on the viewport. The Modify Hatch dialog box opens. Set the focus (on the Status Bar) to Hatch or All to preselect the hatch.

 on the viewport. The Modify Hatch dialog box opens. Set the focus (on the Status Bar) to Hatch or All to preselect the hatch.