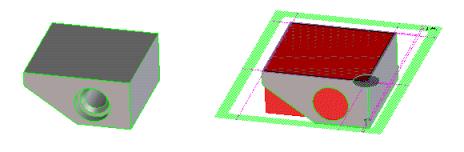
The Coring function removes material from a part while maintaining a minimum wall thickness but without creating undercuts. For example:
On the left is the original part; the right graphic displays the workplane containing the coring profile.
There are no undercuts as a result of the coring operation.
To core a part,
1. Click Mold Design and then, in the Model group, click Coring. The Coring dialog box opens.
2. If necessary, click Part and specify a different part to core.
3. Specify the basis for the coring operation in one of the following ways:
◦ Click Faces and specify a face or faces that are connected and have one closed boundary loop.
◦ Click Workplane (this is selected by default) and specify a workplane containing one or multiple closed profiles. With this option, you can discard the workplane (click Keep WP off) or just the profile on it (click Keep Prof off) when the operation is completed.
4. Specify how the depth of the coring block should be calculated by selecting one of the options in the Depth cascade list:
The following options are available when coring with either Faces or a Workplane:
◦ Maximum cores the part to the maximum possible depth.
◦ To Point cores the part to a specified point. Click a point on the part to core to.
- The following options are available only when coring with a Workplane:
◦ User Def cores the part to a depth you specify. Enter the core depth in the User defined data entry field.
◦ To Plane cores the part to a specified plane. Specify with the Axis 3D tool a plane on the part to core to.
◦ To Face cores the part to a specified face. Click the face on the part to core to.
5. Click Direction, and use the Direction 3D tool to specify the direction for the coring. (When coring by Workplane, the direction is automatically selected, but you can change this if necessary.)
6. Enter a minimum thickness for the cored part in the Minimal data entry field.
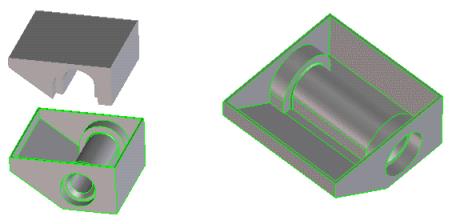
7. To keep the cored volume, click Keep Core on, and specify the name of the part that should retain the core.
 Coring. The Coring dialog box opens.
 to complete the operation.