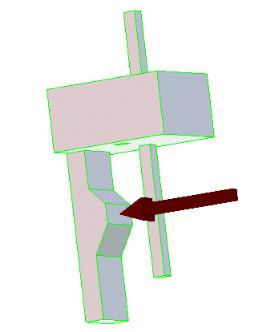
Mechanical forces are point-oriented vectors which can be applied to vertices, edges, and faces. These forces can be placed on, grouped on, or aligned with a point on the geometry.
Pressure, by its nature, is an evenly distributed load which can only be applied perpendicularly to face geometry.
The edit box also displays several editable fields for setting the parameters for these loads. The fields displayed depend on the type of force to be applied. Generally, these fields allow you to set the scaling method, the units of measure, and the value for the load to be applied.
To place a static force on a vertex,
1. Click FEA and then, in the Mechanical LBC group, click Loads. The Loads dialog box opens.
2. Click Vertex in the Force section.
The Force dialog box opens.
3. If necessary, give the study a name.
When no name has been earlier provided, you can click Study in the Force dialog box and enter a new one in the highlighted field.
4. Click Name. Creo Elements/Direct Finite Element Analysis displays a suggested name for the current load in the Name box. You can accept the proposed name or type a new one in the highlighted field.
5. Using the mouse, click the vertex on your design model where you want to apply the load.
While in Select mode you can use the viewport controls to adjust the display and optimize the view of the desired part.
Creo Elements/Direct Finite Element Analysis displays the word "defined" in the Ref Vertex box when you have made your selection.
6. Click Direction in the Force dialog box.
The 3D CoPilot is displayed.
Set directions using the 3D CoPilot and then enter a force value in the Value box.
or
enter a value or values directly into the appropriate coordinate system boxes in the Force dialog box.
7. Next allows you to remain in the menu and define additional forces for vertices.
8. Click to validate your choices and apply the load.
To place a static force on a edge,
1. Click FEA and then, in the Mechanical LBC group, click Loads. The Loads dialog box opens.
2. Click Edge in the Force section.
The Force dialog box is displayed.
3. If necessary, give the study a name.
When no name has been earlier provided, you can click Study in the Force dialog box and enter a new one in the highlighted field.
4. Click Name. Creo Elements/Direct Finite Element Analysis displays a suggested name for the current load in the Name box. You can accept the proposed name or type a new one in the highlighted field.
5. Using the mouse, click the edge on your design model where you want to apply the load.
While in Select mode you can use the viewport controls to adjust the display and optimize the view of the desired part.
Creo Elements/Direct Finite Element Analysis displays the word "defined" in the Ref Edge box when you have made your selection.
6. Click Direction in the Force dialog box.
The 3D CoPilot is displayed.
Set directions using the 3D CoPilot and then enter a force value in the Value box.
or
enter a value or values directly into the appropriate coordinate system boxes in the Force dialog box.
7. Next allows you to remain in the menu and define additional forces on edges.
8. Click to validate your choices and apply the load.
To place a static force on a face,
1. Click FEA and then, in the Mechanical LBC group, click Loads. The Loads dialog box opens.
2. Click Face in the Force section.
The Force dialog box is displayed.
3. If necessary, give the study a name.
When no name has been earlier provided, you can click Study in the Force dialog box and enter a new one in the highlighted field.
4. Click Name. Creo Elements/Direct Finite Element Analysis displays a suggested name for the current load in the Name box. You can accept the proposed name or type a new one in the highlighted field.
5. Using the mouse, click the face on your design model where you want to apply the load.
While in Select mode you can use the viewport controls to adjust the display and optimize the view of the desired part.
Creo Elements/Direct Finite Element Analysis displays the word "defined" in the Ref Face box when you have made your selection.
6. Click Direction in the Force dialog box.
The 3D CoPilot is displayed.
Set directions using the 3D CoPilot and then enter a force value in the Value box.
or
enter a value or values directly into the appropriate coordinate system fields in the Force dialog box.
7. Next allows you to remain in the menu and define additional forces on faces.
8. Click to validate your choices and apply the load.
To modify a static load on a vertex,
1. Click Modify and then, in the LBC group, click Modify.
2. Click the symbol for the vertex force on your design model that you want to modify. (You can also use the Structure Browser for this task.)
While in Select mode you can use the viewport controls to adjust the display and optimize the view of the design.
Once selected the Modify Force dialog box opens.
3. Make any desired changes to the parameters in the displayed fields.
4. Click to validate your modifications and reapply the vertex force with the revised parameters.
To modify a static load on an edge,
1. Click Modify and then, in the LBC group, click Modify.
2. Click the symbol for the edge force on your design model that you want to modify. (You can also use the Structure Browser for this task.)
While in Select mode you can use the viewport controls to adjust the display and optimize the view of the design.
Once selected the Modify Force dialog box opens.
3. Make any desired changes to the parameters in the displayed fields.
4. Click to validate your modifications and reapply the edge force with the revised parameters.
To modify a static load on a face,
1. Click Modify and then, in the LBC group, click Modify.
2. Click the symbol for the face force on your design model that you want to modify. (You can also use the Structure Browser for this task.)
While in Select mode you can use the viewport controls to adjust the display and optimize the view of the design.
Once selected the Modify Force dialog box opens.
3. Make any desired changes to the parameters in the displayed fields.
4. Click to validate your modifications and reapply the face force with the revised parameters.
To place a moment load on a vertex,
1. Click FEA and then, in the Mechanical LBC group, click Loads. The Loads dialog box opens.
2. Click Vertex in the Moment section.
The Moment dialog box opens.
3. If necessary, give the study a name.
When no name has been earlier provided, you can click Study in the Moment dialog box and enter a new one in the highlighted field.
4. Click Name. Creo Elements/Direct Finite Element Analysis displays a suggested name for the current load in the Name box. You can accept the proposed name or type a new one in the highlighted field.
5. Using the mouse, click the vertex on your design model where you want to apply the load.
While in Select mode you can use the viewport controls to adjust the display and optimize the view of the desired part.
Creo Elements/Direct Finite Element Analysis displays the word "defined" in the Ref Vertex box when you have made your selection.
6. Click Direction in the Moment dialog box.
The 3D CoPilot is displayed.
Set directions using the 3D CoPilot and then enter a moment value in the Value box.
or
enter a value or values directly into the appropriate coordinate system fields in the Moment dialog box.
7. Next allows you to remain in the menu and define additional forces on faces.
8. Click to validate your choices and apply the load.
To place a moment load on an edge,
1. Click FEA and then, in the Mechanical LBC group, click Loads. The Loads dialog box opens.
2. Click Edge in the Moment section.
The Moment dialog box opens.
3. If necessary, give the study a name.
When no name has been earlier provided, you can click Study in the Moment dialog box and enter a new one in the highlighted field.
4. Click Name. Creo Elements/Direct Finite Element Analysis displays a suggested name for the current load in the Name field. You can accept the proposed name or type a new one in the highlighted field.
5. Using the mouse, click the edge on your design model where you want to apply the load.
While in Select mode you can use the viewport controls to adjust the display and optimize the view of the desired part.
Creo Elements/Direct Finite Element Analysis displays the word "defined" in the Ref Edge box when you have made your selection.
6. Click Direction in the Moment dialog box.
The 3D CoPilot is displayed.
Set directions using the 3D CoPilot and then enter a moment value in the Value box.
or
enter a value or values directly into the appropriate coordinate system fields in the Moment dialog box.
7. Next allows you to remain in the menu and define additional forces on faces.
8. Click to validate your choices and apply the load.
 to validate your choices and apply the load.