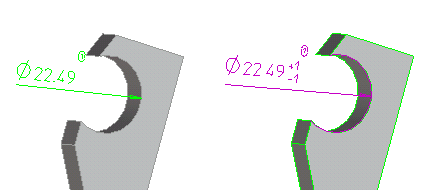
You can add a tolerance to the dimension text of 3D Documentation dimensions. Modifying existing tolerances is done in the same way as creating them.
To add or modify a tolerance, click the Tol Type box, select one of the following types of tolerancing:
None
Specifies no tolerance values to be included with the dimension value (not available for GD&T dimensions).
Basic
Specifies theoretical zero-tolerance.
General
Specifies a tolerance definition taken from customized values.
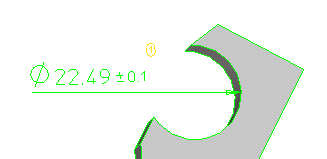
Plus/Minus
Specifies a plus/minus tolerance.
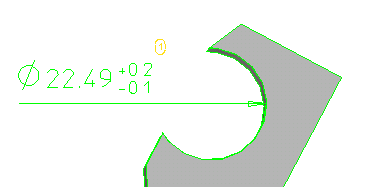
Upper/Lower
Specifies an upper and lower tolerance.
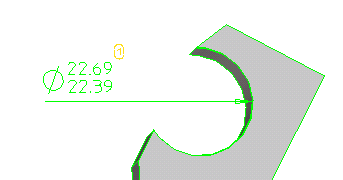
Limits
Specifies an upper and lower tolerance limit.
For the last three tolerance types, the menu expands to display further fields in which to enter necessary tolerance values. To clear a tolerance, select None from the Tol Type box.
The tolerance values used depend on the type of tolerance selected:
Basic
A basic tolerance is the theoretical zero-tolerance. The dimension value is considered accurate (up to the defined number of decimal places). Basic-toleranced dimensions are enclosed within a box.
For dimensions in basic tolerances, the frame type is automatically set to Basic. If you change a basic tolerance type to any other tolerance type, the frame type is automatically set to None.
General
A general tolerance takes default tolerance values from a customization file. As they are "default" tolerances, they are not displayed with the dimensions, but you can view them with the Show General Tol dialog box. You can assign General tolerances to parts and assemblies as attributes, or can generally apply as a system default.
Note that general tolerances are not applicable to angle dimensions.
To set the default general tolerance, or to assign a general tolerance set as an attribute to a part or assembly, see
Add tolerances to dimensions. To define and register general tolerance sets, you need to edit the d3d_customize file, which is read automatically upon initialization of Creo Elements/Direct Modeling.
Plus/Minus
Type a value in the PM Value box. The tolerance can be a numerical value or text (for generic dimensions only).
Upper/Lower
Type text (for generic dimensions only) or numerical values in the Upper value and Lower value boxes. Creo Elements/Direct Modeling assumes that both upper and lower (numerical) values are positive. If you require a tolerance to be negative, start the value with a negative sign (-).
Limit
Type values in the Upper limit and Lower limit boxes. Creo Elements/Direct Modeling assumes that both limit values are positive. If you require a tolerance to be negative, start the value with a negative sign (-).
The Dimension Presets Table
The Dimension Presets table displays predefined tolerance values and fix texts that can be applied while you are creating a dimension. Rows in a table can be deleted when no longer needed. When you start Creo Elements/Direct Modeling, all the fix text and tolerance values at the default, corporate, site, and user levels are automatically loaded. When you exit Creo Elements/Direct Modeling, the fix text and tolerance values that you have added are automatically saved in the files all_dimension_texts.fix and all_dimension_texts.tol files, respectively, in the default, user-level, site or corporate customization directory.
To add data to the table, click Add Row in the table to include the fix text or tolerance values from the current operation.
If necessary, you can edit the text displayed in the system-generated Name column. First exit Creo Elements/Direct Modeling, open the table file in a standard text editor, and make your changes. Start Creo Elements/Direct Modeling and the changes are visible in the table.
To sort table columns,
You can sort the data displayed in the Dimension Presets table by clicking a column header. The column data is sorted alphabetically or numerically depending on the data. Click the column header again to reverse the sort order.
To filter table columns,
1. In the table, right-click the column header of the column that you want to filter. The Column Filter dialog box appears.
2. Set filters as required.
The table displays the filtered list of text or values.
To clear filters, follow the instructions above, but click Reset or Reset all filters of table in the Column Filter dialog box.
To delete rows in a table,
You can delete a row of data in a table that is no longer required. Click the unwanted row in the table and click Delete Row.