Configure GitLab Webhook
|
|
Make sure there is a Codebeamer user with the same username as the pusher in GitLab or use the pusher email (see below)
|
|
|
Make sure there is no repository in the project with the same name
|
Configure Codebeamer
There are 2 things to do in Codebeamer:
1. Create user(s) who has the same username as the pusher(s) in GitLab.
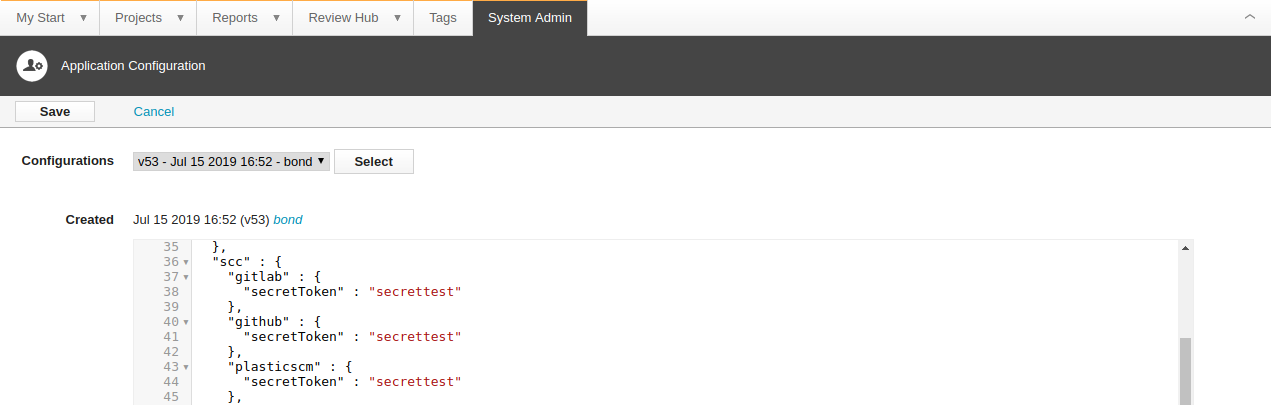
Steps to configure secret token in Codebeamer:
• Go to Codebeamer's System Admin page.
• Go to Application Configuration.
• Add scc node if it is not exist in your json (json root level).
• Add gitlab node if it is not exist in your json under scc node.
• Add secretToken : <secret_token_of_the_webhook> under gitlab node.
Configure GitLab webhook
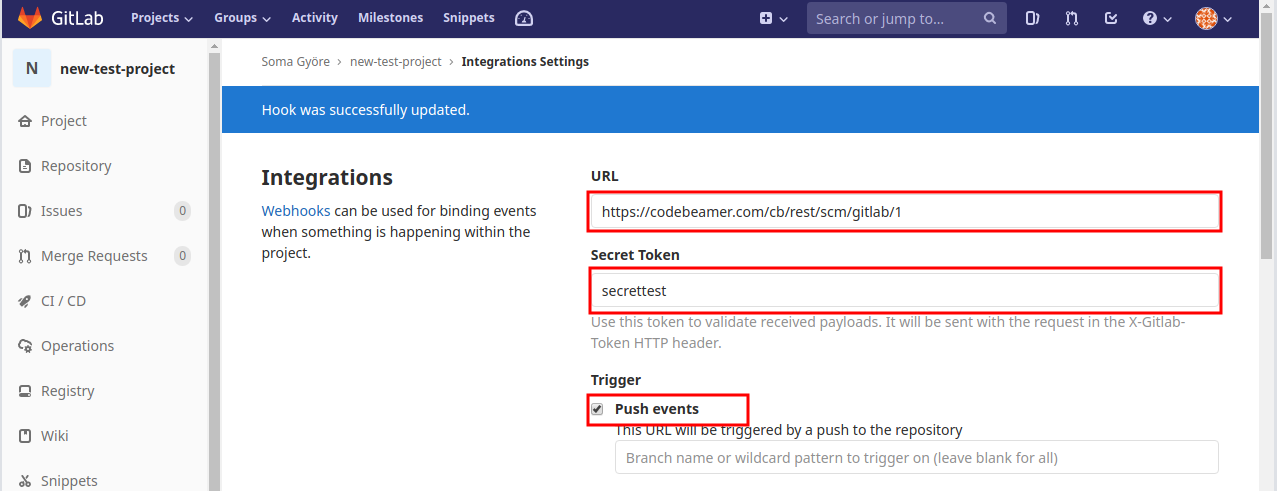
Steps to configure GitLab webhook:
• Navigate to the Settings page of a repository.
• Choose the Integrations menu.
• Fill out the fields.
◦ URL: <Codebeamer_url>/rest/scm/gitlab/<project_id>
Where Codebeamer_url is the url of your Codebeamer and project_id is the id of your project where the GitLab repository will belong to after the first webhook execution.
Example: https://Codebeamer.com/cb/rest/scm/gitlab/1
◦ Secret Token: Codebeamer validates the source of the requests with the Secret Token. It is required to set the same Secret Token in GitLab and in Codebeamers's Application Configuration too (see above)
• Select Push events (Codebeamer supports only push event)
• Check/Uncheck Enable SSL verification according to your Codebeamer server SSL configuration
• Click Add webhook

Configure GitLab email address privacy
|
|
This feature is available since Codebeamer 9.5
|
In case there is no user in Codebeamer with the same username as the pusher in GitLab Codebeamer will use the user for repository operations who has the same email address as the pusher.
Set the correct email address:
• Go to > > >
• Select your email address instead of 'Do not show on profile' then Click update profile settings